
It can be intimidating to start a quilted jacket project. It feels like a big undertaking, and it’s hard to know where to start.
Albeit scary, the quest for a quilted jacket is worthwhile. Here are some thoughts and guidance to help it feel more possible and accessible than ever.
1) Stitching design
If spending a lot of time stitching is intimidating, good news!

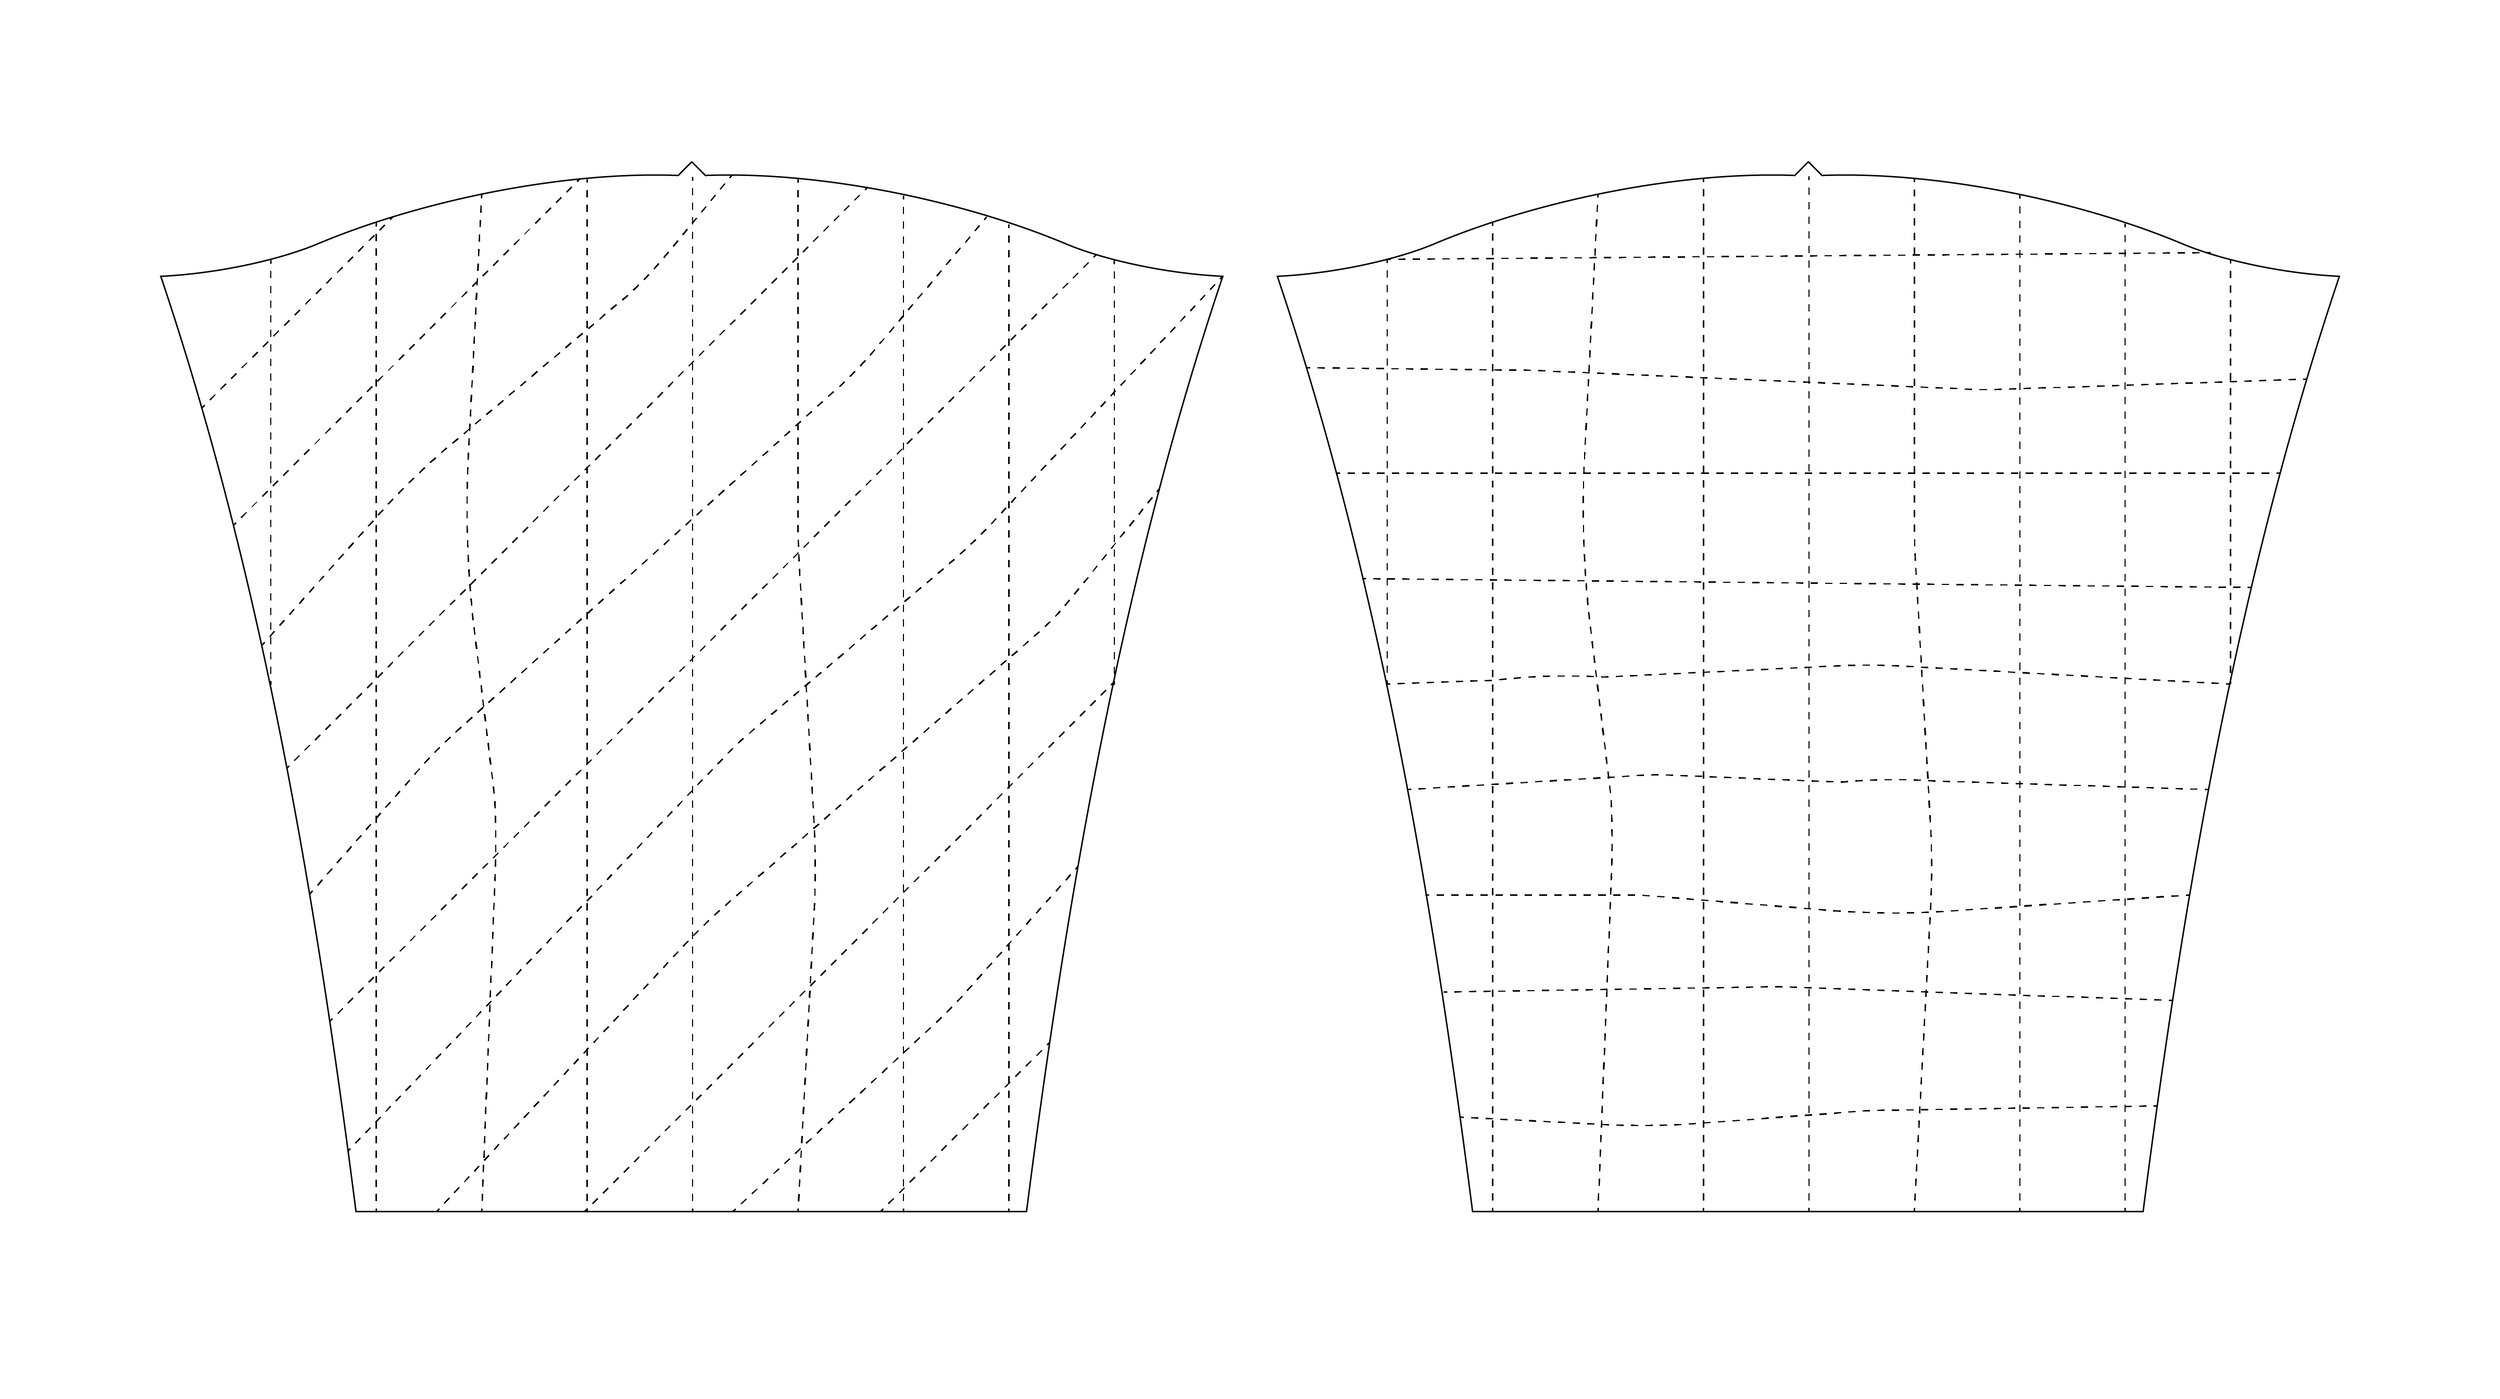
I ran the numbers. In this example of jacket sleeves, increasing the spacing just 1/2” (1.3 cm) from 1 1/2” (3.8 cm) to 2” (5 cm) between lines decreased the total length of stitching by 25%.
That means if it would normally take you three hours to quilt all the pattern pieces, if you increased the spacing 1/2” (1.3 cm), you could save 45 minutes of sewing time.
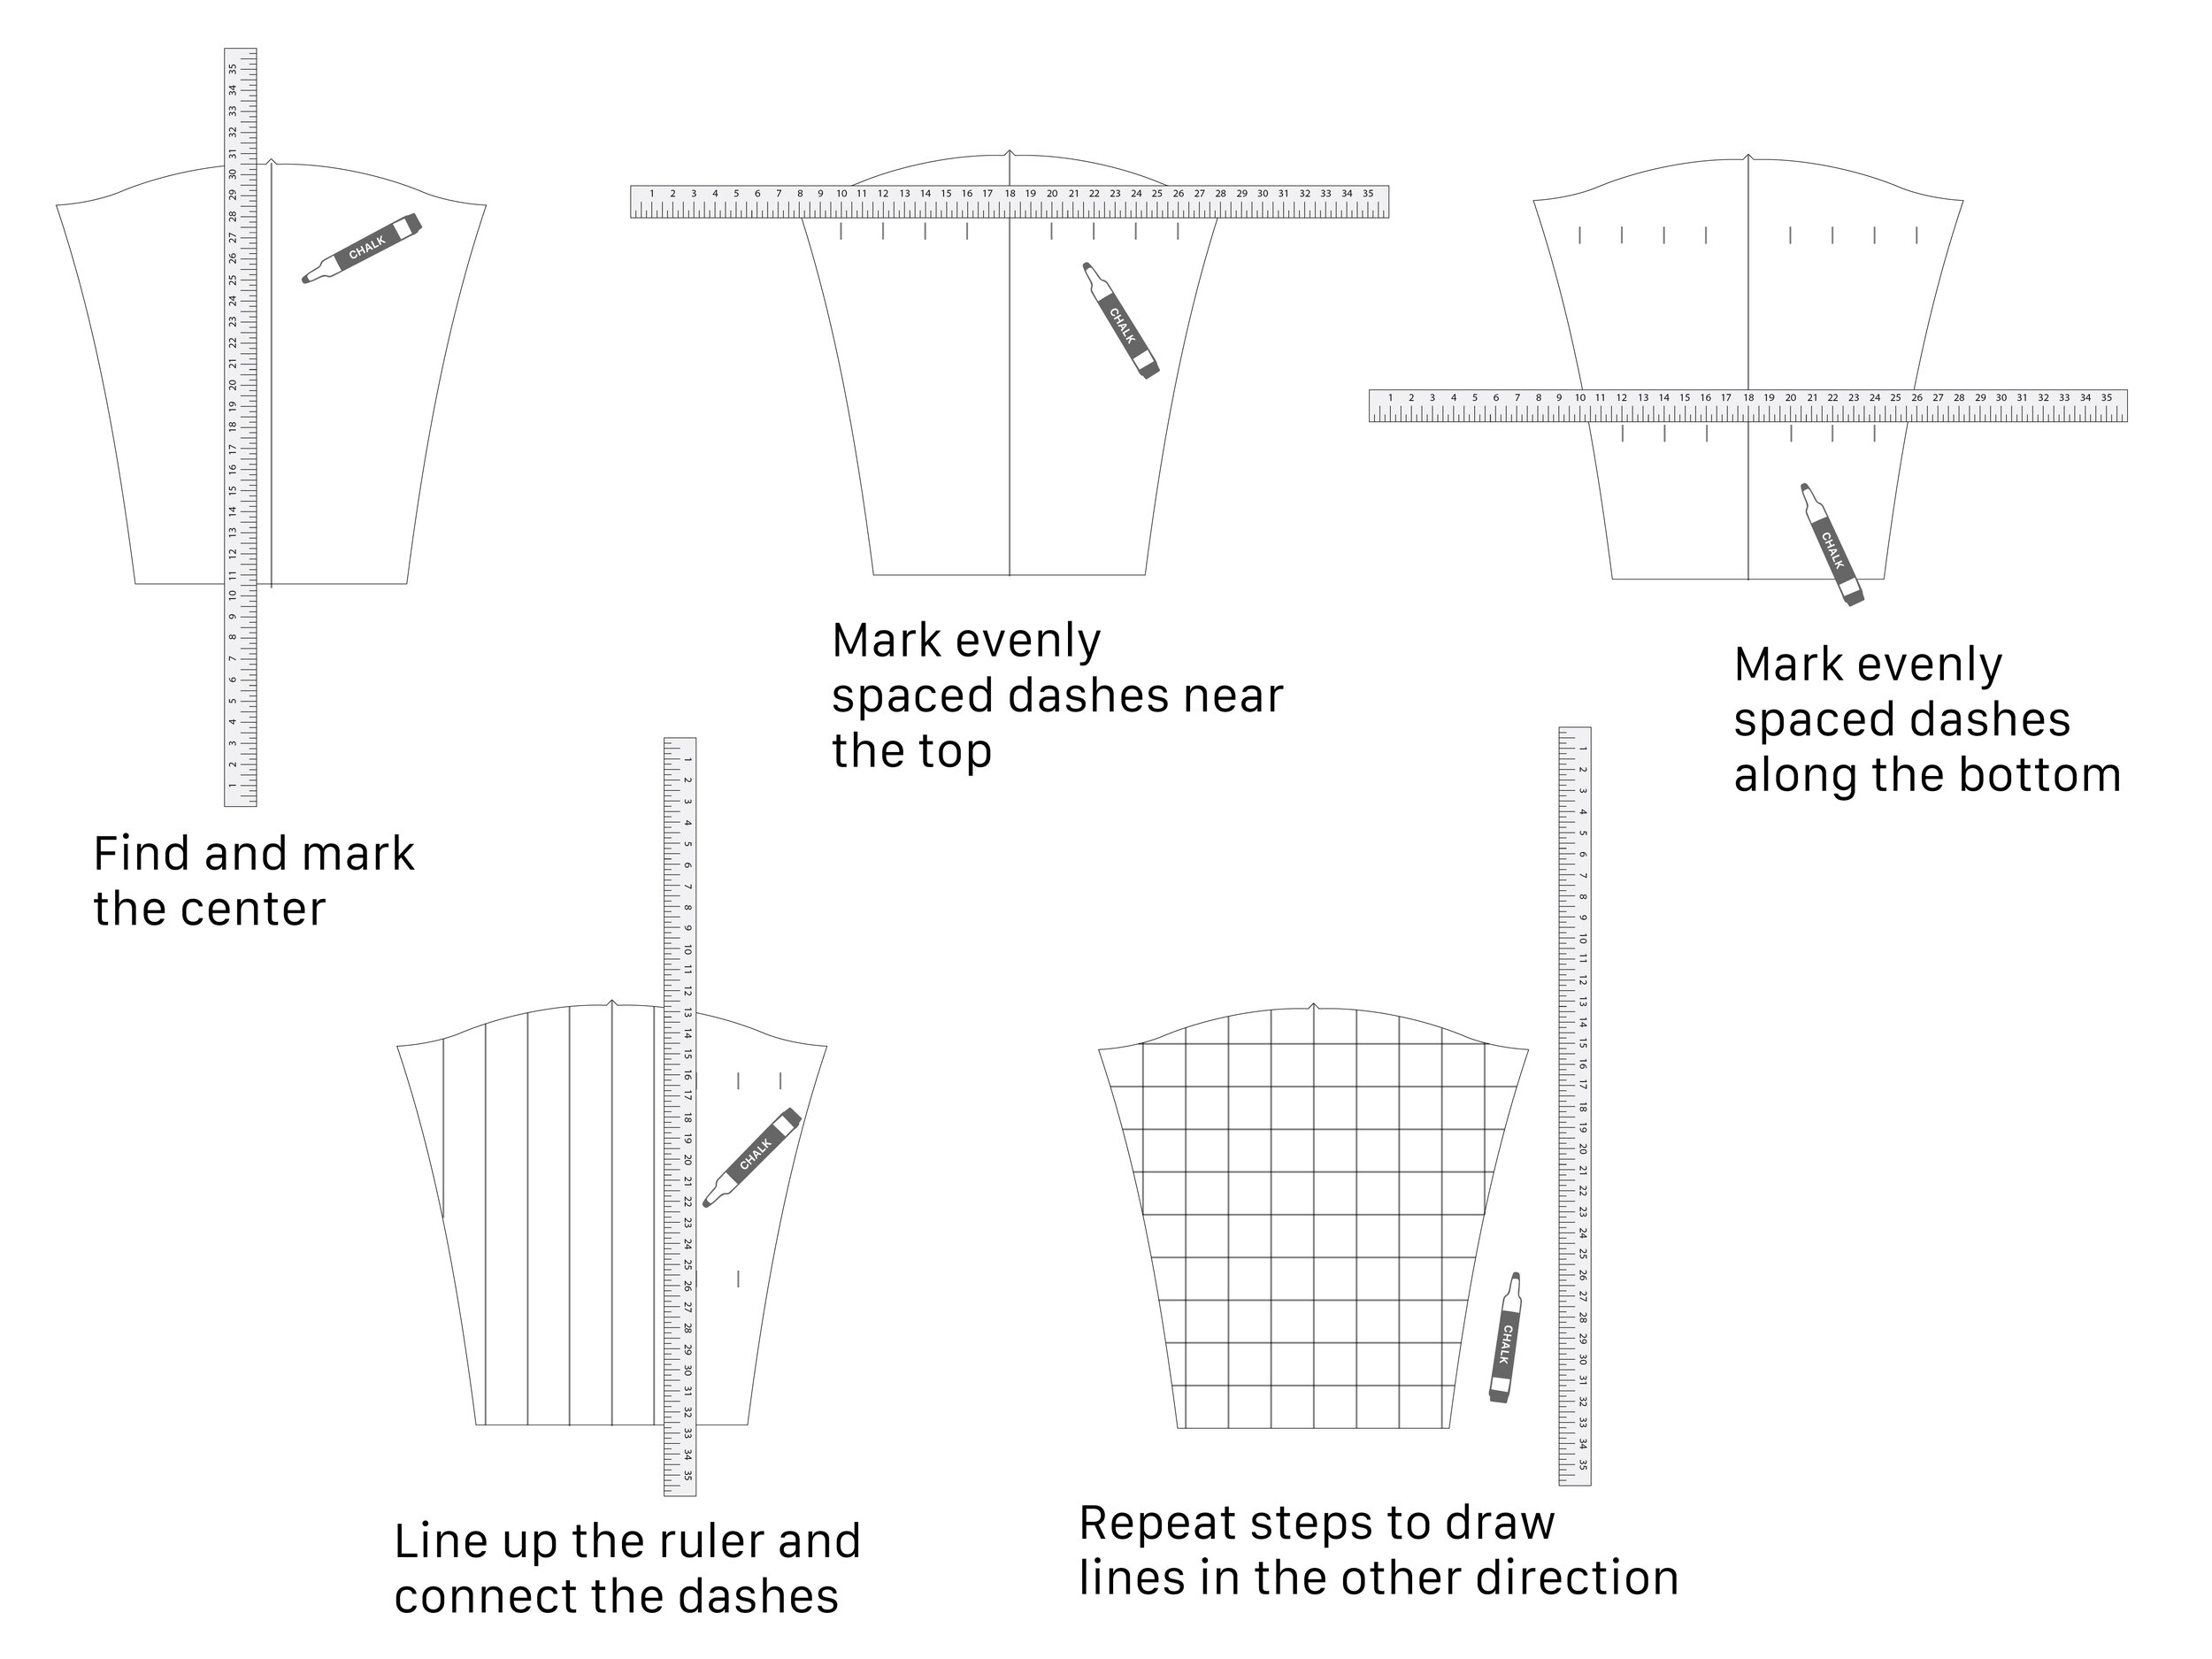
2) Marking stitch lines
The best way to get consistently straight stitching is to mark each line with chalk. You don’t even need to use fancy fabric chalk. A stick of classroom white chalk works perfectly and is easy on the budget.
Without marking the lines you may end up with some stitching like this. But if you do get wavy lines, fear not. They are hard to detect once the jacket is washed. Plus, they are kind of extra cozy anyway.
3) Sewing
If you only remember one thing from these tips, remember this one. Starting from the center and sewing towards the sides allows the fabric to stretch toward the outsides as you sew. If you start on the outsides and go towards the center, you will likely end up with lots of excess fabric and wrinkles in the middle.
Sew all the lines of one direction before you start the other direction. Do all of the vertical lines before the diagonal or horizontal, etc. This is for the same reason — to let the fabric stretch toward the sides so no wrinkles build up.


4) Trimming around the edges
Stitching several hundred inches across multiple layers of fabric is inevitably going to result in some fabric edges and corners not lining up. Don’t worry. That’s what scissors are for! When you’re done sewing, trim around all the edges that need truing up. Easy peasy.
5) Waiting to wash
For quilted jackets, I’d like to make a case for throwing out the rule of thumb of washing fabric before you sew.
One of the joys of quilted jackets is their wrinkled lines. Sew the whole jacket and then throw it in the wash. It will shrink up and be so extra cozy.
If you’re using fabric and batting that shrinks significantly (may want to do a test patch), start with sewing one size larger.

If you’d like to play with a new quilting project, you can grab my Juniper Quilted Jacket pattern here!


