Oh the joy of sleeves. Drafting can be fun.
Here’s how to do it
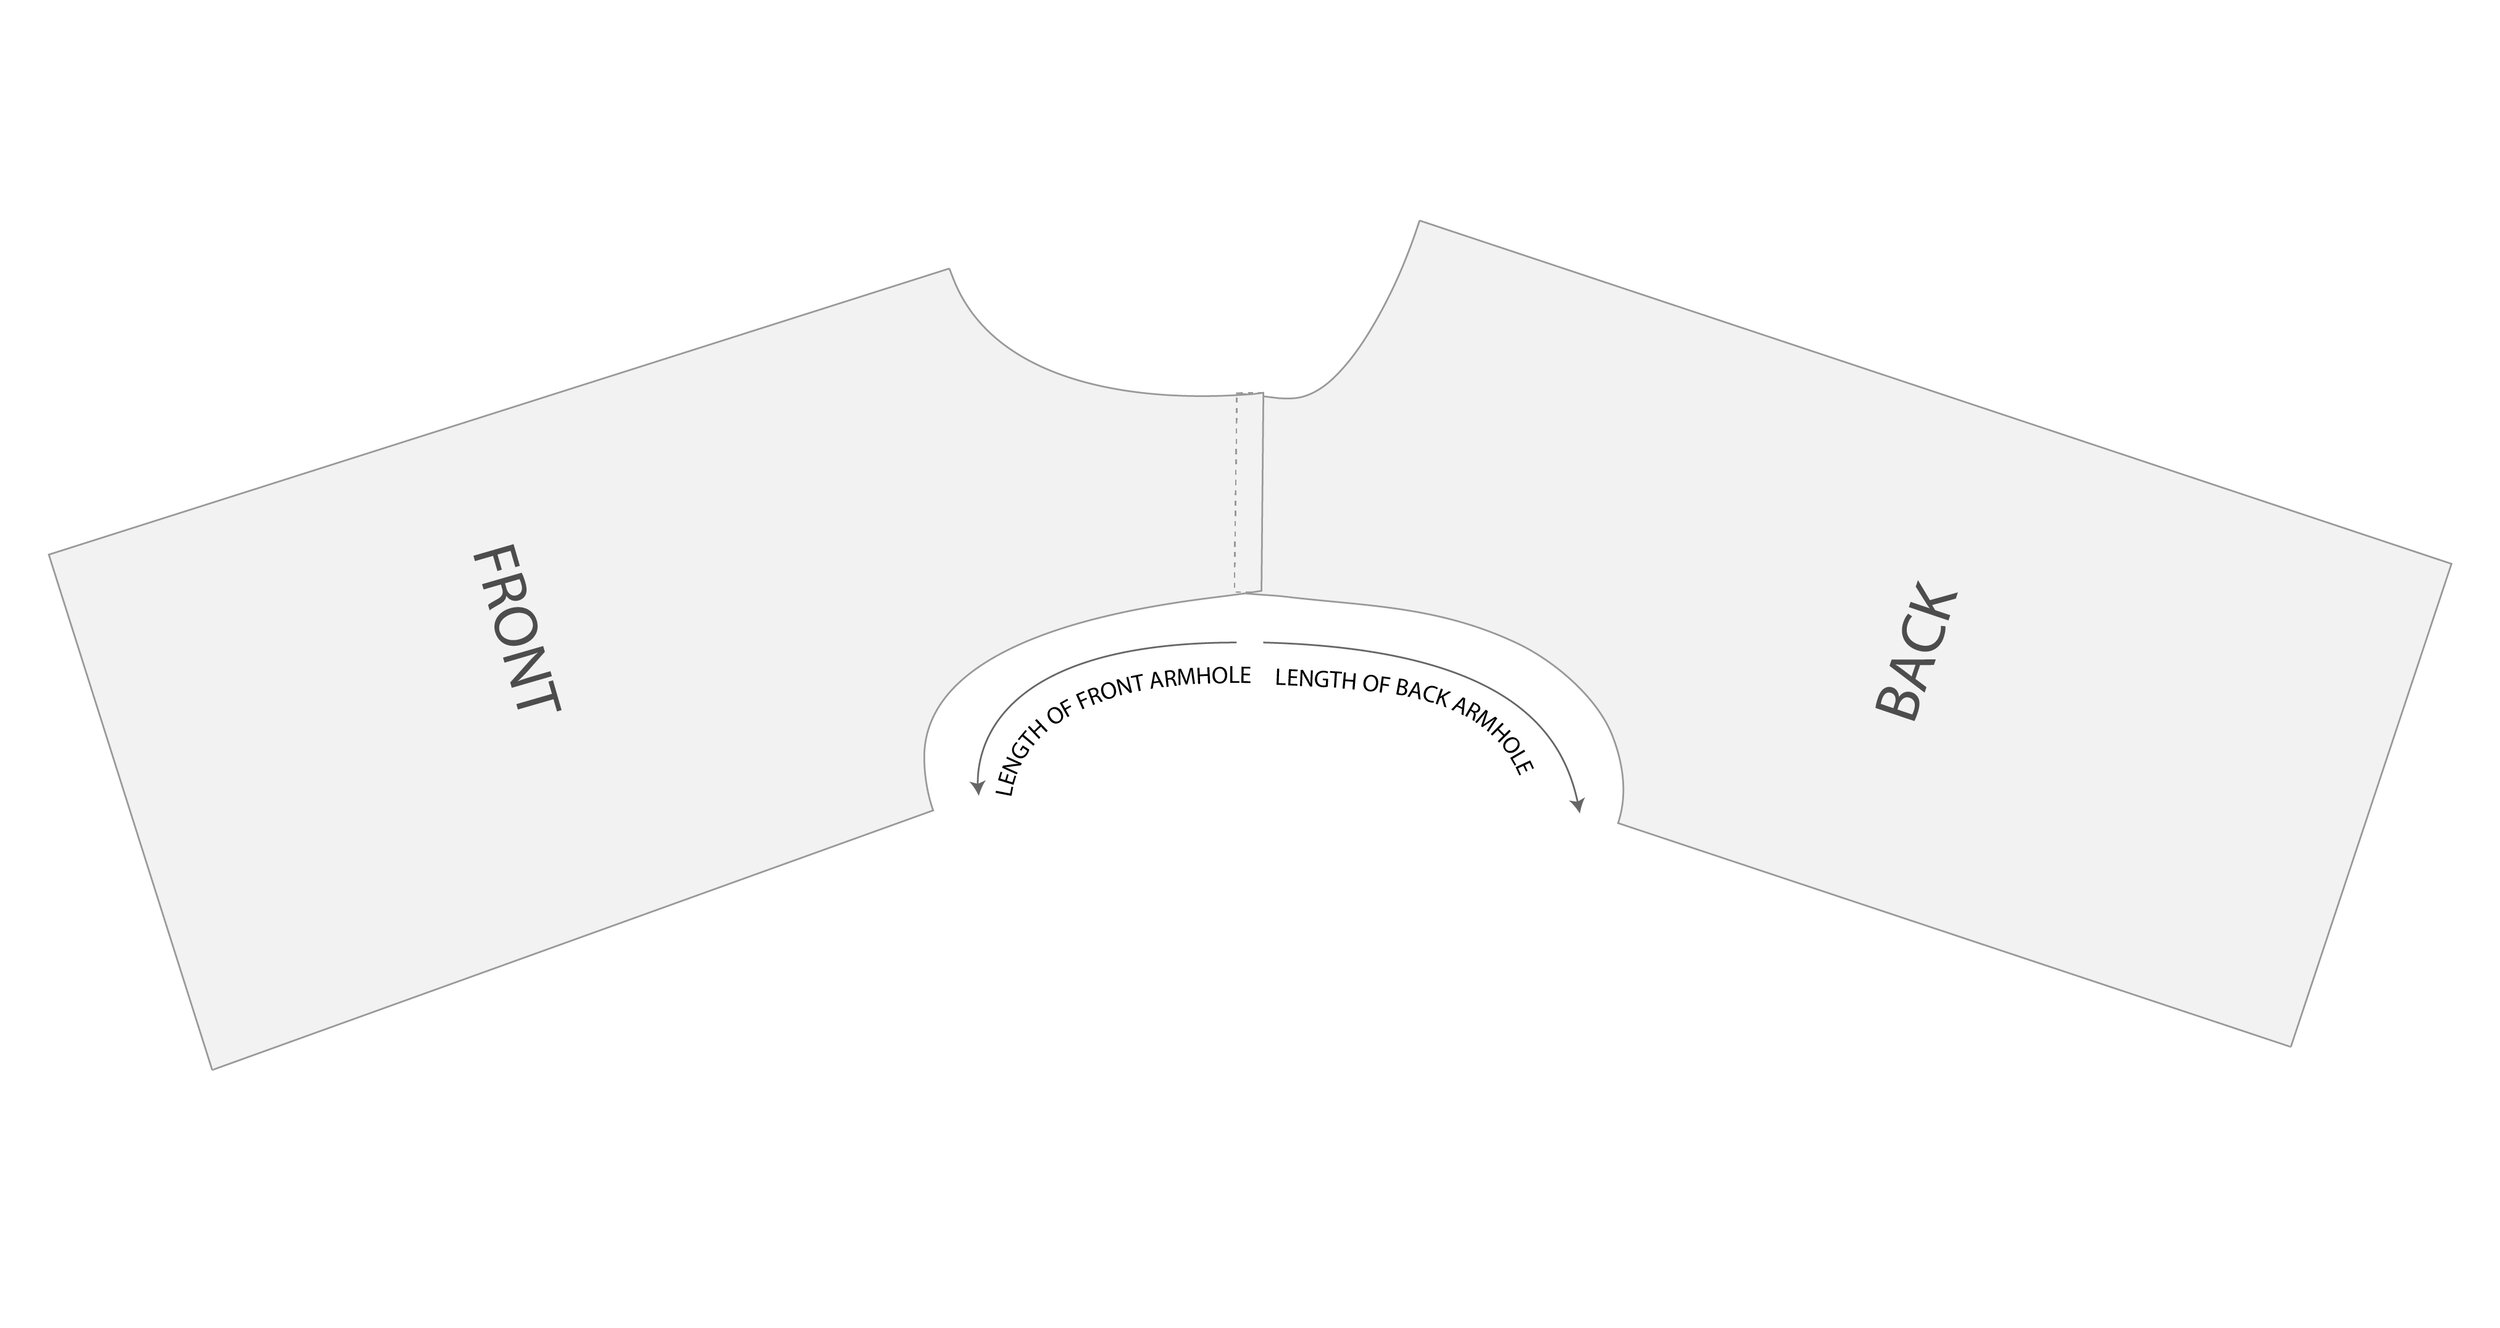
Step 1: Measure the length of the front and back armhole.
You can sew the shoulders together and then measure, or measure the pattern pieces and remove the shoulder seam allowance from the measurement.
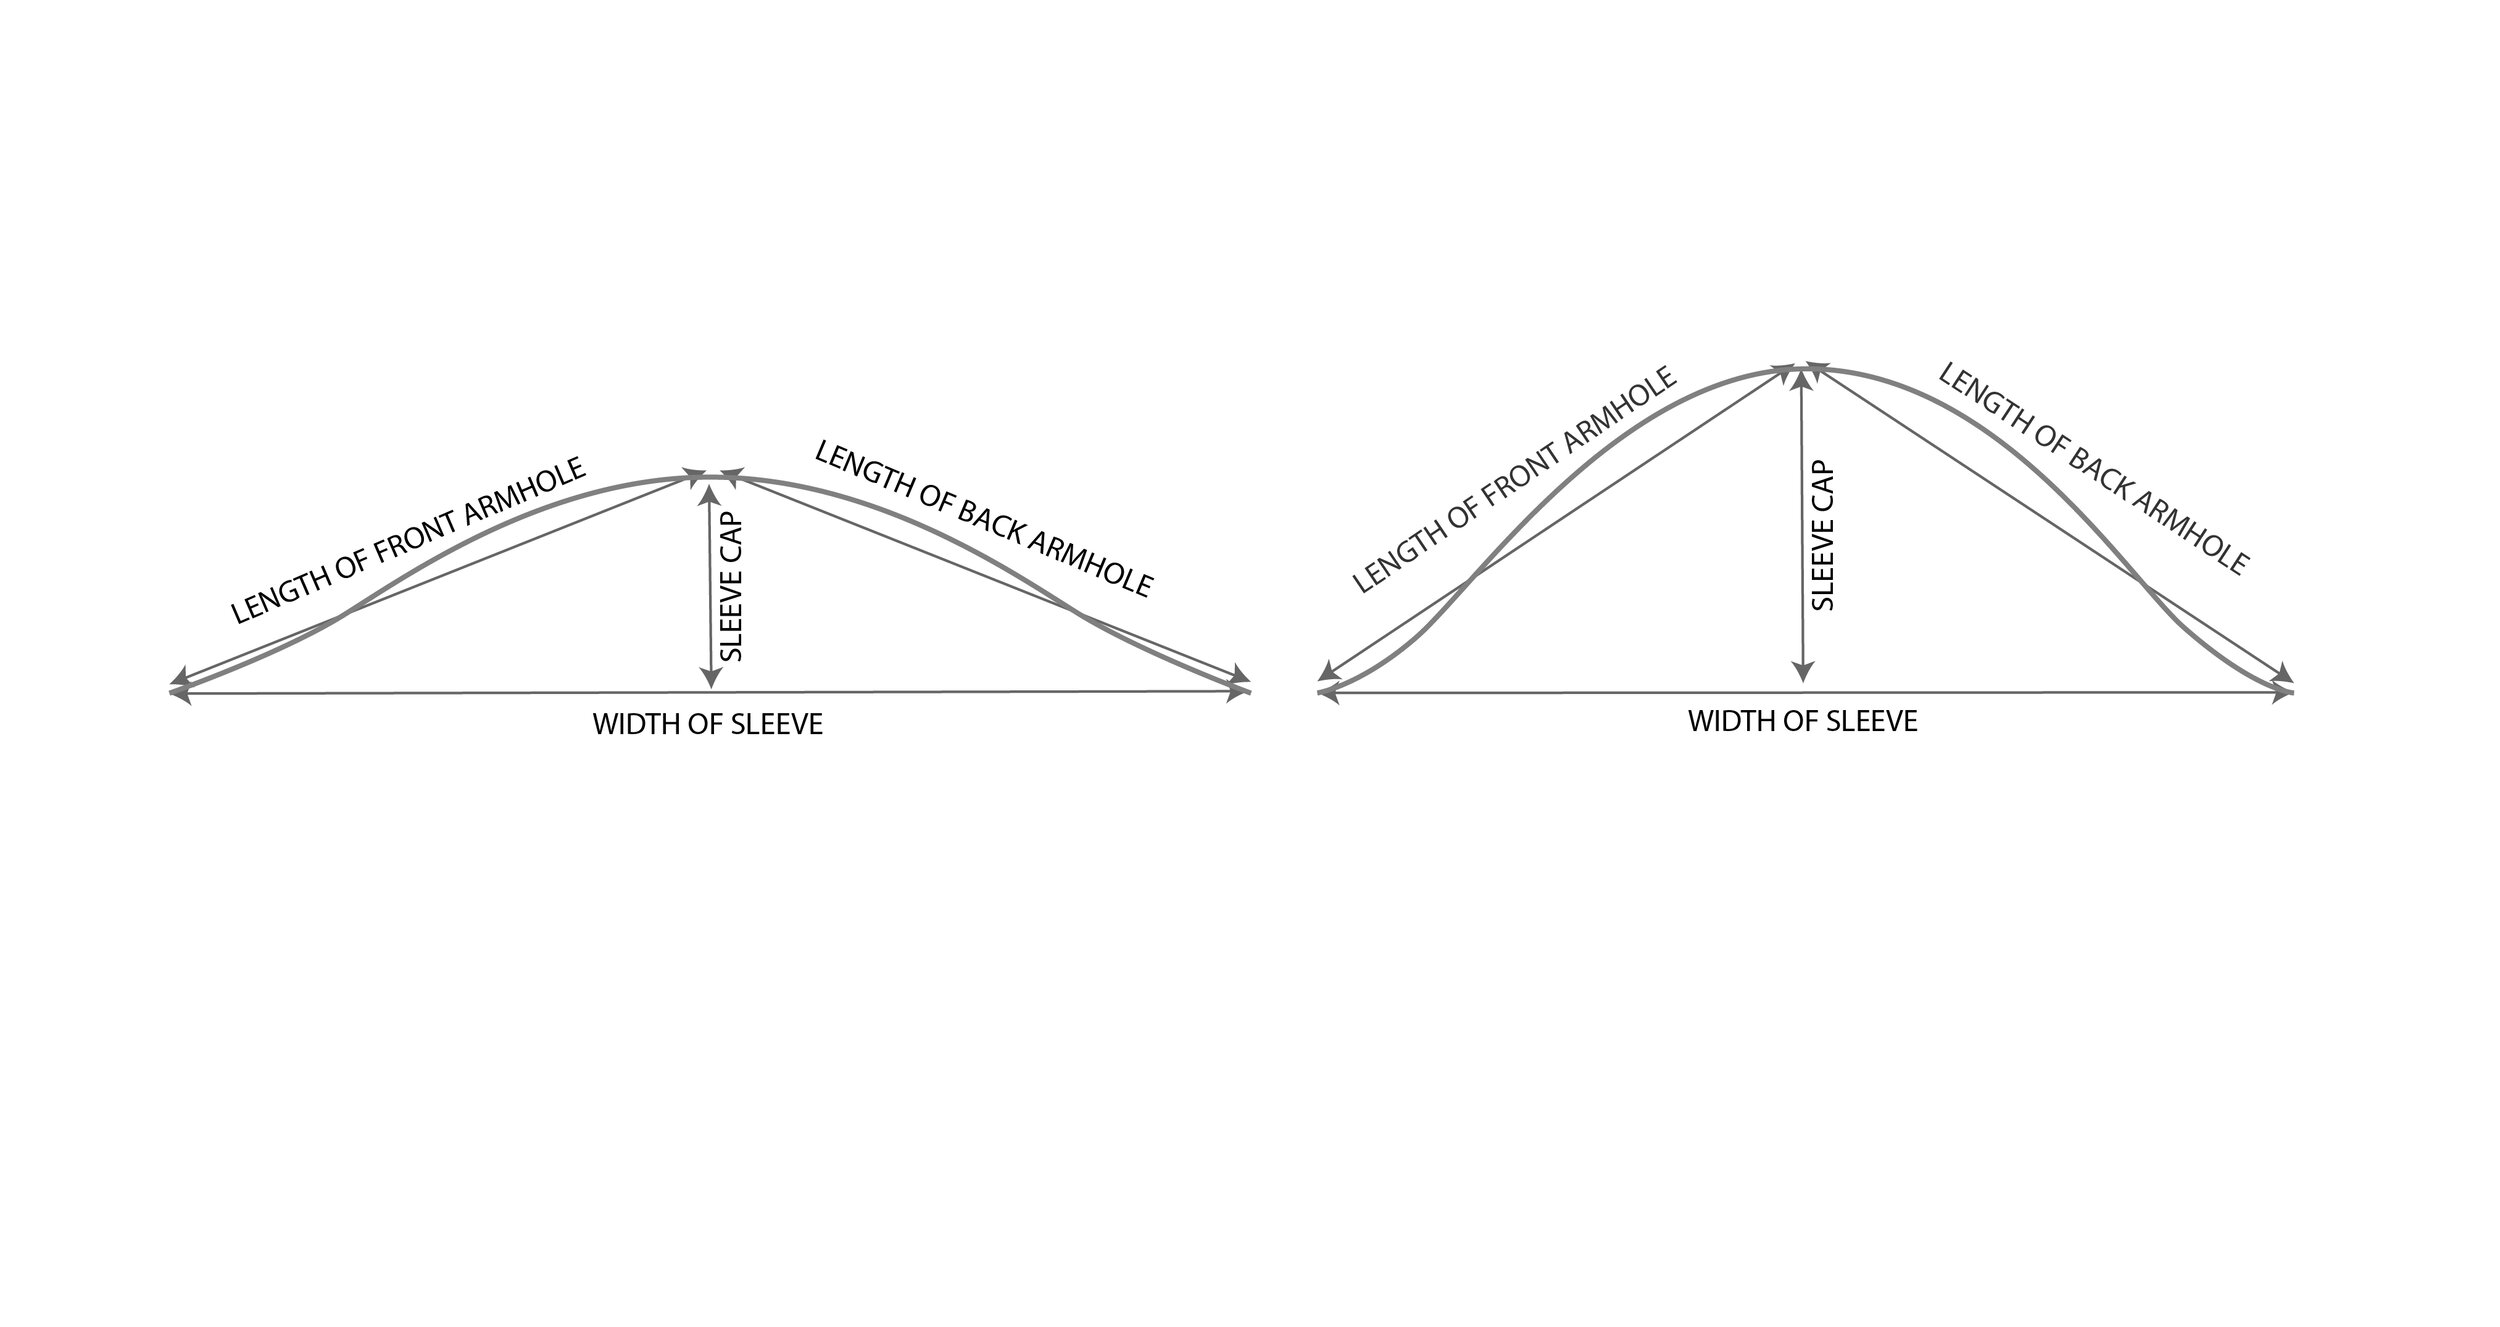
Step 2: Make a triangle using the armhole measurements where the length of the legs are equal to the length of the front and back armhole.
The steepness of the angle of the legs depends on how wide you want the sleeve to be and/or how deep you want the sleeve cap (we’ll look more deeply at pros and cons of each later in the post).
Here is an example of two different angles. Notice the shallower the angle, the wider the sleeve and the shorter the sleeve cap. The steeper the angle, the narrower the sleeve and the longer the sleeve cap.
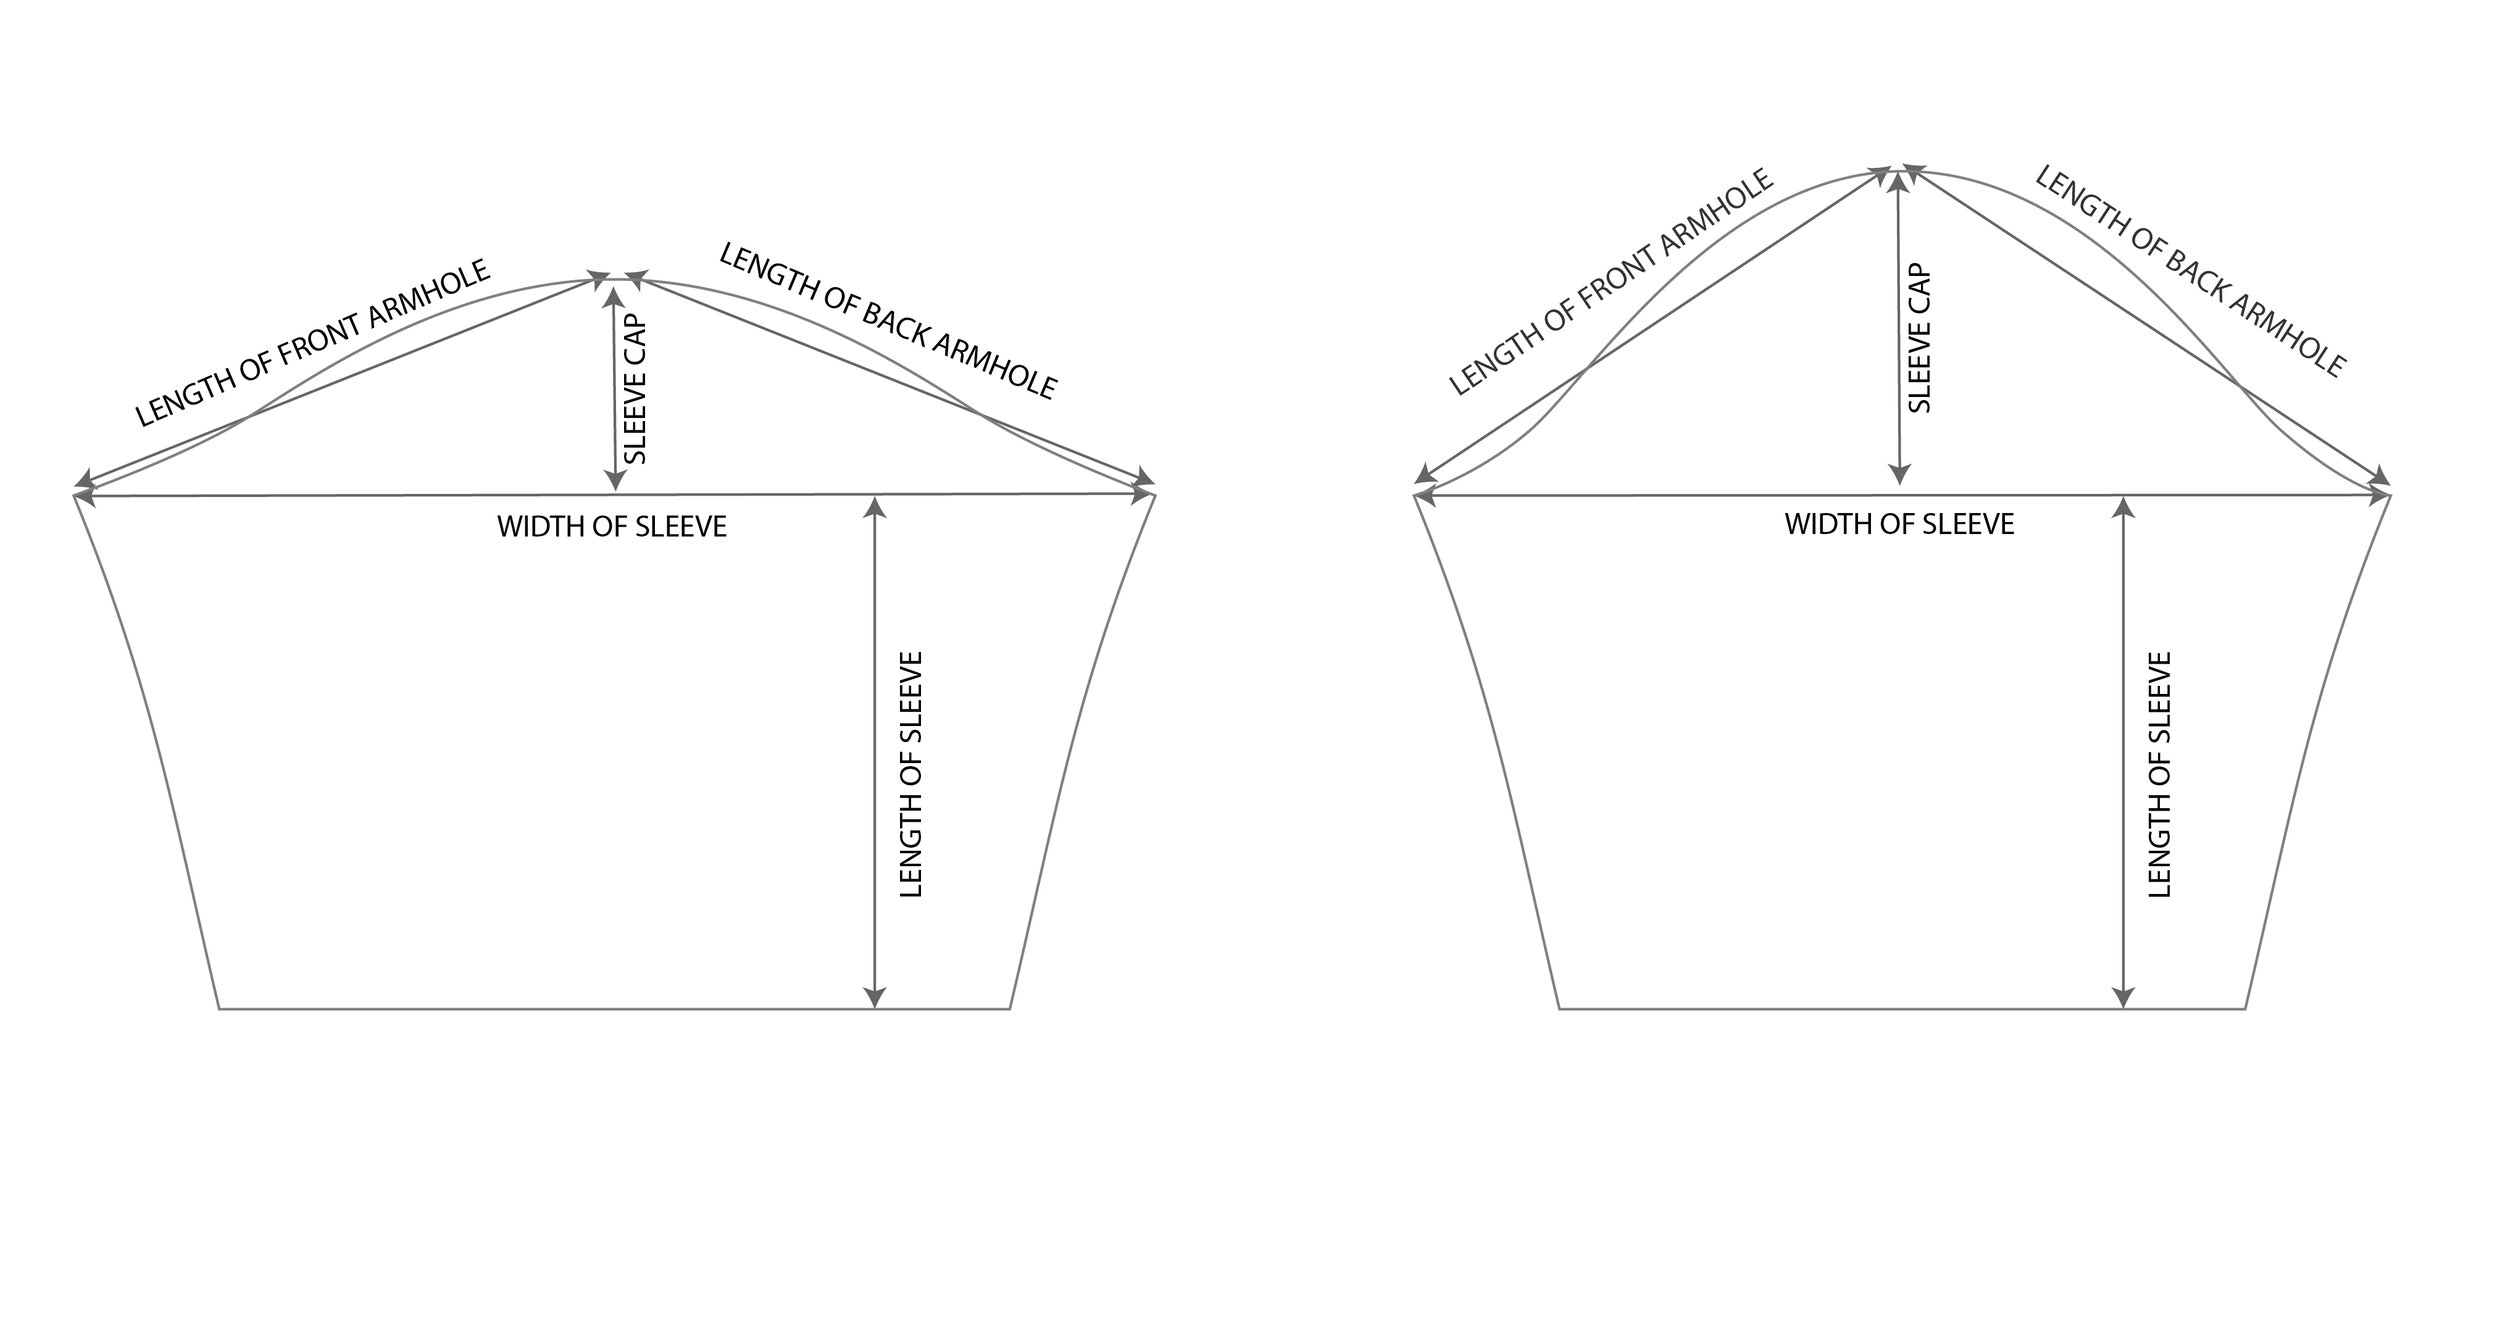
Step 3: Draw a nice swooping curve that follows the angle of the triangle legs.
Sleeves are quite forgiving, so don’t get too hung up on the shape of the curve. But here are some things to keep in mind.
a) Many sleeve curves go under the triangle in the bottom section, and then even more over the triangle near the top section.
b) It’s normal for the total length of the sleeve curve to be about 1” (2.5 cm) longer than the total length of the armholes. A little ease is good in the sleeve curve.
Step 4: Decide how long you want the sleeve to be and if you want the sleeve to taper in.
That’s it! You can totally do it! Just play and have fun with it.
Sleeve Angle and Width
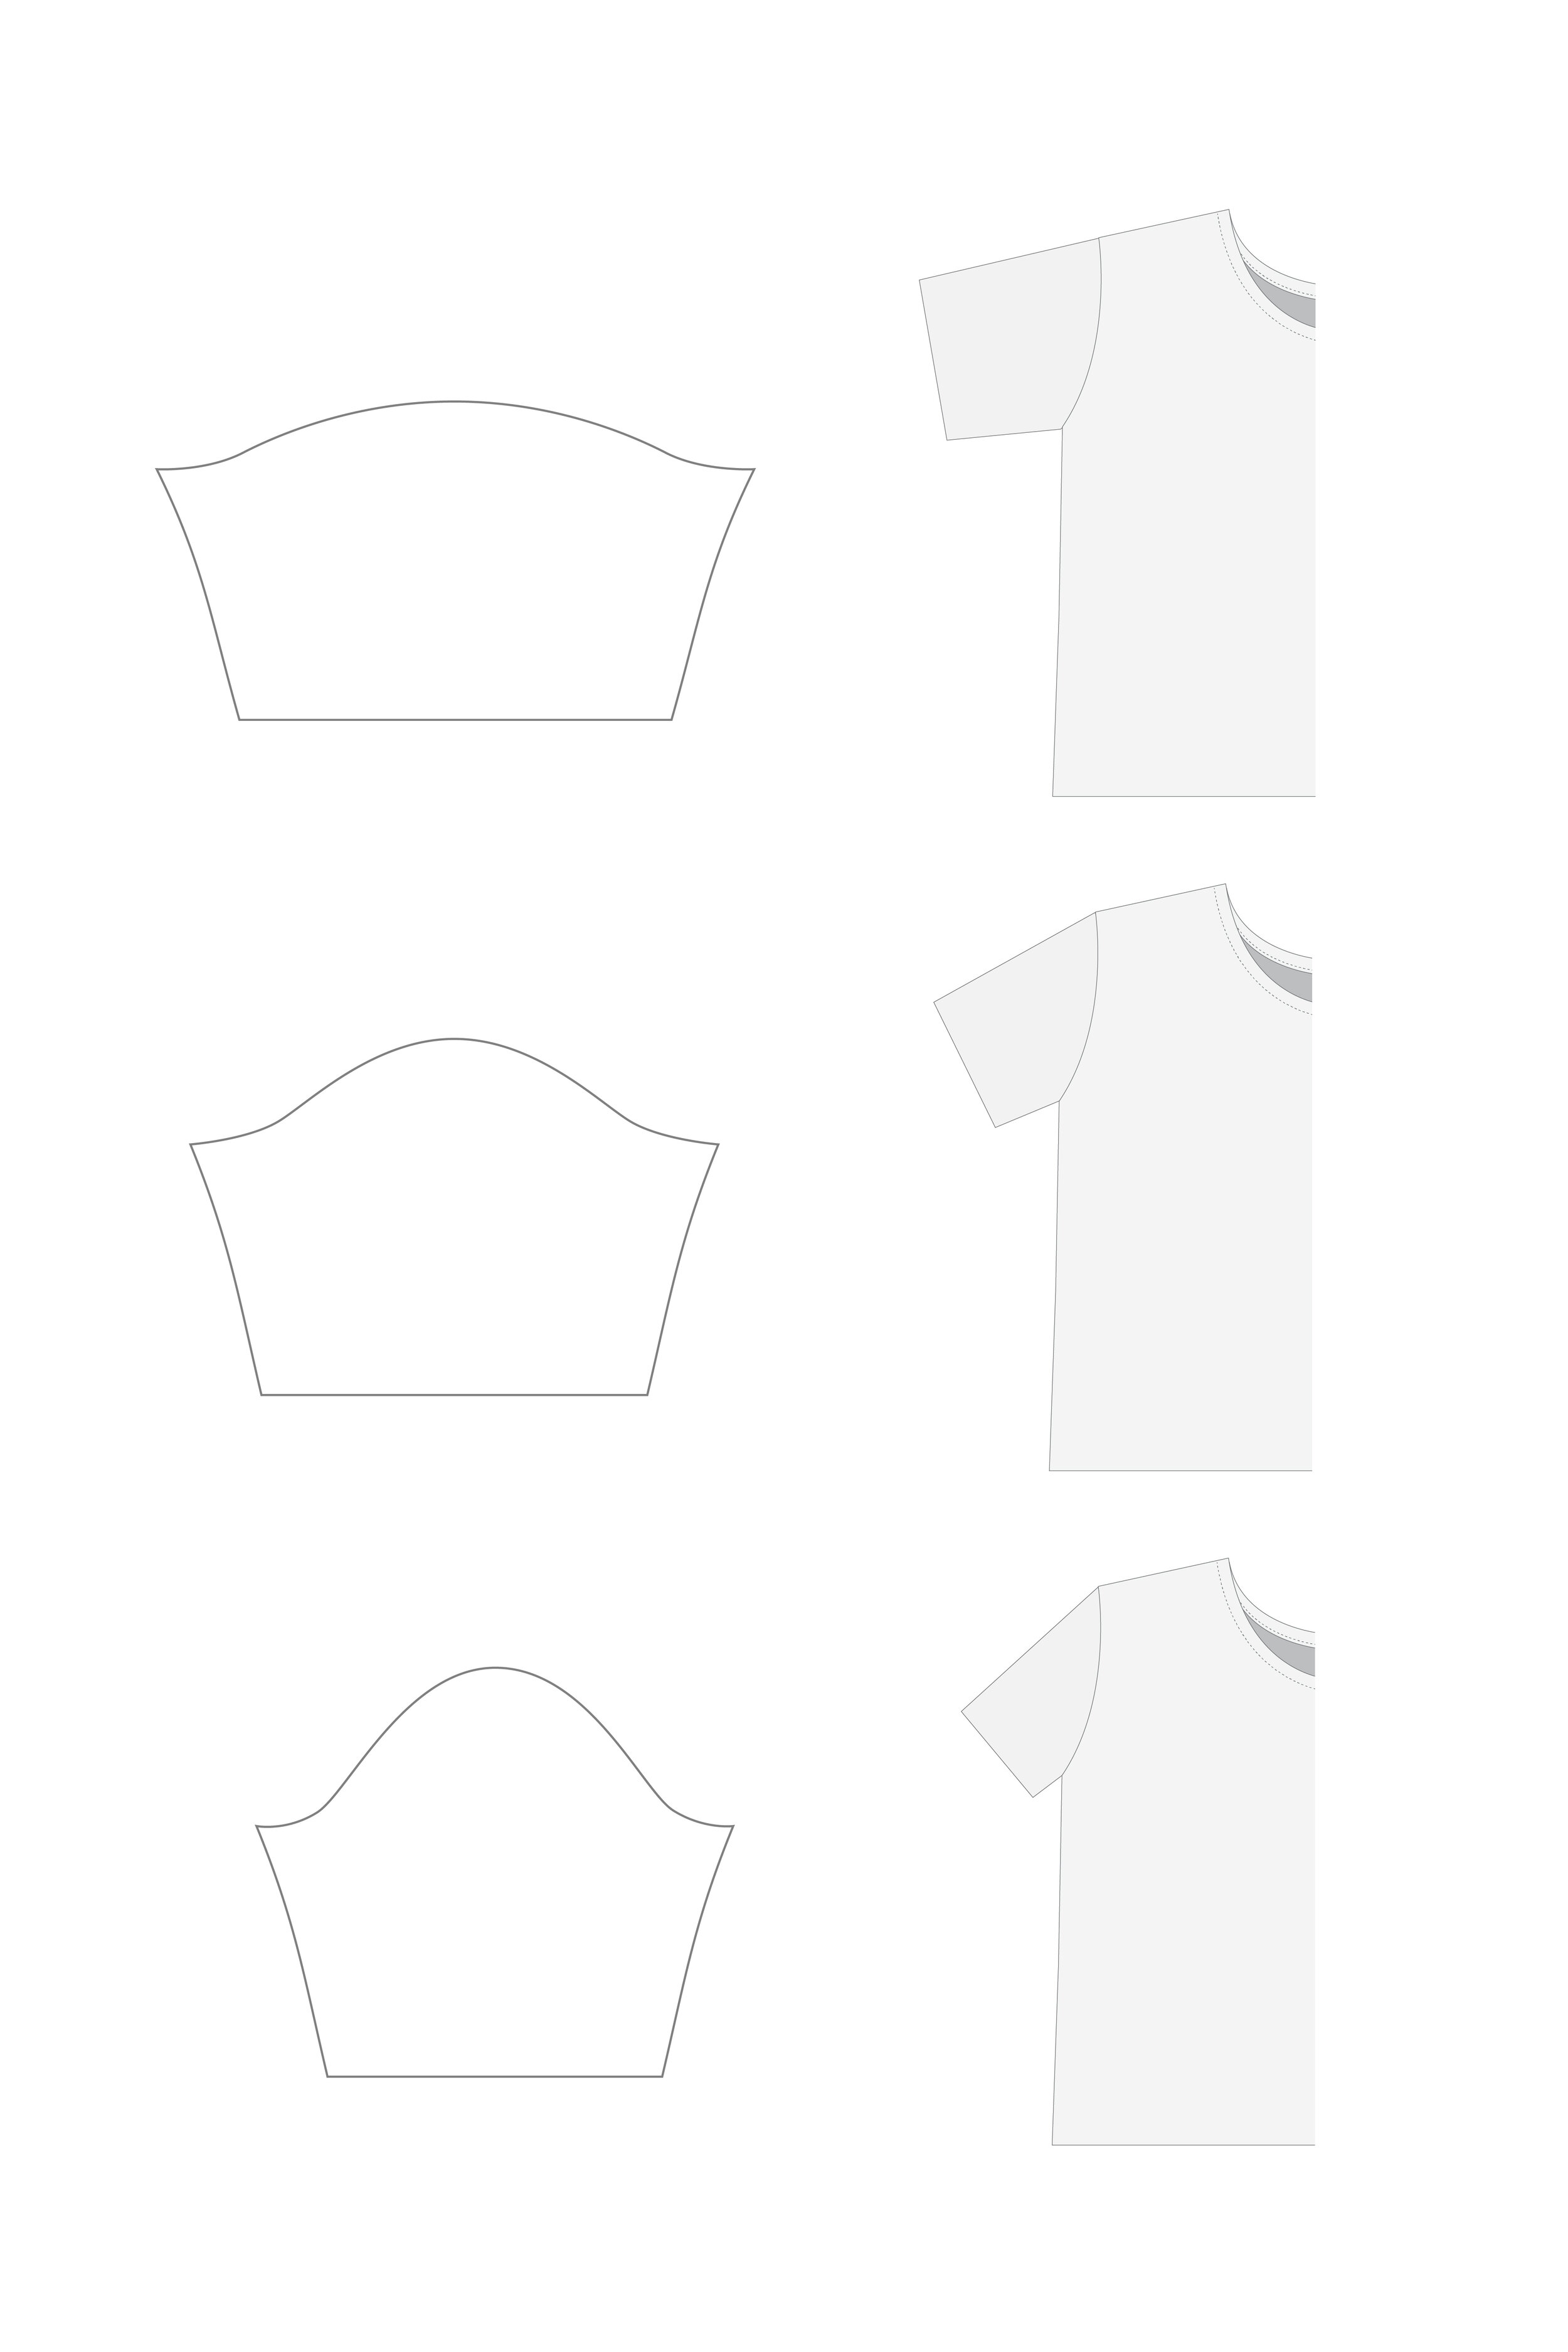
Here are examples of what different triangle angles look like on a shirt.
Wide sleeves with short sleeve caps will point out from the shirt. Lots of athletic shirts and casual sweatshirts have this angle because when you raise your arms, it doesn’t pull the whole shirt up with them. When your arms are down, there is excess fabric around your armpits.
Medium wide sleeves with medium sleeve caps are similar to a basic t-shirt. They give you room to move, but don’t have too much excess fabric around your armpits when your arms are down.
Narrow sleeves with high sleeve caps will point down sharply from the shoulder. Lots of professional clothing uses this angle for a clean profile that doesn’t have a lot of excess fabric around the armpit. It looks nice, but the downside is if you ever do have to raise your arms, your whole shirt is coming up with them!
What if I want a sleeve that points out but is really narrow?
Good question. If you want a sleeve that points out (has a short sleeve cap) but is also really narrow, here are some things to play with. You can make the armhole smaller on the front and back bodice pattern pieces by raising up the bottom of the armhole and readjusting the armhole curve. Or you can try a drop shoulder and make the shoulder angle whatever you’d like and the width of the sleeve whatever you’d like. There is something to be said for the freedom that drop shoulders offer!
Adjusting Sleeve Patterns
If you have a sleeve pattern already that you want to adjust to fit a different shirt, here are some adjustments you can make.
If you need to add length to the curve, you can either increase the sleeve cap height, increase width, or a combination of both.
If you need to reduce the length of the curve, you can either decrease the sleeve cap height, decrease width, or a combination of both.
Sleeves can be frustrating, sleeves can be fun. Don’t let them get the best of you. Give them your best playful attitude of enjoyment.
