Pocket Placement Really Does Make a Difference on How Your Bum Looks

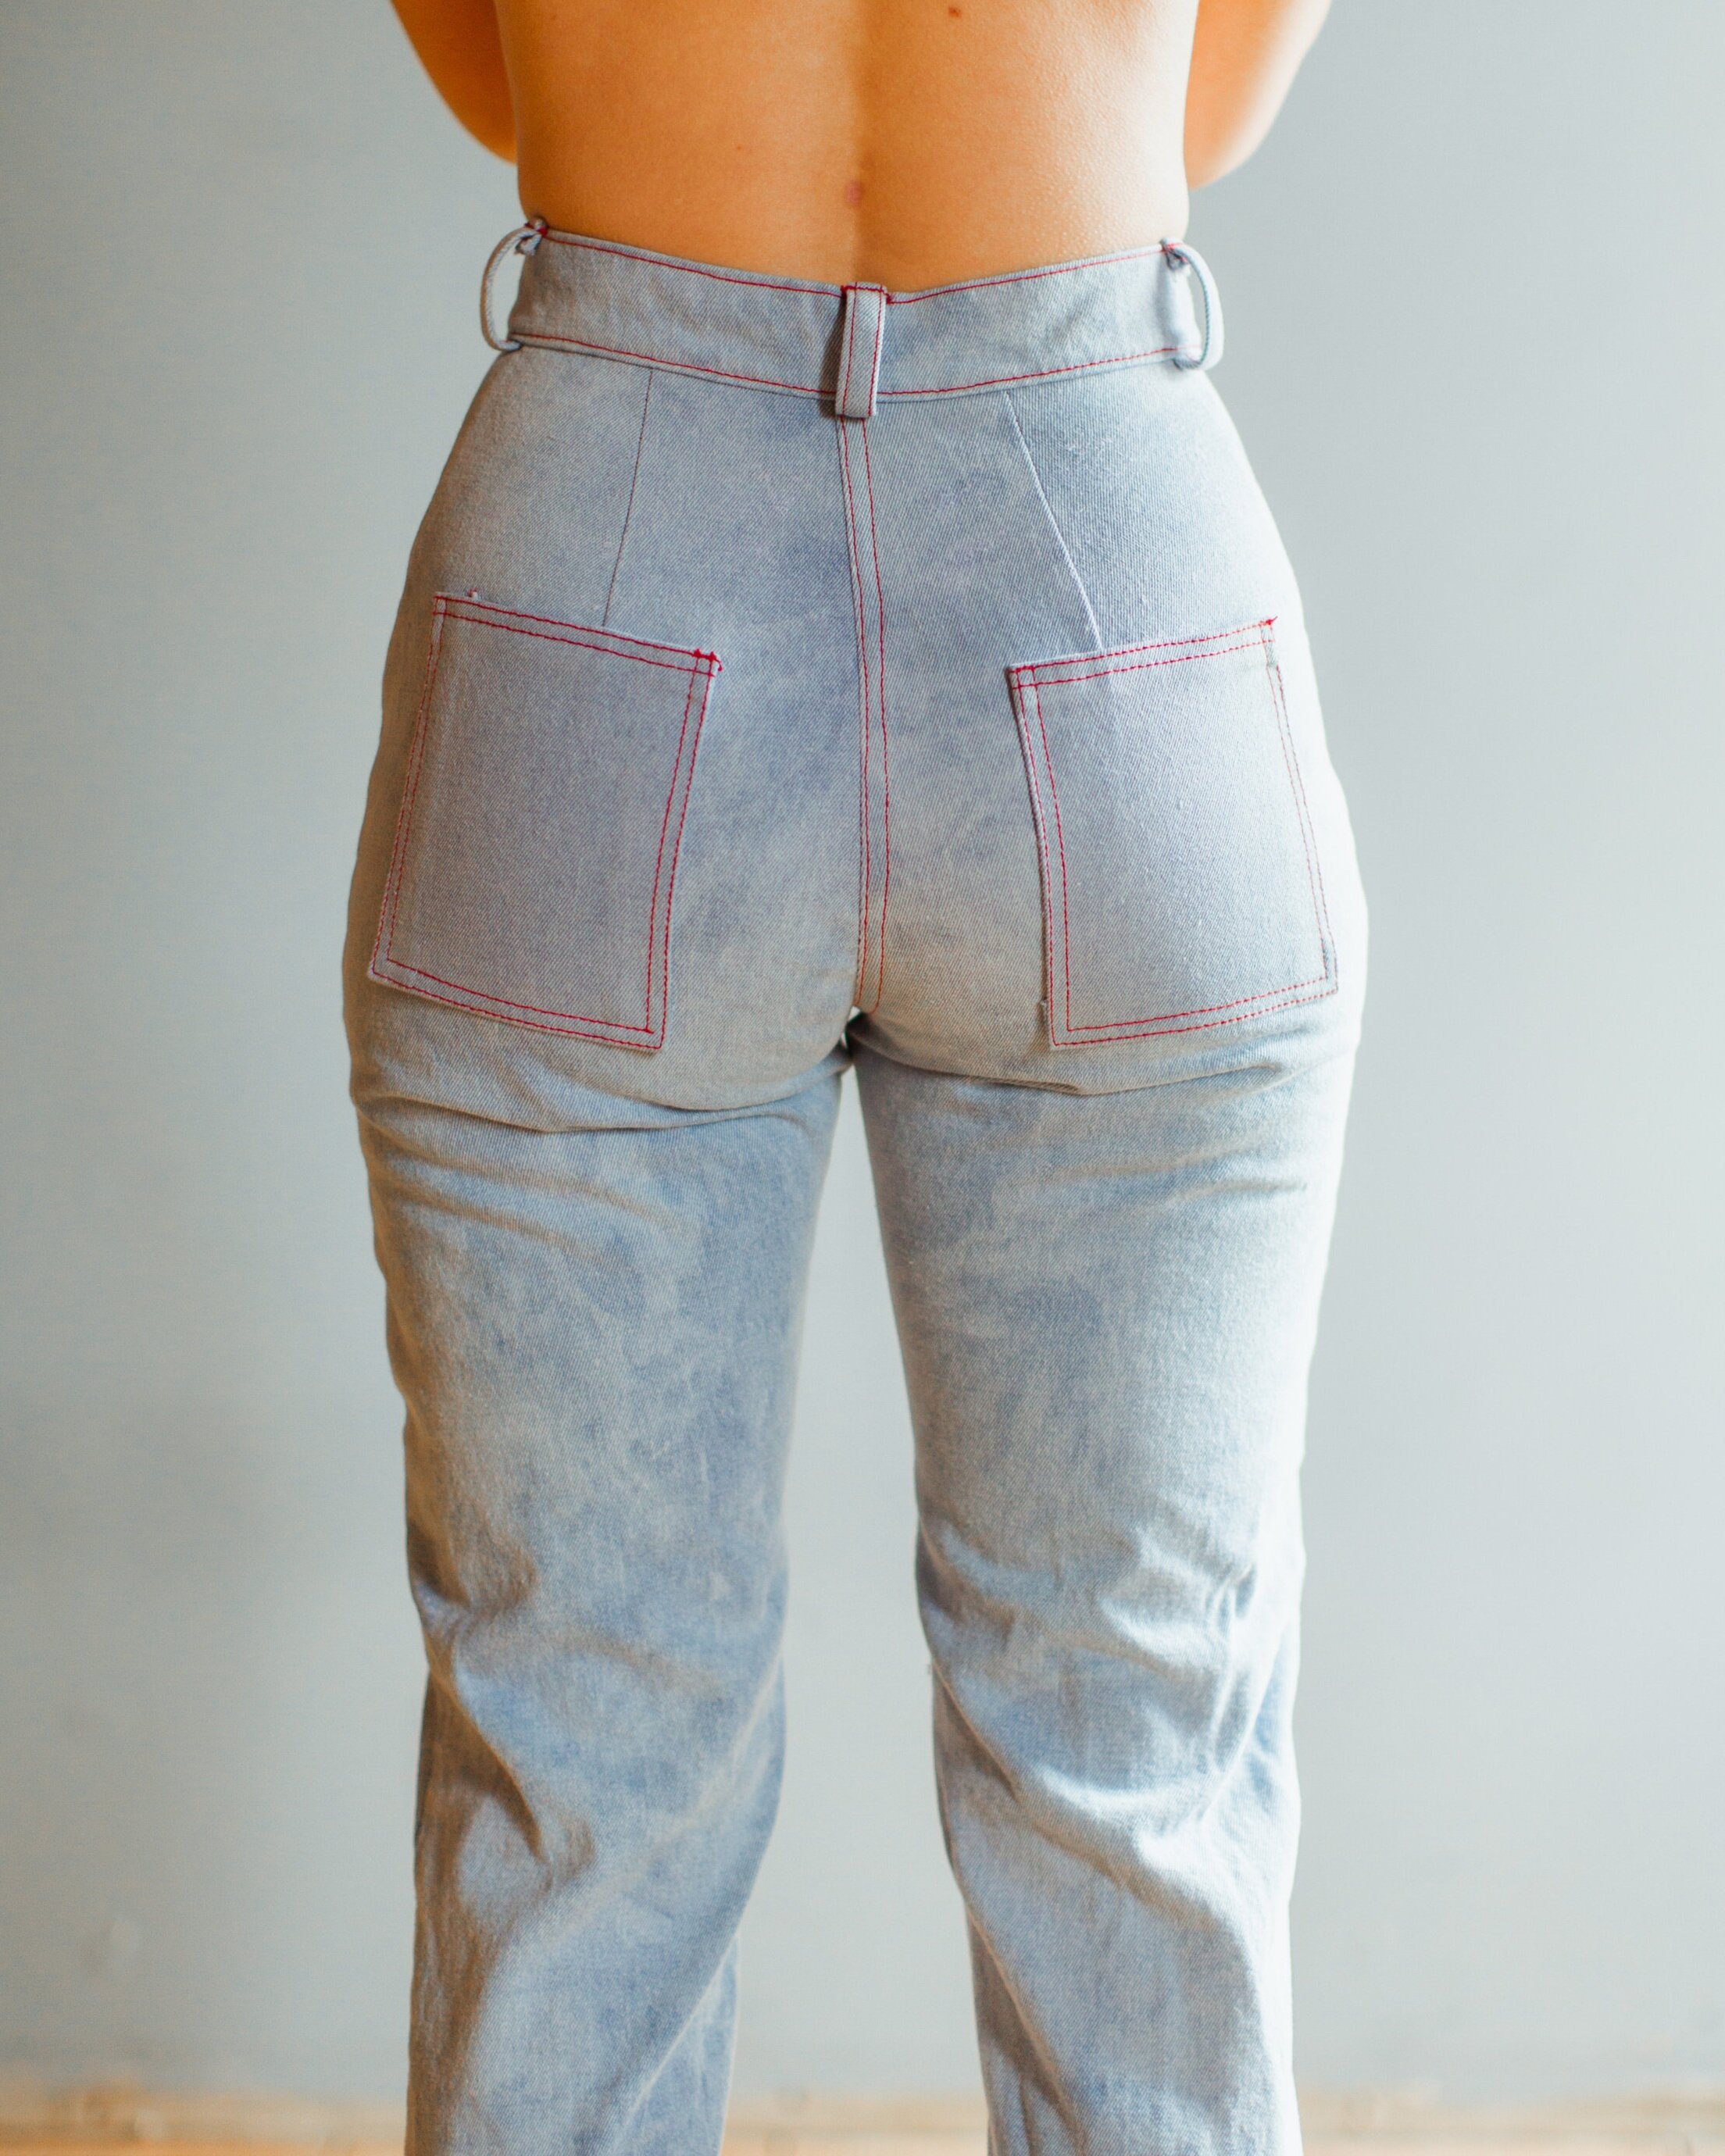
I glued pockets in different spots to experiment with the way they can effect the look of your bum. It turns out, it really does make a difference.

1) Small pockets make your bum look bigger.

1) Small pockets can make your bum look bigger.

3) Low pockets make your bum look saggy.

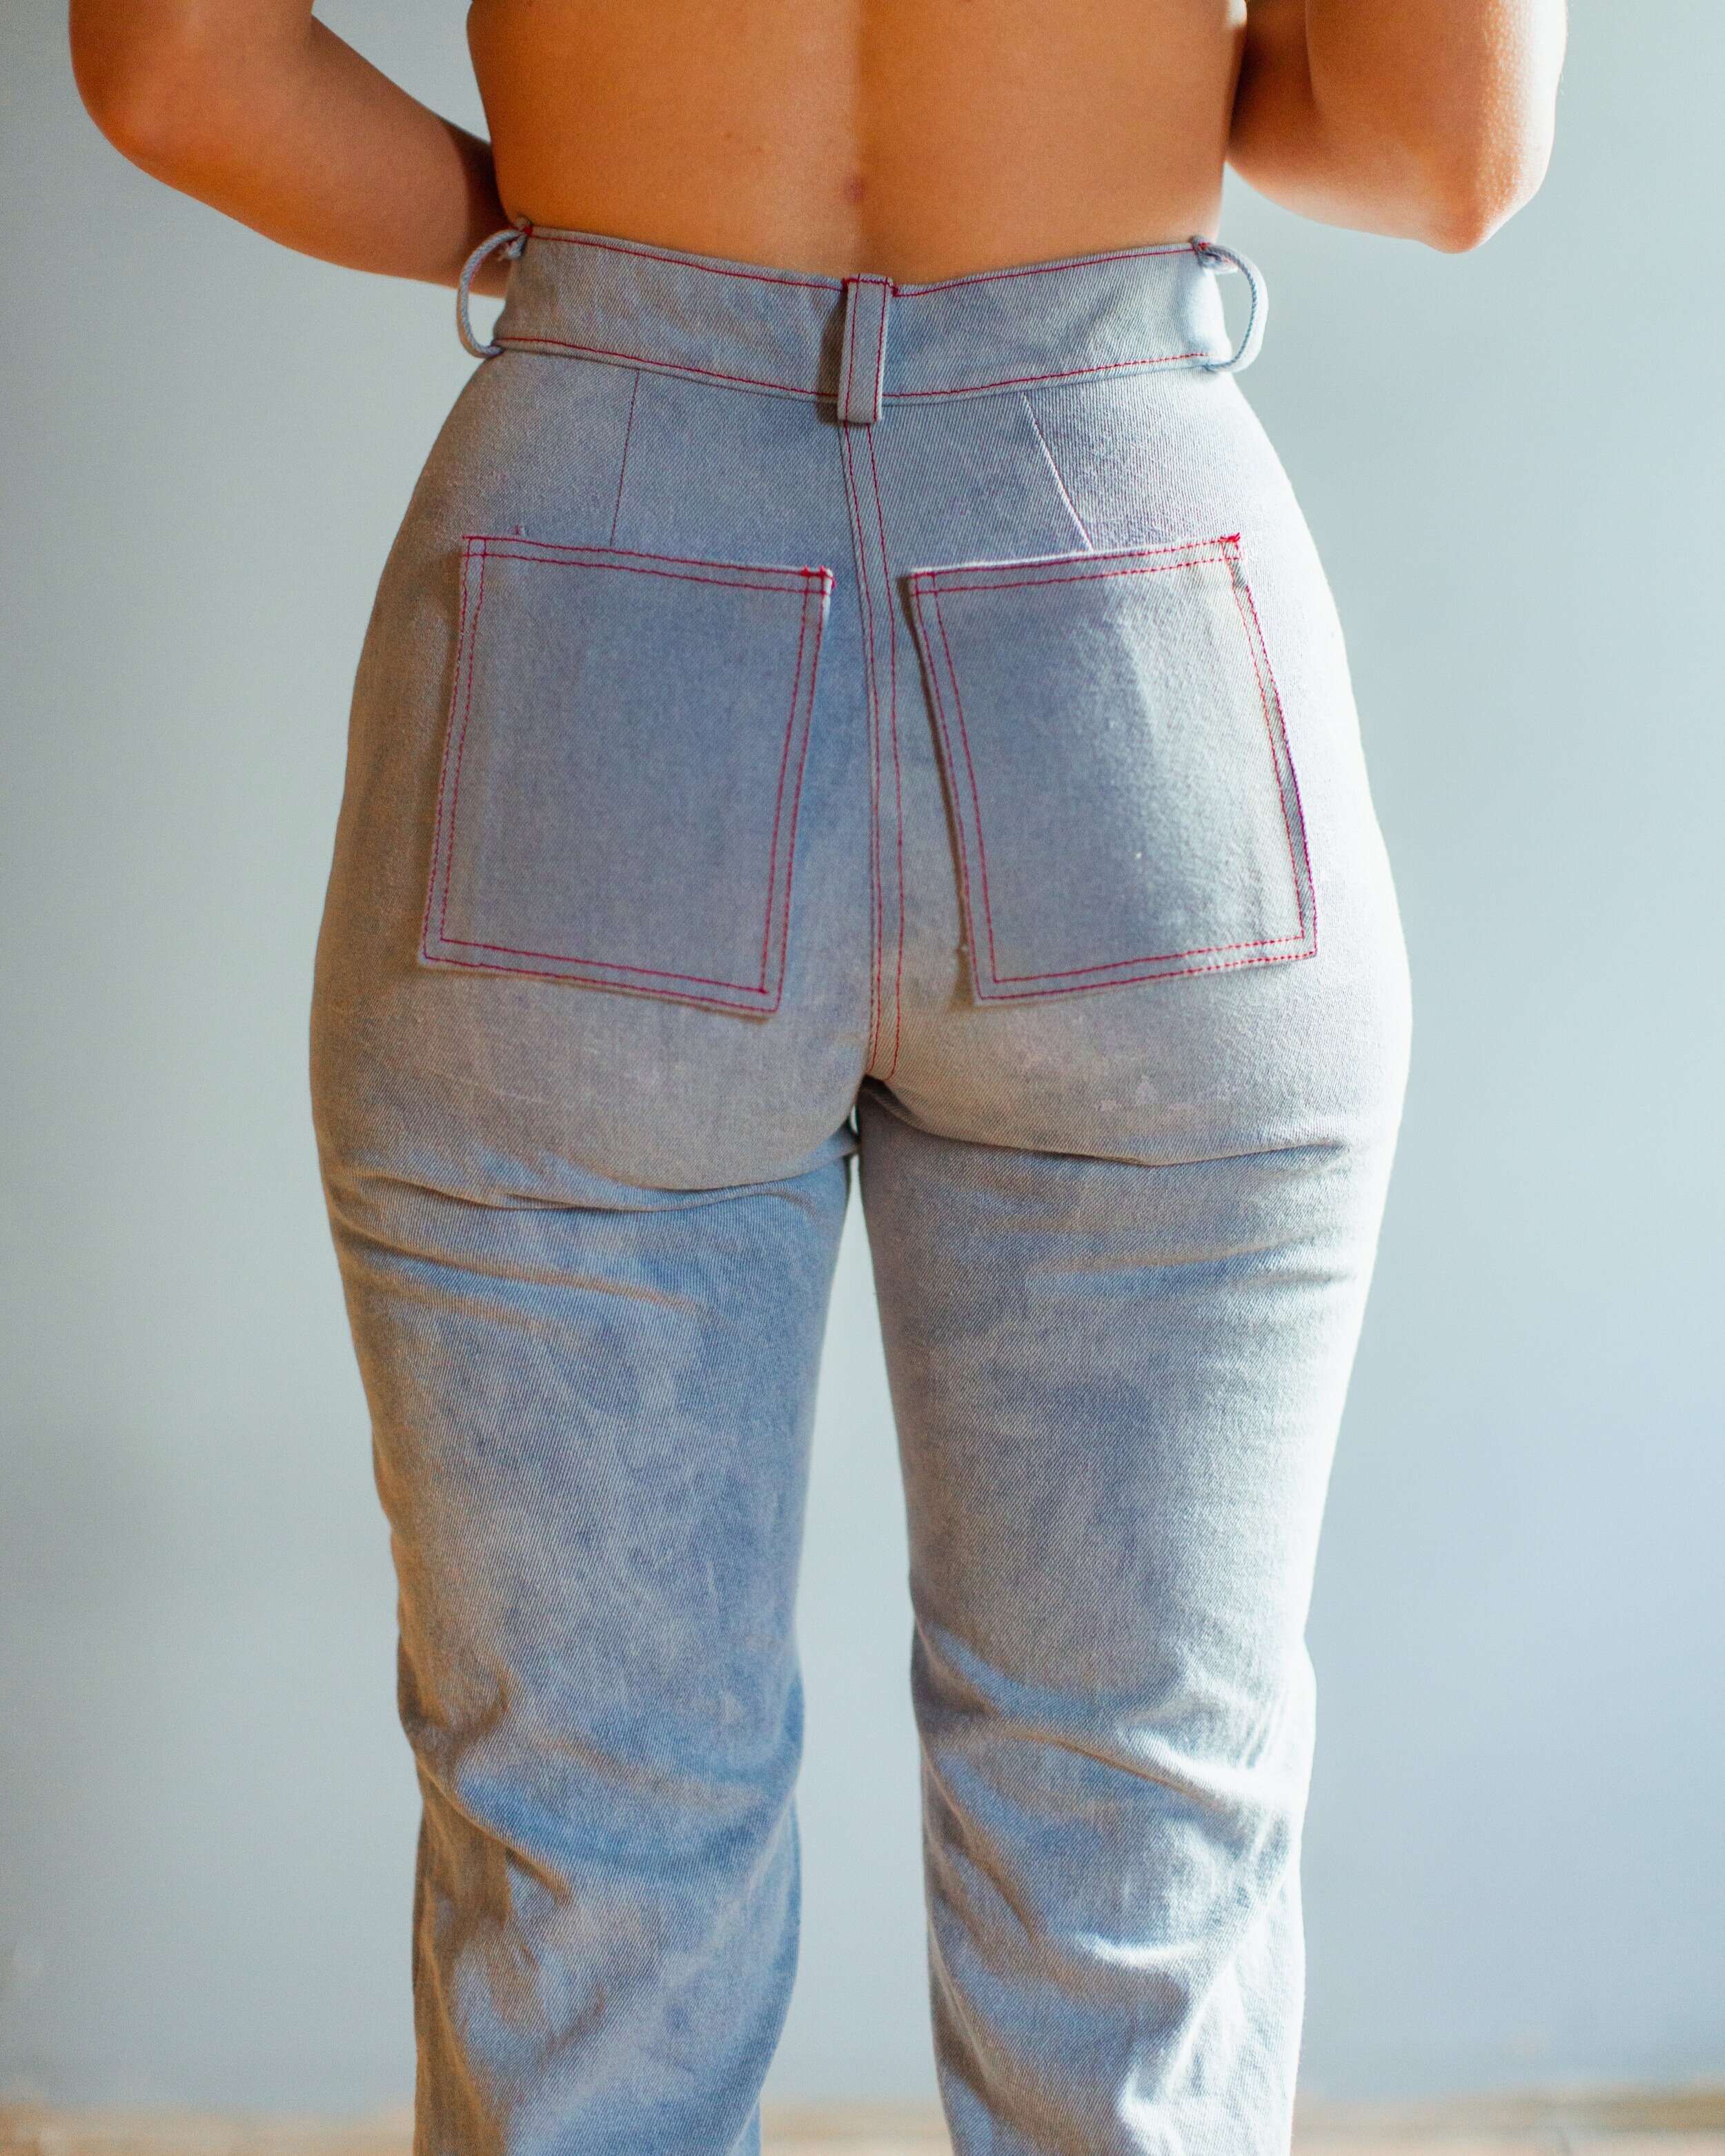
3) Low pockets can make your bum look saggy.

2) Big pockets make your bum look smaller.

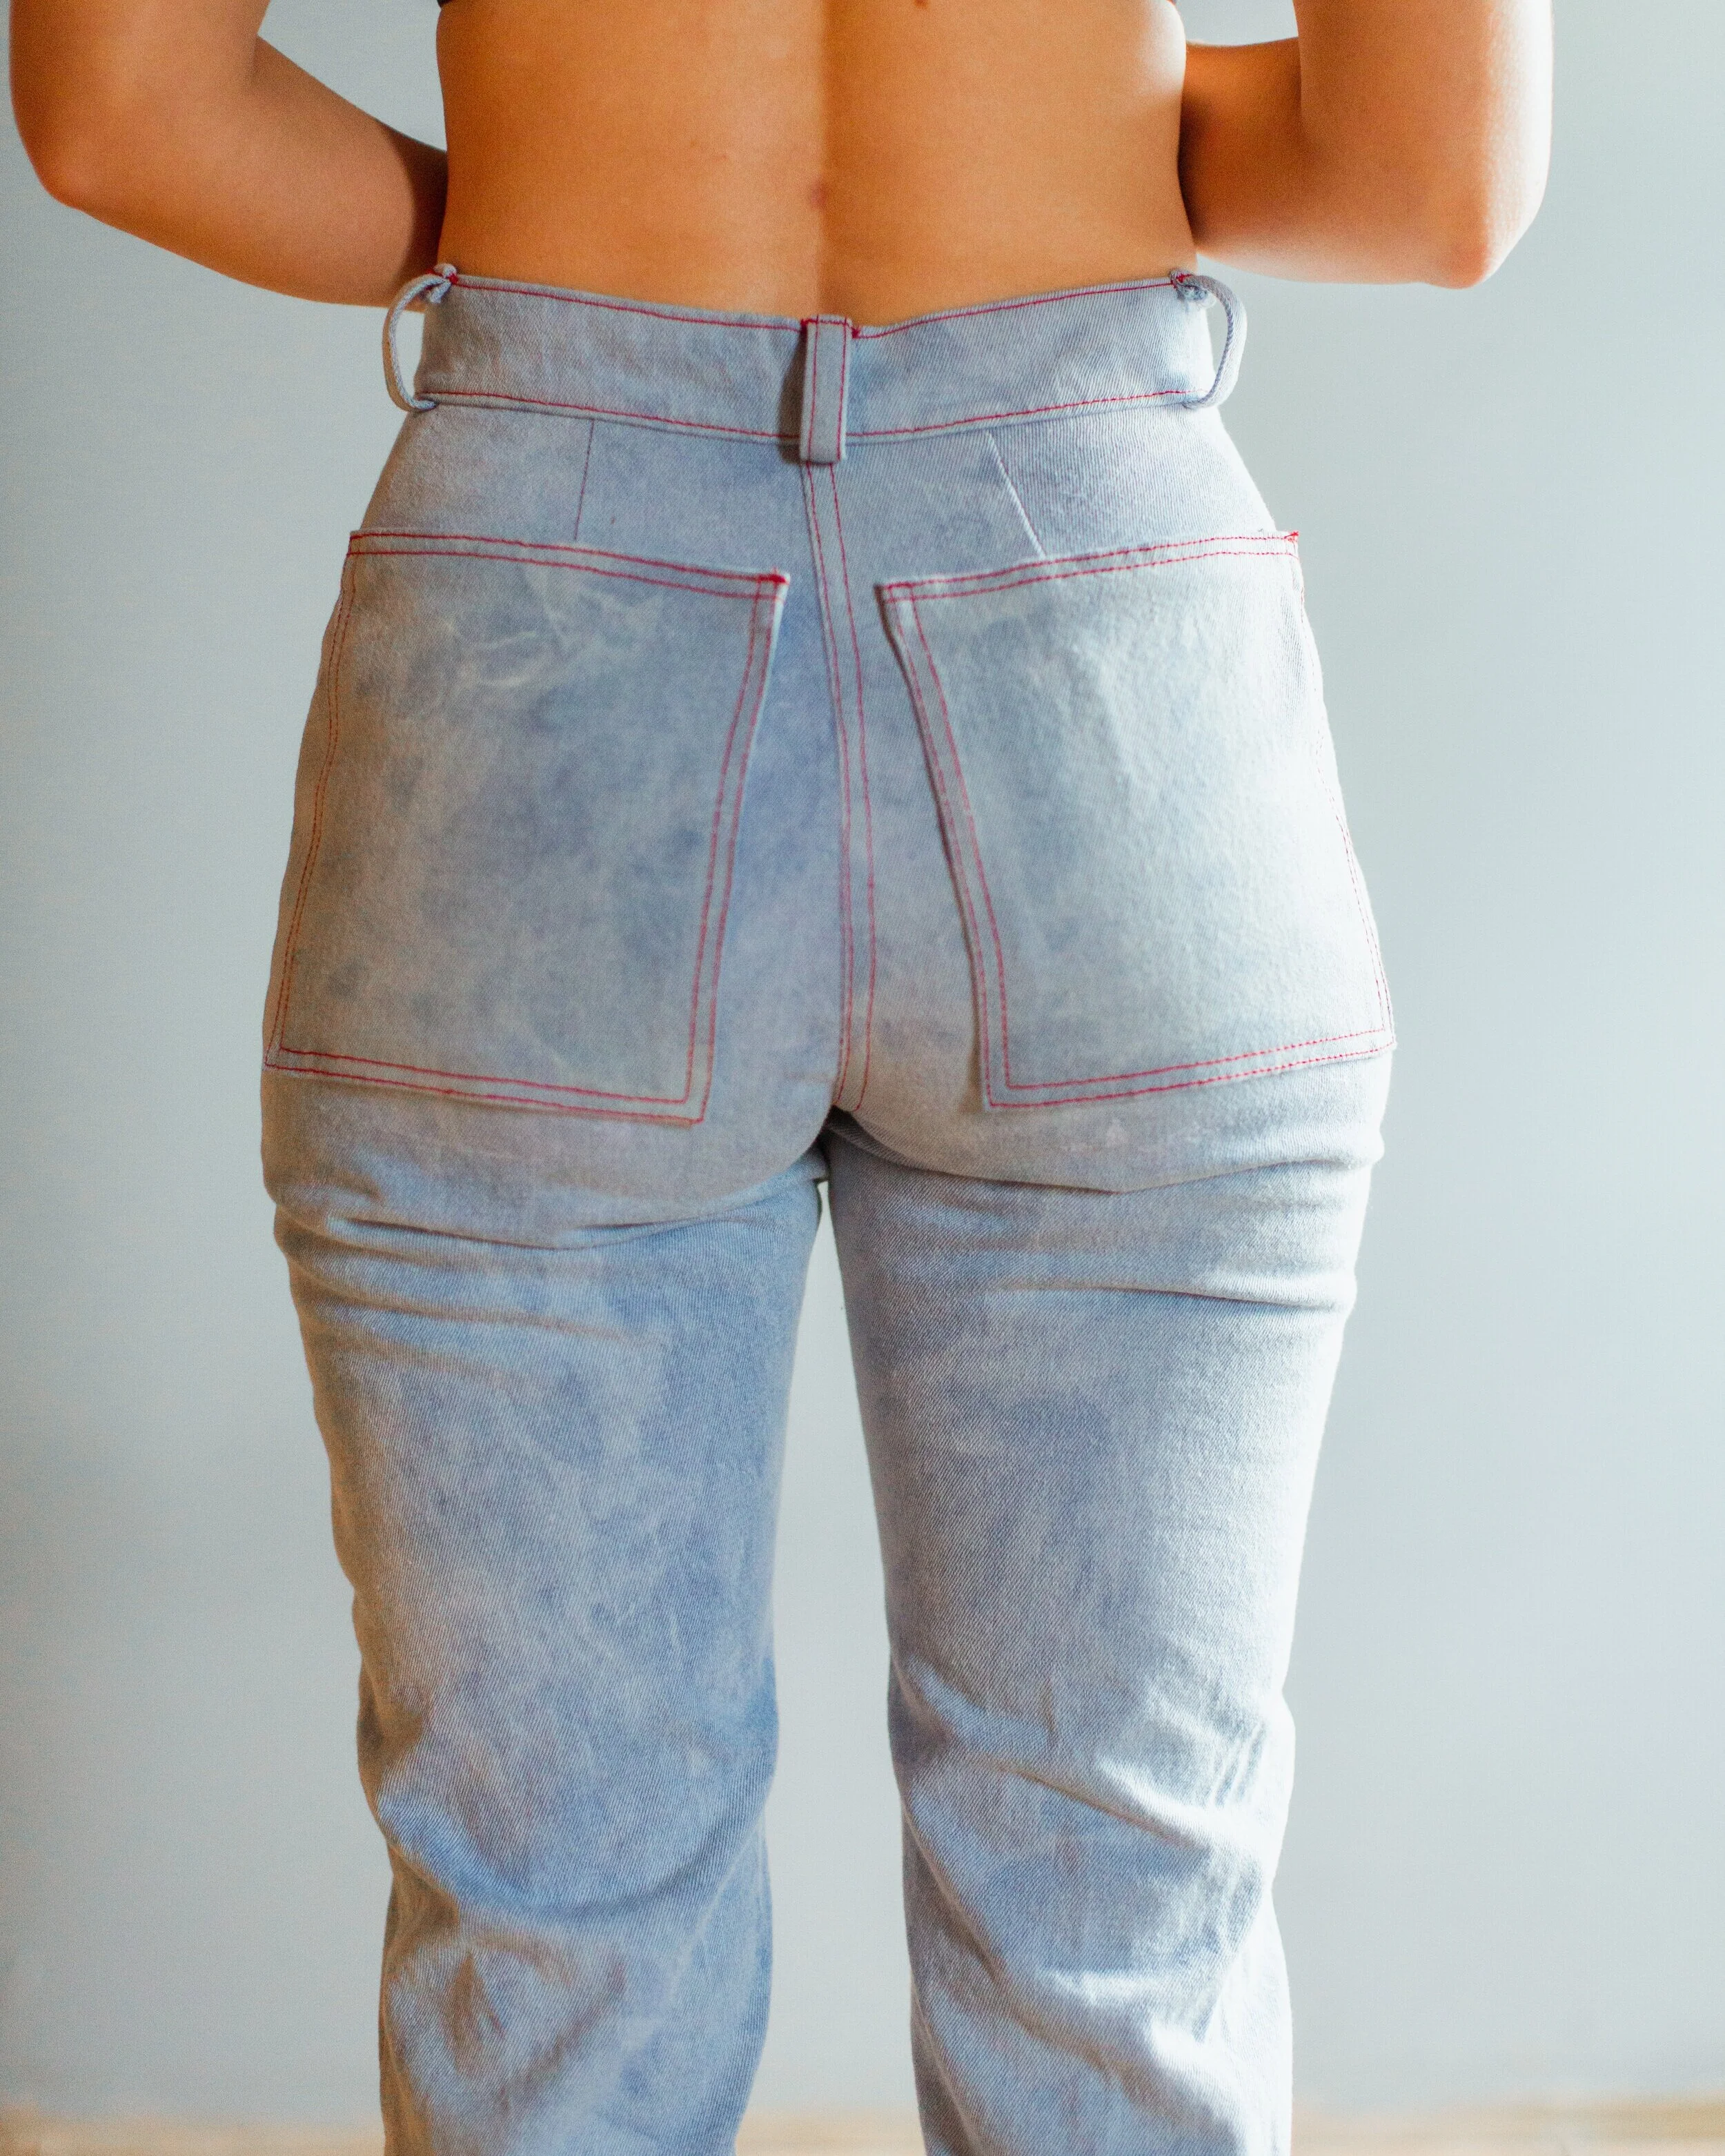
2) Big pockets can make your bum look smaller.

4) High pockets can possibly make your bum look lifted (although I don’t think this really works with my bum shape).

4) High pockets can possibly make your bum look lifted (although I don’t think this really works with my bum shape).

5) Narrow pockets can make your bum look narrow and not plump.

5) Narrow pockets can make your bum look narrow and not plump.

6) Wide pockets make your bum look wide, but not necessarily in a good way.

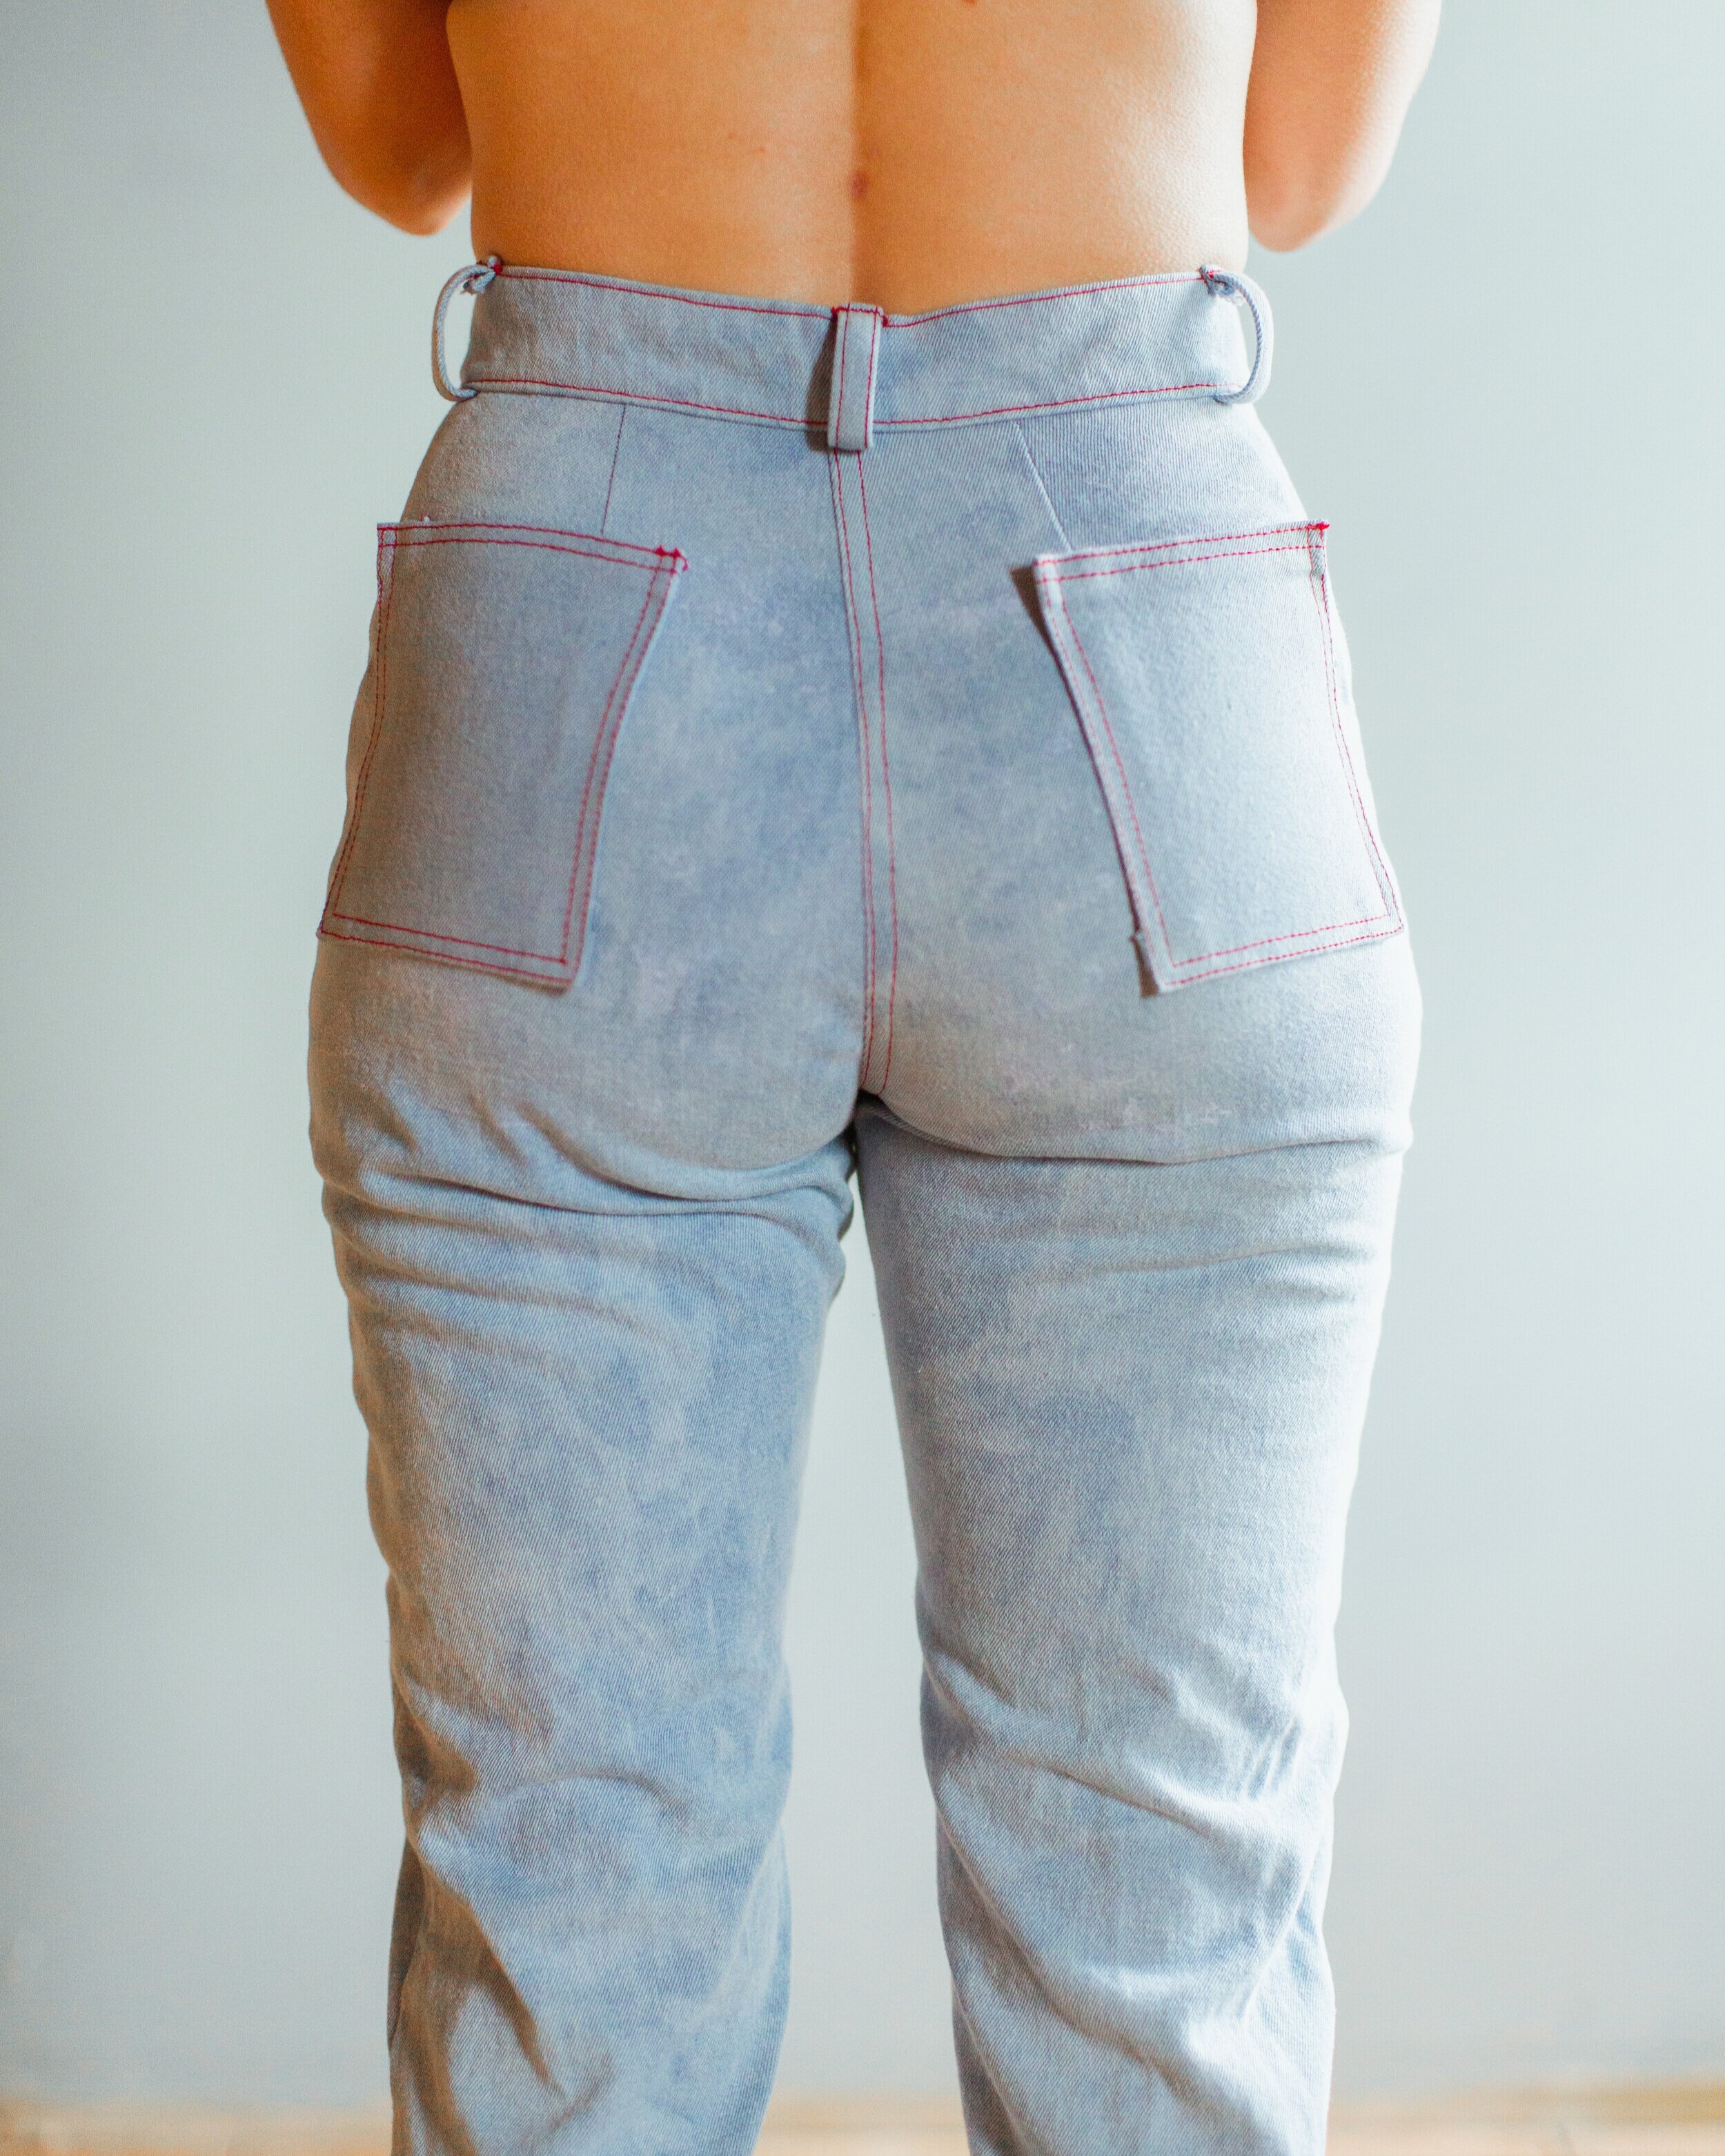
6) Wide pockets can make your bum look wide, but not necessarily in a good way.

The best placement is different for every bum (and how that we can decide where to put our pockets when we sew). For me, I think I like medium sized pockets right in the center (photo 1).

I hope this is helpful for deciding where to place your pockets. Gotta get that bum looking its best!

How to Sew Mitered Corners

How to Sew Mitered Corners - Sarah Kirsten

Here’s how to do it

1) Iron all sides of the fabric at your desired hem width.

How to Sew Mitered Corners - Sarah Kirsten

2) Fold the hem over again with the same width and iron.

How to Sew Mitered Corners - tutorial with lots of photos

3) On the corner, unroll one fold of the hem.

How to Sew Mitered Corners - Sarah Kirsten

4) Fold the corner in diagonally. Align it so the fold creases made from the iron in the previous step match up with the width of the first fold of the hem. Iron the corner down so it makes a diagonal crease in the fabric.

How to Sew Mitered Corners - Sarah Kirsten

5) Mark along that diagonal crease with chalk or pencil or fabric pen.

How to Sew Mitered Corners - Sarah Kirsten

6) Fold the fabric over and sew along the marked diagonal line.

How to Sew Mitered Corners - Sarah Kirsten

7) Trim off the corner, leaving about 3/16” seam allowance.

How to Sew Mitered Corners - Sarah Kirsten

8) Flip the corner right side out. Use a point turner or some other pointy object to press out the corner.

How to Sew Mitered Corners - Sarah Kirsten

9) Edge stitch along the inside edge of the hem.

How to Sew Mitered Corners - Sarah Kirsten

10) Enjoy the beautiful corners with all the extra care and love you put into creating them.

How to Sew Mitered Corners - Sarah Kirsten

This lovely lightweight linen fabric is from Fabrics-Store.com. I enjoy sewing with their fabric. They have a wonderful selection of linens in various weights and colors. Not to mention they are a family company, and their blog is amazing.

How to Sew Mitered Corners - Sarah Kirsten

Rainbow Arch - How to do it

How to paint a rainbow arch in your house - Sarah Kirsten

Before I bought my new house, I was dreaming of how I would decorate. There is this wide beautiful archway, and I knew I wanted to do something with a rainbow. The ideas kept morphing into other ideas, and then this idea hit. It was pretty clear it was the one. (As in, the one you are going to marry, the rainbow you are going to paint.)

The ancient Hebrew texts describe the rainbow as a sign of the Lord’s faithfulness and promises. I love that! Besides rainbows being beautiful in and of themselves, I want to walk under a reminder of the Lord’s faithfulness every day.

Here’s how to do it

1) Paint the arch white.

2) Figure out how wide each rainbow strip is going to be.

3) Mark the lines of each strip in several places along the archway.

4) Following your markings, use 1/4” painters tape to delineate the strips.

 
How to paint a rainbow arch in your house - Sarah Kirsten
 

5) Paint the wall white again over the tape. This seals the cracks and gives a really clean edge when you peel off the tape. This step feels a bit extra, but seriously, do it. It makes a big difference and you’ll be glad you did it.

6) Spend a long time picking out the perfect colors.

 
How to paint a rainbow arch in your house - Sarah Kirsten
 

7) Paint the rainbow. (Somewhat difficult to decide if you want the red on the right or the left….)

 
How to paint a rainbow arch in your house - Sarah Kirsten
 

8) Carefully peel up the tape.

 
How+to+paint+a+rainbow+arch+in+your+house+-+Sarah+Kirsten
 

9) Enjoy rainbow.

How to paint a rainbow arch in your house - Sarah Kirsten

This superior painting method for obtaining crisp lines was taught to me by my friend Nate. Thank you, Nate!

Behind the Scenes - How I Made My Parents House Video

I recently posted this video, and I wanted to show you the more messy parts of how I made it.

One principle I see over and over again is that anytime something is birthed, it’s messy. I grew up on a farm and have seen many, many, many births. It’s always messy and painful. But the result is beautiful.

The same goes for creation of our projects.

Here’s my messy creation process

1) The best thinking happens while driving for me. I go on long drives just to come up with ideas. The idea for this video came on a drive, so I recorded the basic structure of how I wanted the story to go into my phone while rolling along the river.

2) Sitting on my bed a few days later, I re-recorded the story into my phone (much quieter in my house than in my car) in sections. At first I tried to record the whole thing straight through, but that was hard to not mess up, so I recorded it in 14 parts.

 
How to birth a creative project - Sarah Kirsten
 

3) I went through hundreds of photos at my parents house (on multiple occasions). I was looking for:

  • Photos of construction work on the house

  • Photos of the family

  • Photos of the new farm location

  • Photos of Grammie and Papa

  • Photos of my parents

My original idea was to tell the story through props. I was going to use popsicle sticks to build the house and a little toy truck to haul the house down the road. I went to the store and bought supples, and then went back to get even more supplies. But I couldn’t quite get it the way I wanted. So I scraped that idea and realized photos were a good option.

Birthing a creative project - Sarah Kirsten

4) It was a task to sort them out and decide which photos were best to use, and to decide the order. This took a long time.

Birthing a creative project - Sarah Kirsten

5) There were lots of gaps in the story that couldn’t be told through photographs, so I had to come up with ideas of other things to illustrate the story. This part was hard because I also had to figure out how to make the props visually engaging for the duration of time they were being talked about. That’s how I came up with the idea of writing, so there would be movement on the screen for a longer period of time to keep interest.

6) After putting photos and props in the chosen order and running through several practices, I set up the camera and recorded it. I hit record, then sat under the tripod and slowly piled on the story pieces.

Birthing a creative project - Sarah Kirsten

7) I imported the audio files and video file into Adobe Premier Pro and edited them together. It took some time to get each part to line up. Lots of the video parts are sped up or slowed down dramatically from their original state.

Birthing a creative project - Sarah Kirsten

8) After seeing about how long the video was, I knew how long the piano part had to be. I recorded the piano and made the song roughly as long as the video.

 
Birthing a creative project - Sarah Kirsten
 

9) After final edits, I hit publish. This step is simple but isn’t to be overlooked in any birth process. Without hitting send, your creations are not birthed into the world. It’s the scariest part, but one of the most important steps.

Birthing a creative project - Sarah Kirsten

All in all, it took me several weeks of thinking, rethinking, collecting more photos, re-working ideas. The final product is very different than my original imaginings. Very different but better. It’s finally done, birthed into the world. The mess is cleaned up, the photos are back at my parents’ house where they belong, and my camera is waiting for its next story.