Tutorials

5 Ways to Sew an Elastic Waistband

How to sew an elastic waistband - tutorial with lots of photos

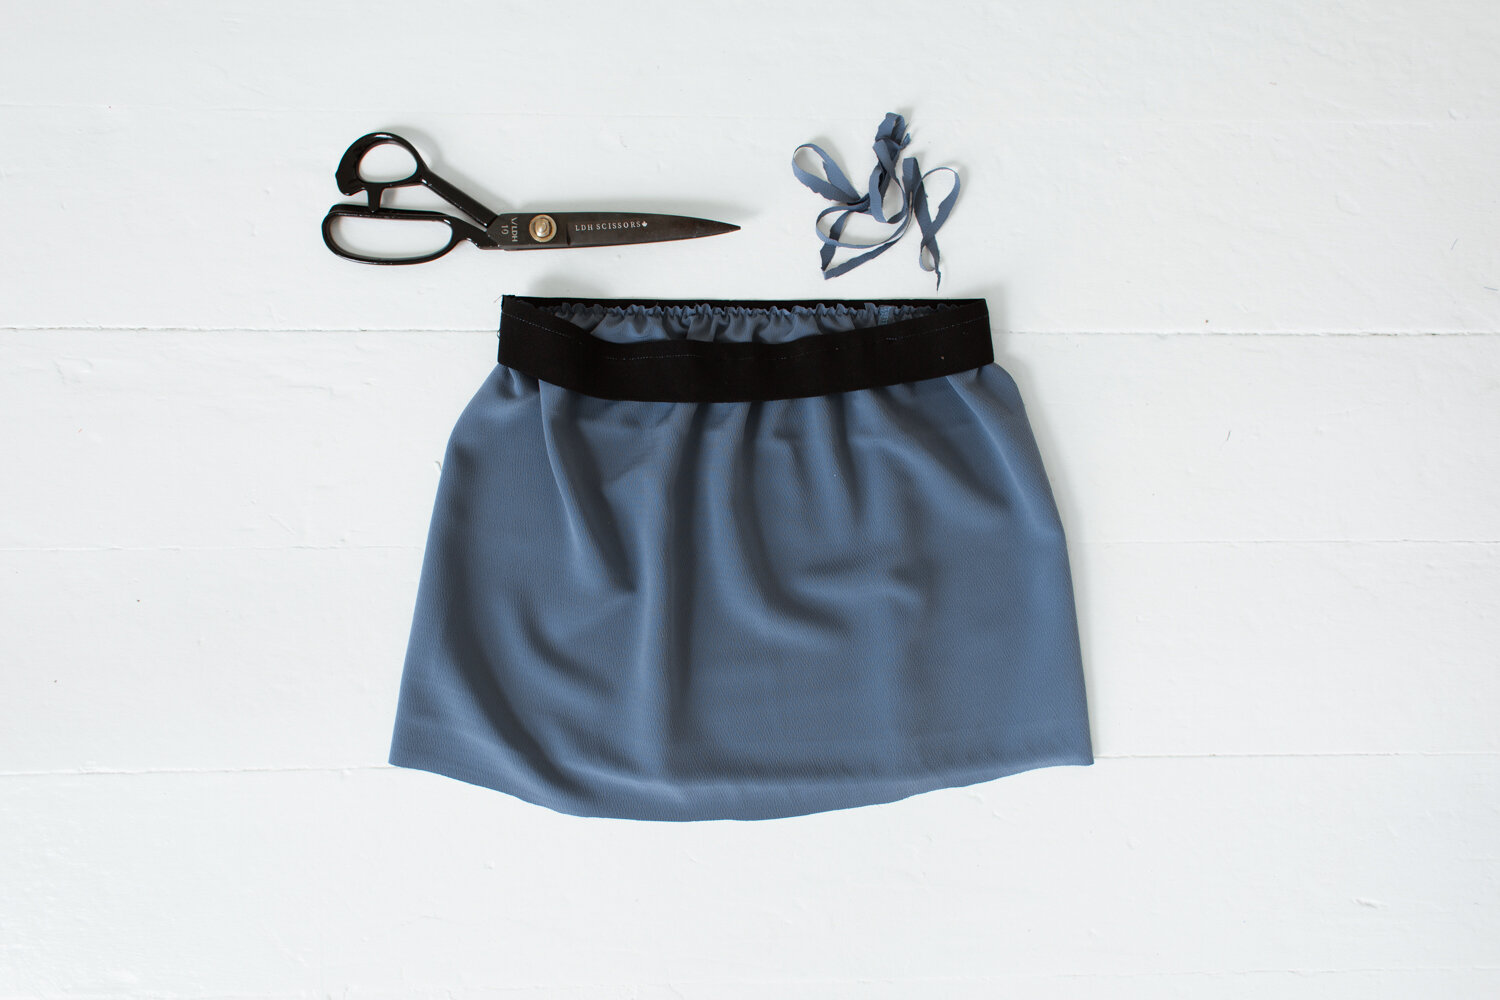
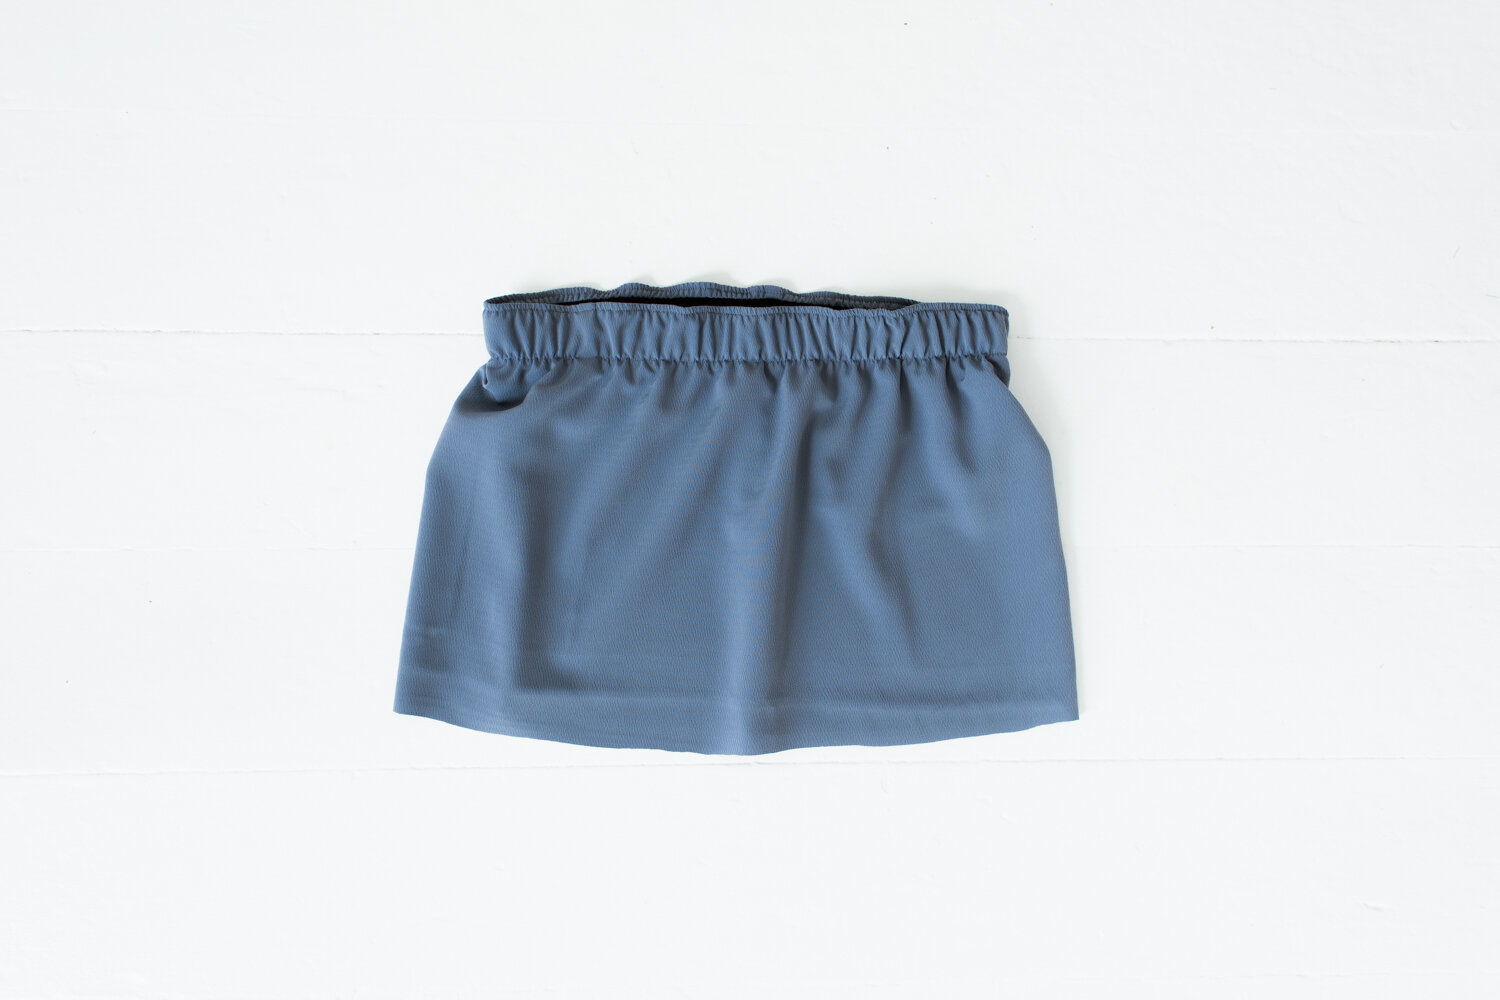
Here is how to sew an elastic waistband. Five ways! Most of these methods start with the elastic already sewn into a loop.

Let’s jump in!

Method One

This method leaves the waistband exposed and will touch your skin, so be sure to use a soft waistband elastic.

Step 1: On the right side of the fabric, align the top edge of the elastic and the top edge of the fabric. Sew the elastic all the way around with 3/8” (1 cm) seam allowance. Stretch the elastic so it is evenly distributed all the way around.

5 Ways to sew an elastic waistband - tutorial with tons of photos.

Step 2: Trim the seam allowance of the fabric to 1/4” (0.5 cm).

5 Ways to sew an elastic waistband - tutorial with tons of photos

Step 3: Fold the elastic to the wrong side of the fabric.

5 Ways to sew an elastic waistband - tutorial with tons of photos

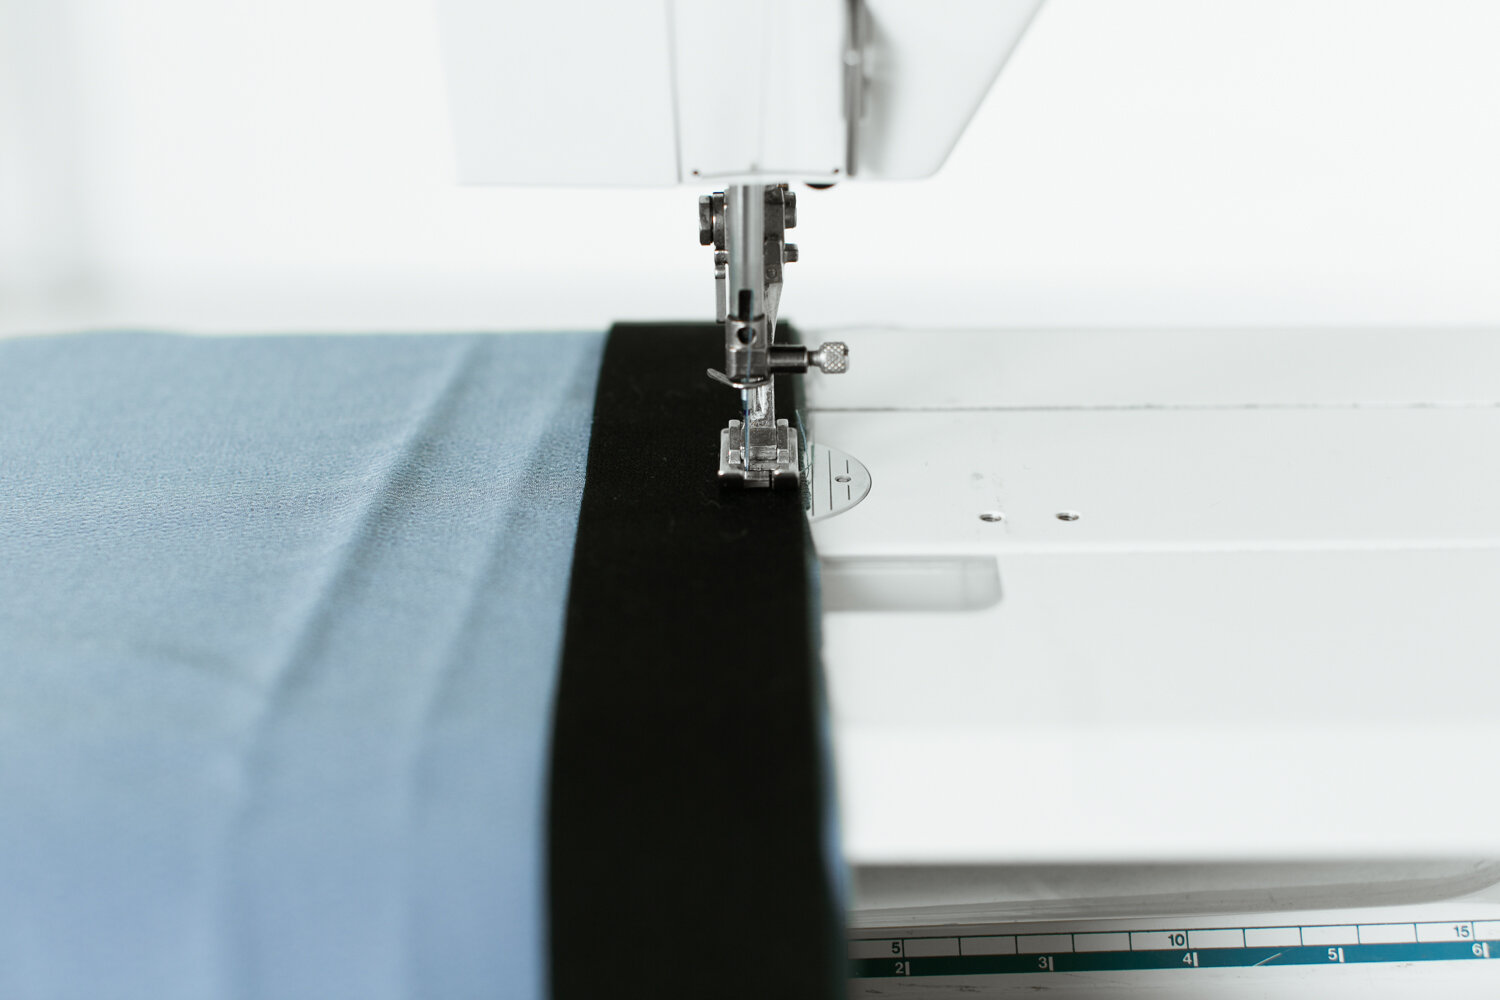
Step 4: Sew 1/8” (0.3 cm) from the top edge all the way around. Pull elastic tight while sewing.

5 Ways to sew an elastic waistband - tutorial with tons of photos

Step 5: Sew 1/4” (0.6 cm) from the bottom edge of the elastic all the way around. Pull elastic tight while sewing.

5 Ways to sew an elastic waistband - tutorial with tons of photos
5 Ways to sew an elastic waistband
5 Ways to sew an elastic waistband - tutorial with tons of photos

This method is commonly used in sports clothing and has a sporty look. It’s fun to sew! Works best with lightweight fabrics. The top of the elastic is sewn to two more layers of fabric than the bottom which can cause the top to be more stretched out than the bottom.

Method Two

Step 1: On the wrong side of the fabric, align the top edge of the elastic and the top edge of the fabric. Sew the elastic all the way around with 3/8” (1 cm) seam allowance. Stretch the elastic so it is evenly distributed all the way around.

5 Ways to sew an elastic waistband - tutorial with tons of photos

Step 2: Fold the elastic two times toward the wrong side of the fabric.

5 Ways to sew an elastic waistband - tutorial with tons of photos

Step 3: Sew 1/4” (0.6 cm) from the bottom edge of the elastic all the way around. Stretch the elastic so it is evenly distributed as you sew.

5 Ways to sew an elastic waistband - tutorial with tons of photos

This method works best with medium to lightweight fabrics. The equal amount of fabric at the top and the bottom of the elastic reduces elastic distortion. The elastic is sewn through, so it doesn’t twist while wearing. The elastic is fully encased, which feels extra luxurious.

Method Three

Step 1: On the wrong side of the fabric, align the top edge of the elastic and the top edge of the fabric. Serge (or zig zag stitch) all the way around. Stretch the elastic so it is evenly distributed as you sew.

5 Ways to sew an elastic waistband - tutorial with tons of photos

Step 2: Fold the elastic once toward the wrong side. Sew 1/4” (0.6 cm) from the bottom edge of the elastic. Pull the elastic tight while sewing.

5 Ways to sew an elastic waistband - tutorial with tons of photos

This method is among the easiest methods with the fewest steps. Quick and easy to sew with consistently good results. It does leave the serged edge with the bottom of the elastic exposed, so a little less luxurious. Good method to use with heavyweight fabrics like sweatshirt fabric. Also commonly used in sports clothing.

Method Four

Step 1: Serge the top edge of the fabric.

5 Ways to sew an elastic waistband - tutorial with tons of photos

Step 2: Fold the fabric toward the wrong side 1/4” (0.6 cm) and press. Fold the fabric again 1/4” (0.6 cm) longer than the width of the elastic and press.

In this example, the elastic is 1 1/2” wide. So the fabric is folded over the second time 1 3/4” and pressed.

5 Ways to sew an elastic waistband - tutorial with tons of photos

Step 3: Sew 1/8” (0.3 cm) from the bottom edge. Instead of sewing all the way around, leave a 4” (10 cm) opening to insert the elastic.

5 Ways to sew an elastic waistband - tutorial with tons of photos

Step 4: Attach two safety pins to the elastic and push it through.

5 Ways to sew an elastic waistband - tutorial with tons of photos

Step 5: Overlap the two ends of elastic and sew them together.

5 Ways to sew an elastic waistband - tutorial with tons of photos

Step 6: With the elastic in place, sew the 4” (10 cm) opening shut. Be sure to not catch the elastic in the stitching!

5 Ways to sew an elastic waistband - tutorial with tons of photos

This method is a common favorite among sewists. Easy to sew because it doesn’t require sewing through the elastic. But that means the fabric can twist if additional lines of stitching aren’t added. Can also be tricky to press the fabric really evenly all the way around. The line of stitching is below the elastic, which causes the gathers to lay differently than when the elastic is sewn through.

Method Five

Step 1: Fold the fabric in half around the elastic and sew right along the elastic edge. Be sure to not catch the elastic in the stitching!

Tip: Extra long seam allowances are helpful with this method. In this example, the elastic is 1 1/2” wide. The strip of fabric is 5” wide to allow 1” of extra fabric on each side of the elastic.

5 Ways to sew an elastic waistband - tutorial with tons of photos

Step 2: Match up the edges and sew the elastic to the right side of the waistline. Again sew right along the bottom edge of the elastic, but be sure to not catch the elastic in the stitching. Pull elastic tight as you sew.

5 Ways to sew an elastic waistband - tutorial with tons of photos

Step 3: Trim seam allowance and serge edges together.

5 Ways to sew an elastic waistband - tutorial with tons of photos

This method gives a clean looking definition between the waistband and the rest of the skirt/pants. It can be tricky to sew closely to the elastic without catching it in the stitching. It leaves the elastic unattached and free within the tunnel of fabric and can twist unless it is sewn down with more lines of stitching.

Variation to Method Five:

Sew the two pieces of fabric together without the elastic. Leave a 4” (1 cm) opening. Insert the elastic using safety pins and then sew the elastic together into a loop. Sew the 4” (10 cm) opening shut. Trim and serge seam allowance.


Additional lines of stitching can be added to each of these methods. Each method is fun to sew in its own way! Which is your favorite?


If you’d like to try one of these methods in action, you can make the Sweet Pea Sweat Set!

This pattern uses easy method three to sew the waistband on the sweatpants with great results.

If you enjoyed this tutorial, you may enjoy this exploration of gathering fabric and making ruffles.

You may also enjoy using the Tote Bag Calculator and using the step by step illustrated instructions.

The Easiest Way to Change Serger Thread

The easiest way to change serger thread

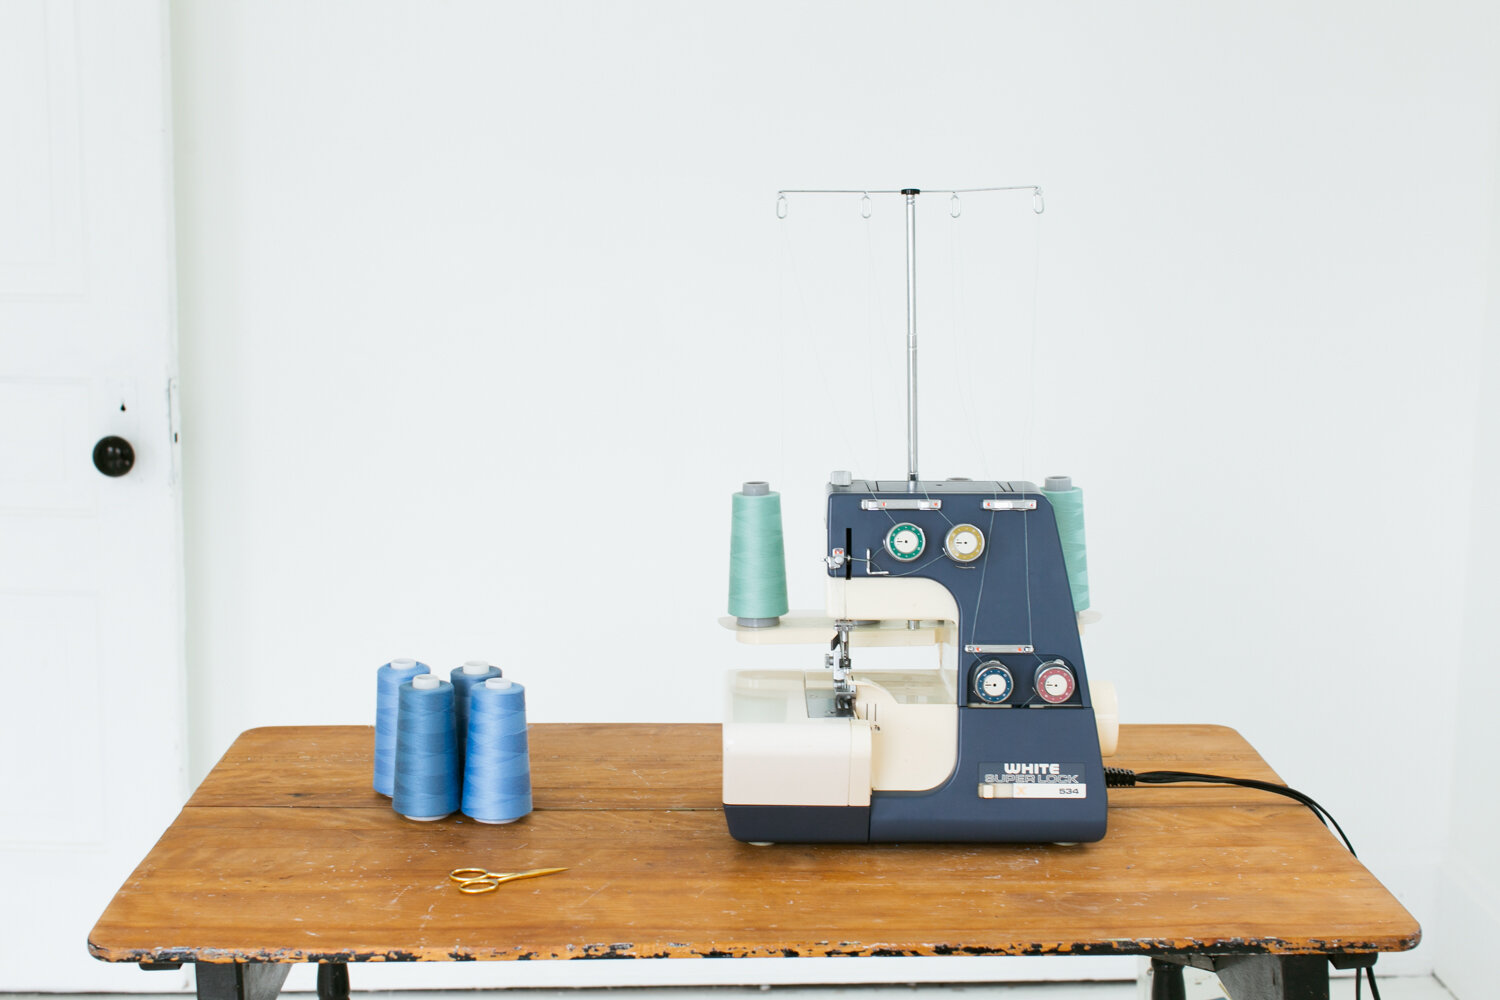
Sergers are a real joy to sew with, but not always fun to rethread.

I learned threading the hard way. My serger is on semi permanent loan from my sister who inherited it from our grandmother. No one taught me how to use it and I didn’t have the manual, so I always changed the threads manually. It took a long time, was quite frustrating, and it led me to not change the thread color very often.

But a good way to make your handmade clothes look more professional is to use matching thread, which means changing the serger thread often. Thankfully there is an easy way to do it!

I hope this can save someone else some frustration.

How to change serger thread the easy way

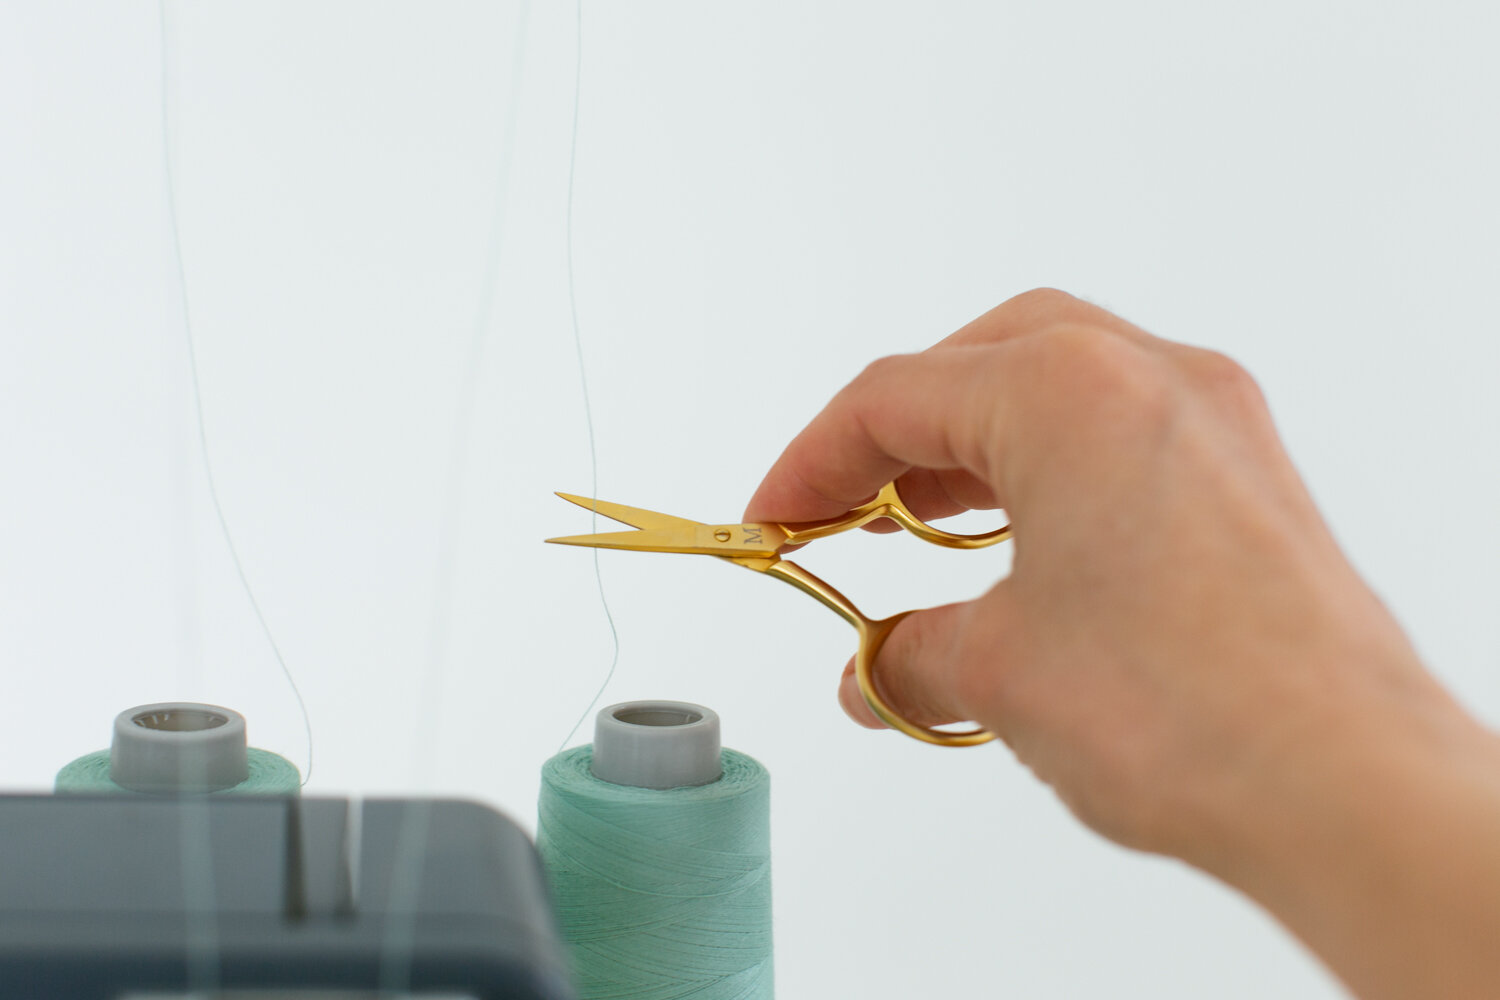
1) Snip all the threads that are currently threaded through the serger near their spool.

2) Put on the new spools. Tie each new spool to the old thread with a square knot.
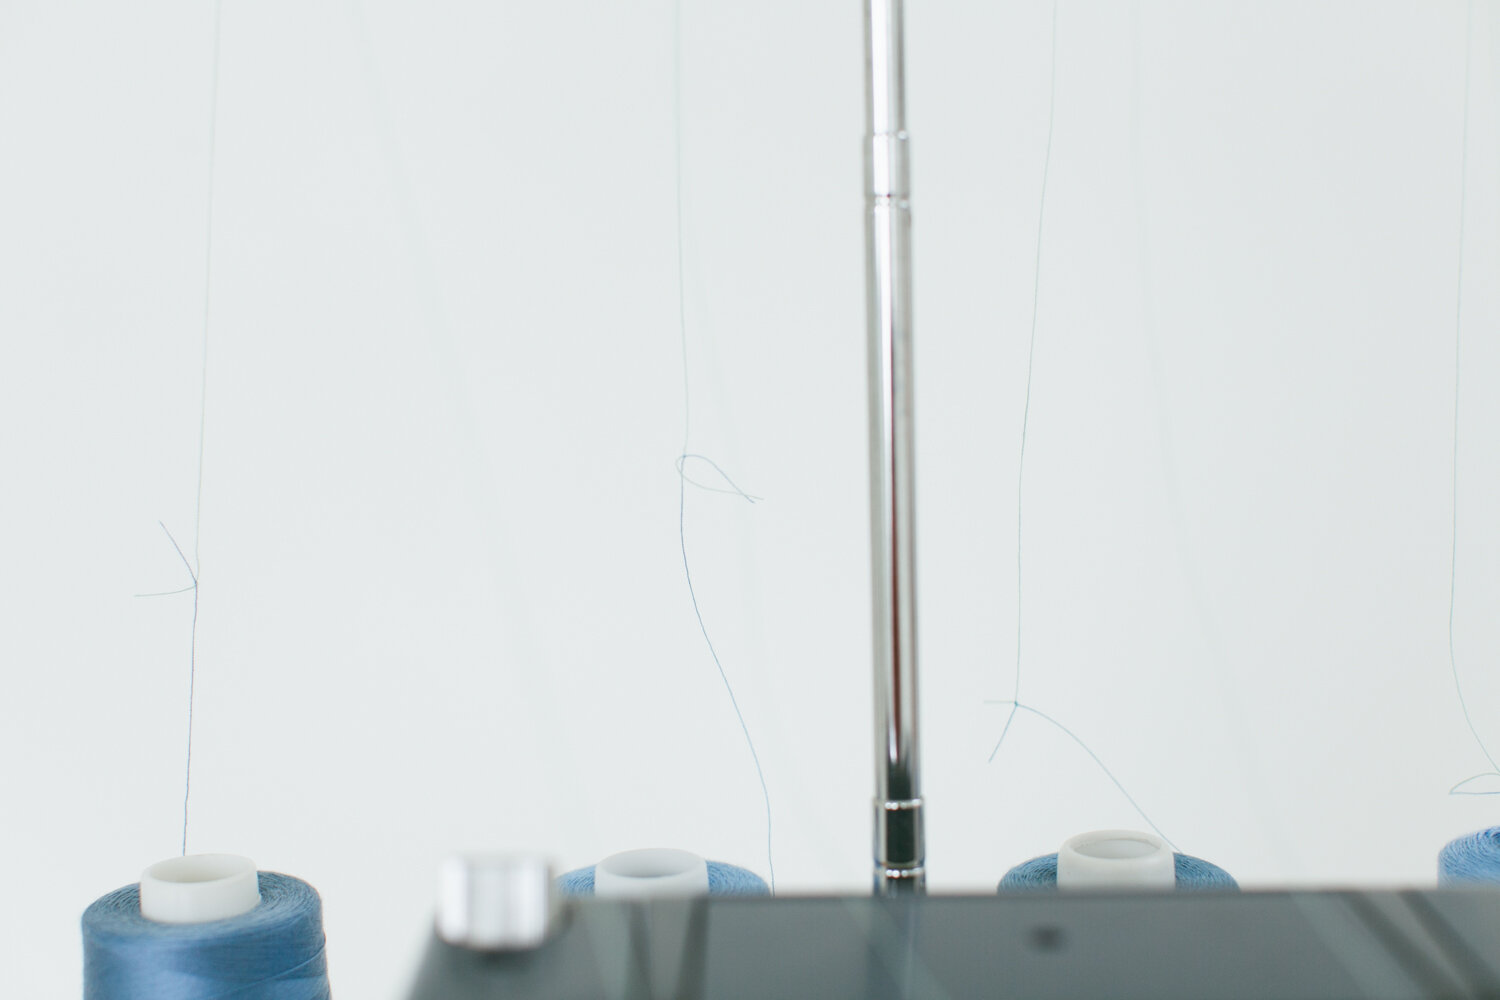
The easiest way to changer serger thread

3) Press the pedal and carefully let the new threads wind their way to the needles.

The easiest way to changer serger thread

Often the thread goes smoothly through the needles with no problem. But sometimes you have to help a knot through a needle or to cut a knot and thread a needle manually. Either way, it beats manually threading the whole machine!

The easiest way to changer serger thread

Woohoo! That’s it! This method is a big time saver (not to mention stress and frustration).

The easiest way to changer serger thread

How to Draft Sleeves

Oh the joy of sleeves. Drafting can be fun.

Here’s how to do it

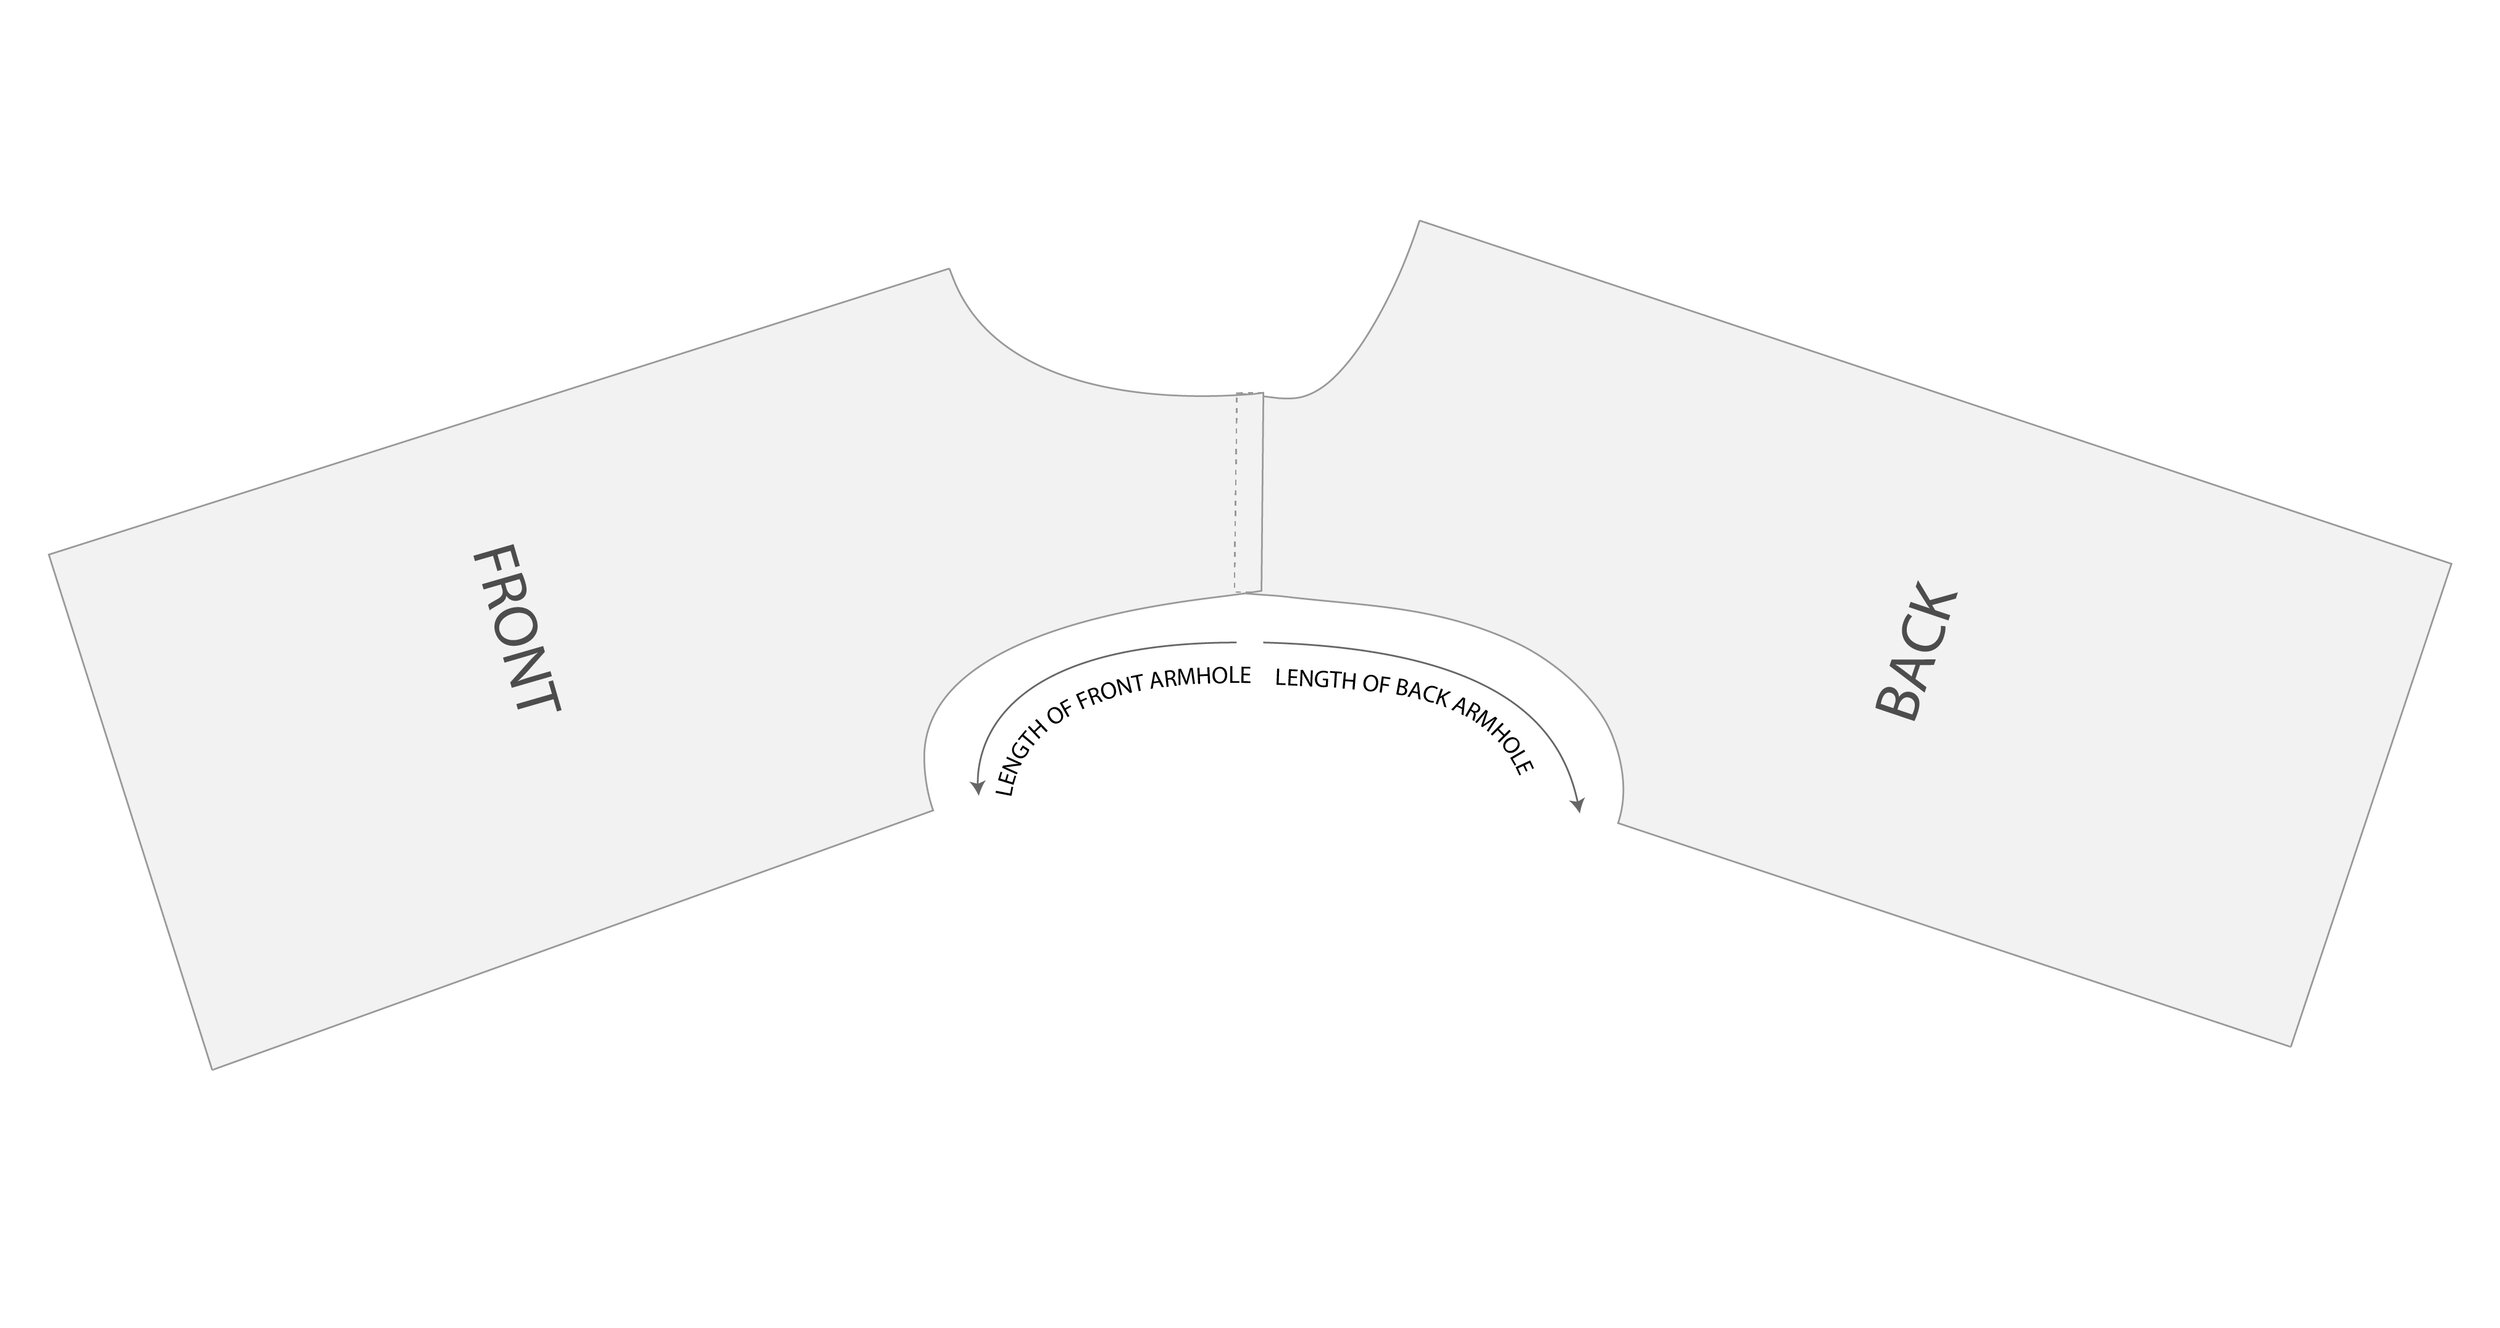
Step 1: Measure the length of the front and back armhole.

You can sew the shoulders together and then measure, or measure the pattern pieces and remove the shoulder seam allowance from the measurement.

BlueberryArtboard 9.jpg

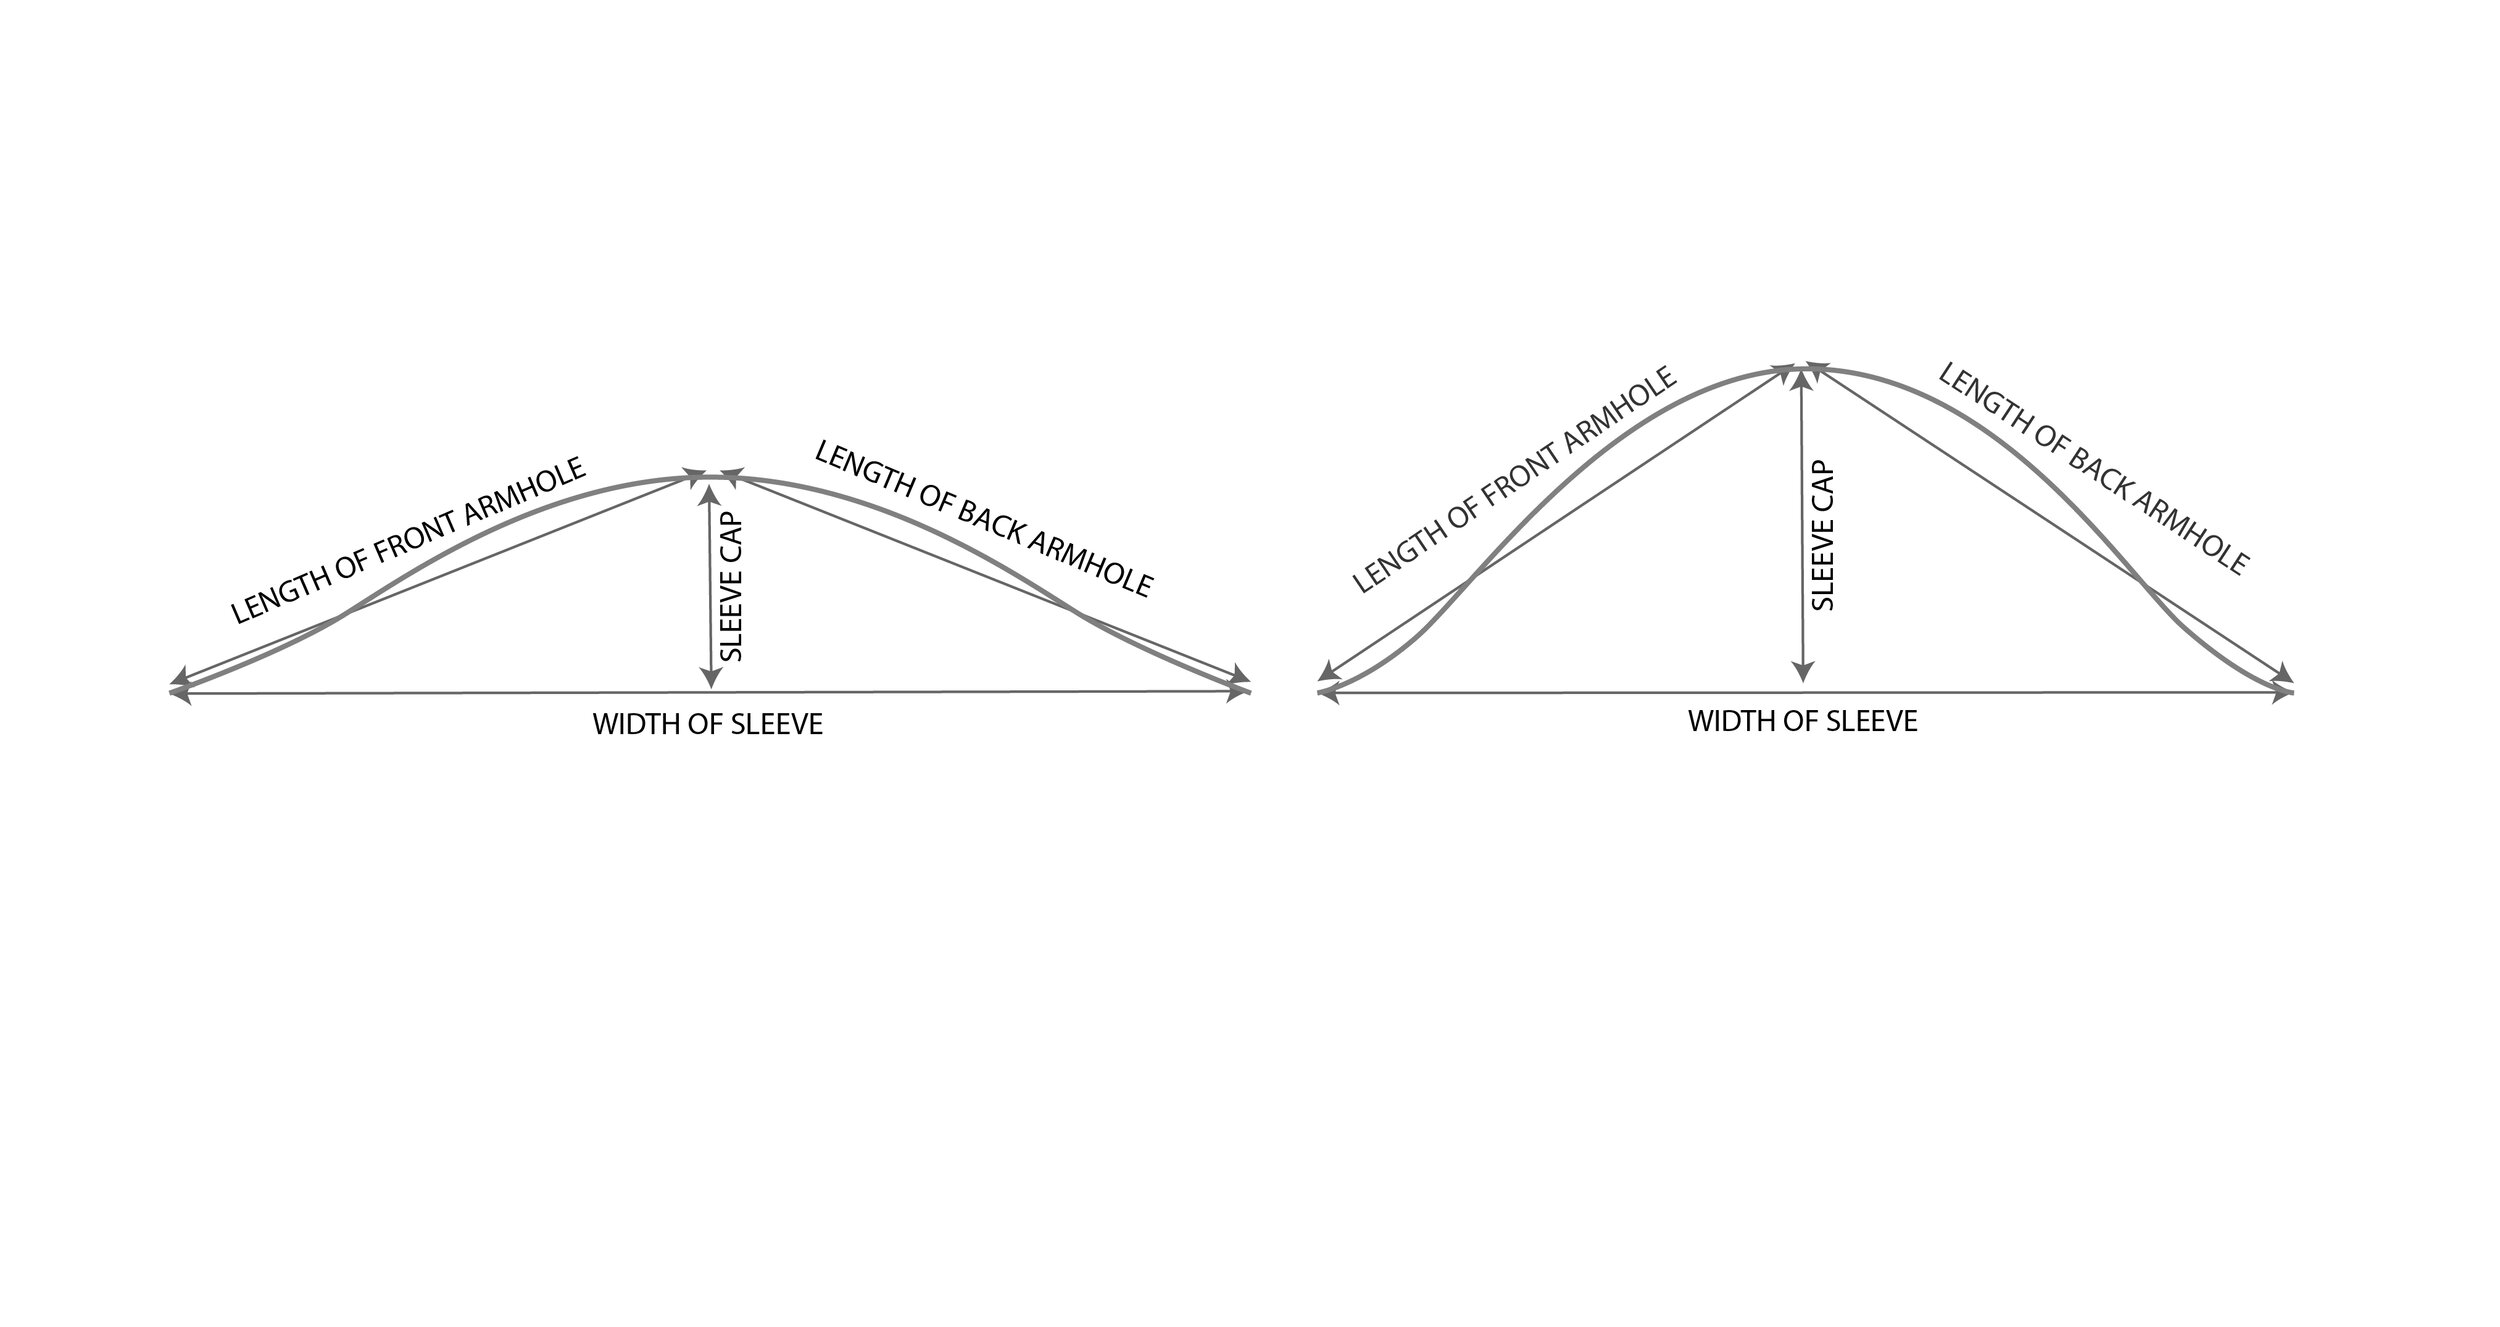
Step 2: Make a triangle using the armhole measurements where the length of the legs are equal to the length of the front and back armhole.

The steepness of the angle of the legs depends on how wide you want the sleeve to be and/or how deep you want the sleeve cap (we’ll look more deeply at pros and cons of each later in the post).

BlueberryArtboard 10.jpg

Here is an example of two different angles. Notice the shallower the angle, the wider the sleeve and the shorter the sleeve cap. The steeper the angle, the narrower the sleeve and the longer the sleeve cap.

BlueberryArtboard 13.jpg

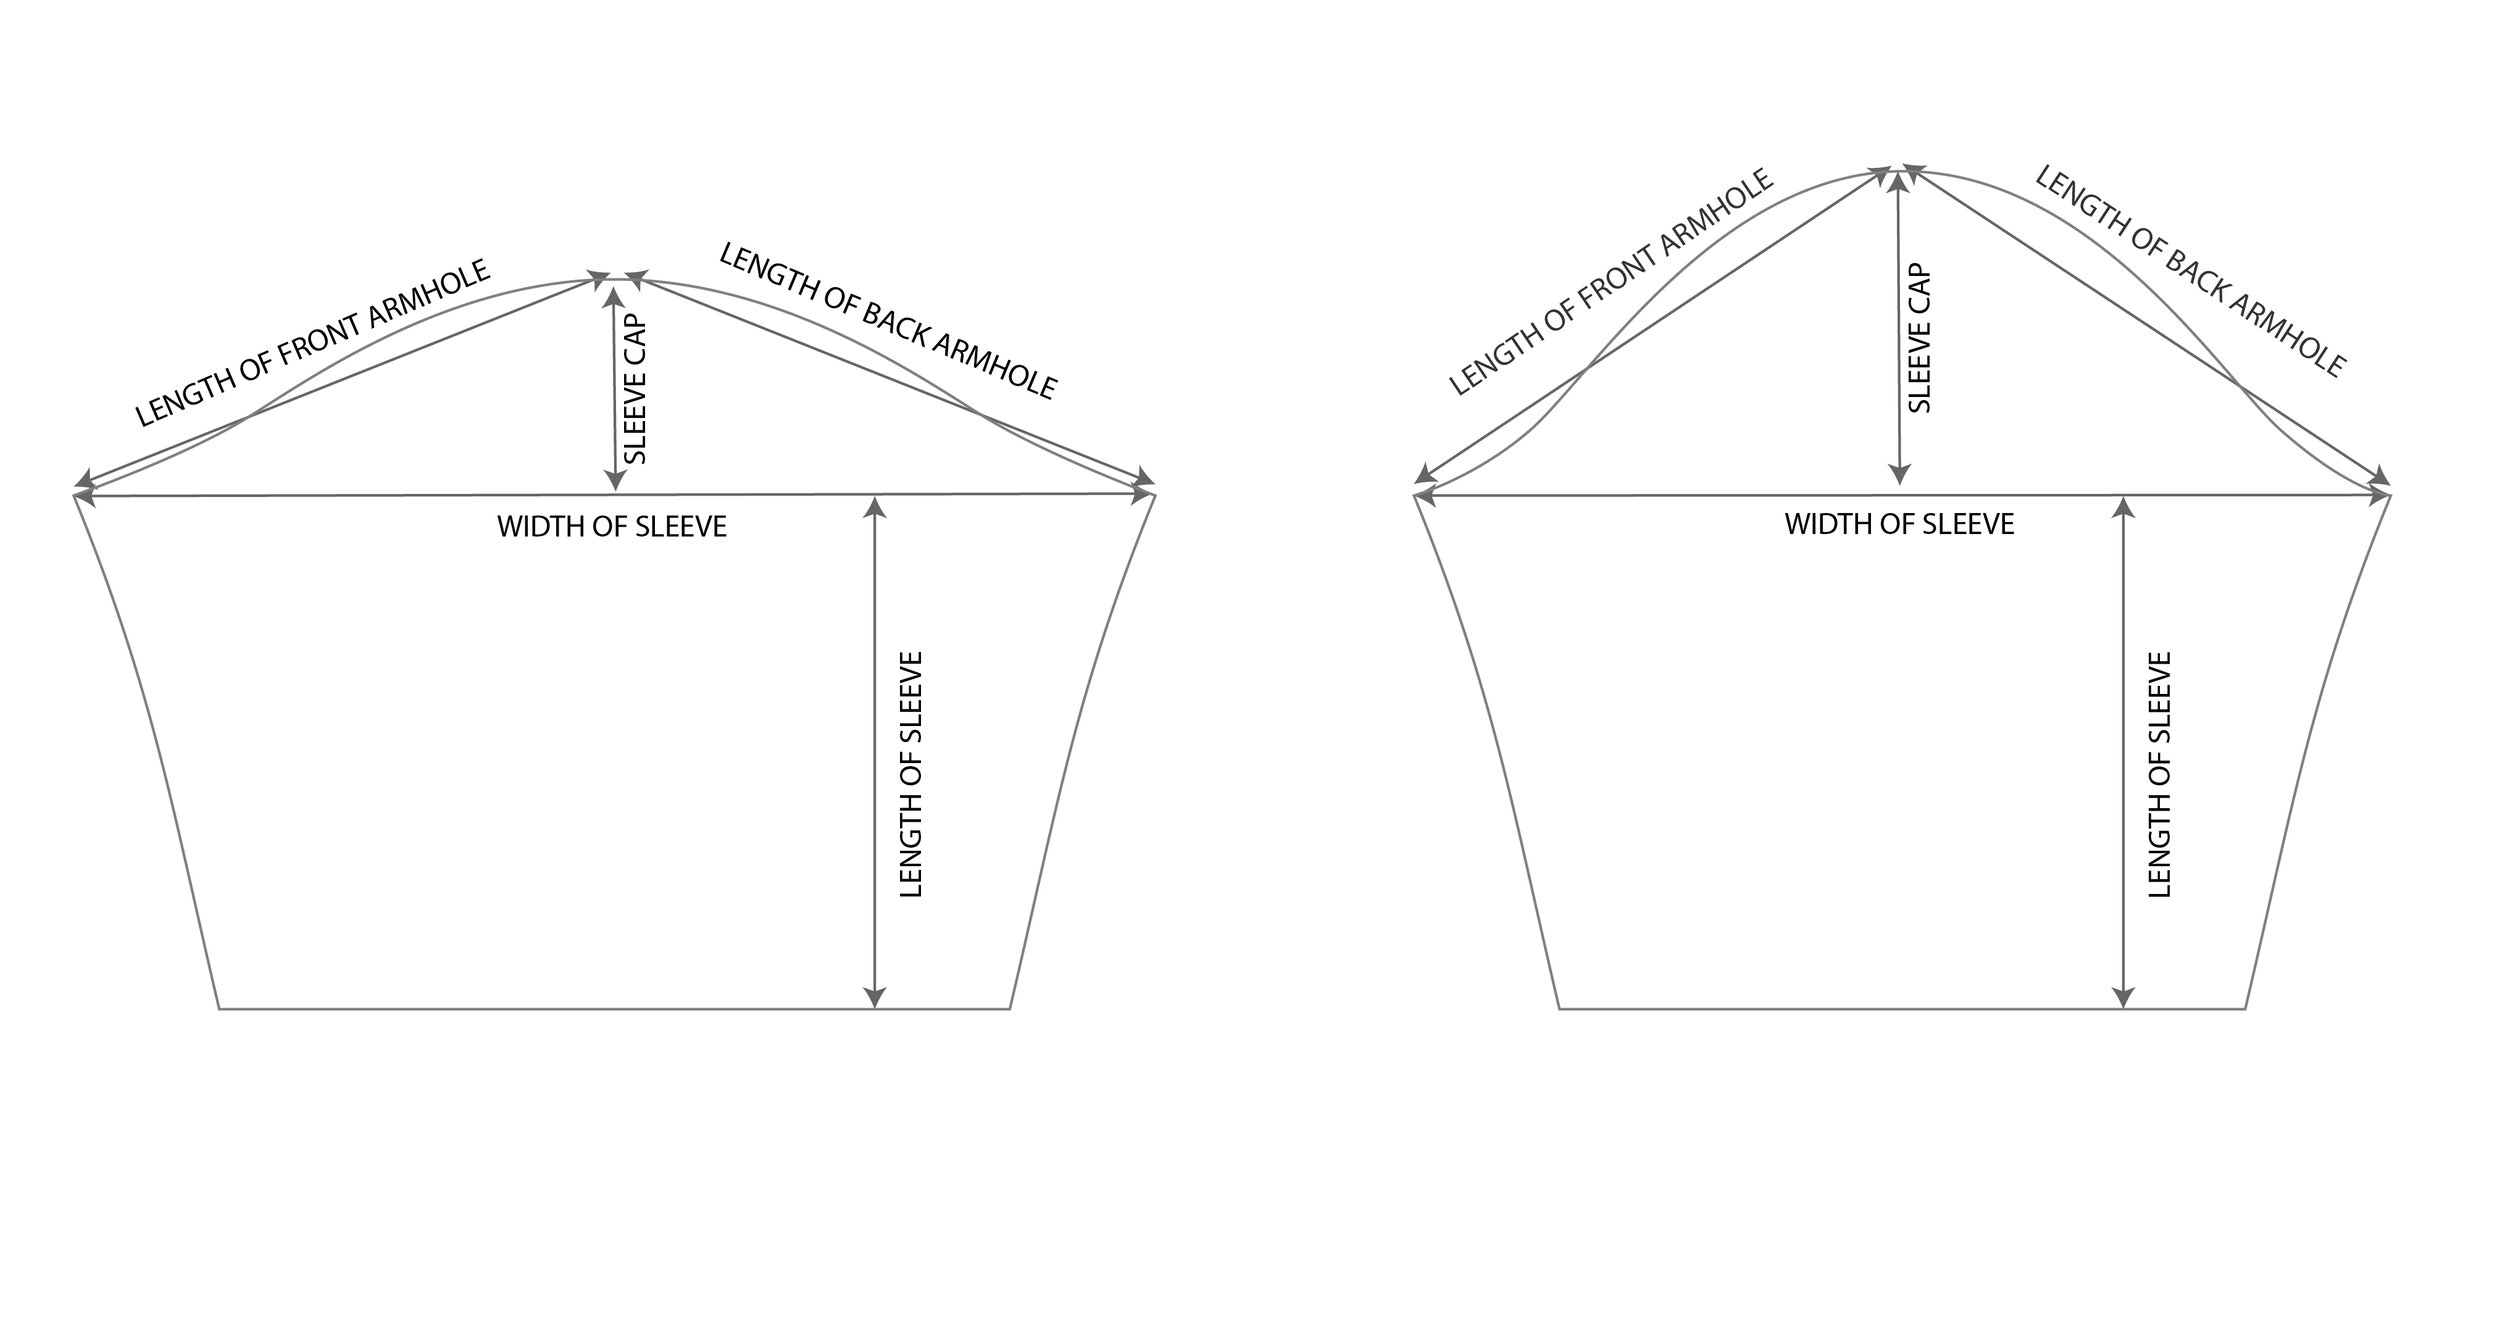
Step 3: Draw a nice swooping curve that follows the angle of the triangle legs.

Sleeves are quite forgiving, so don’t get too hung up on the shape of the curve. But here are some things to keep in mind.

a) Many sleeve curves go under the triangle in the bottom section, and then even more over the triangle near the top section.

b) It’s normal for the total length of the sleeve curve to be about 1” (2.5 cm) longer than the total length of the armholes. A little ease is good in the sleeve curve.

BlueberryArtboard 12.jpg

Step 4: Decide how long you want the sleeve to be and if you want the sleeve to taper in.

BlueberryArtboard 11.jpg

That’s it! You can totally do it! Just play and have fun with it.

Sleeve Angle and Width

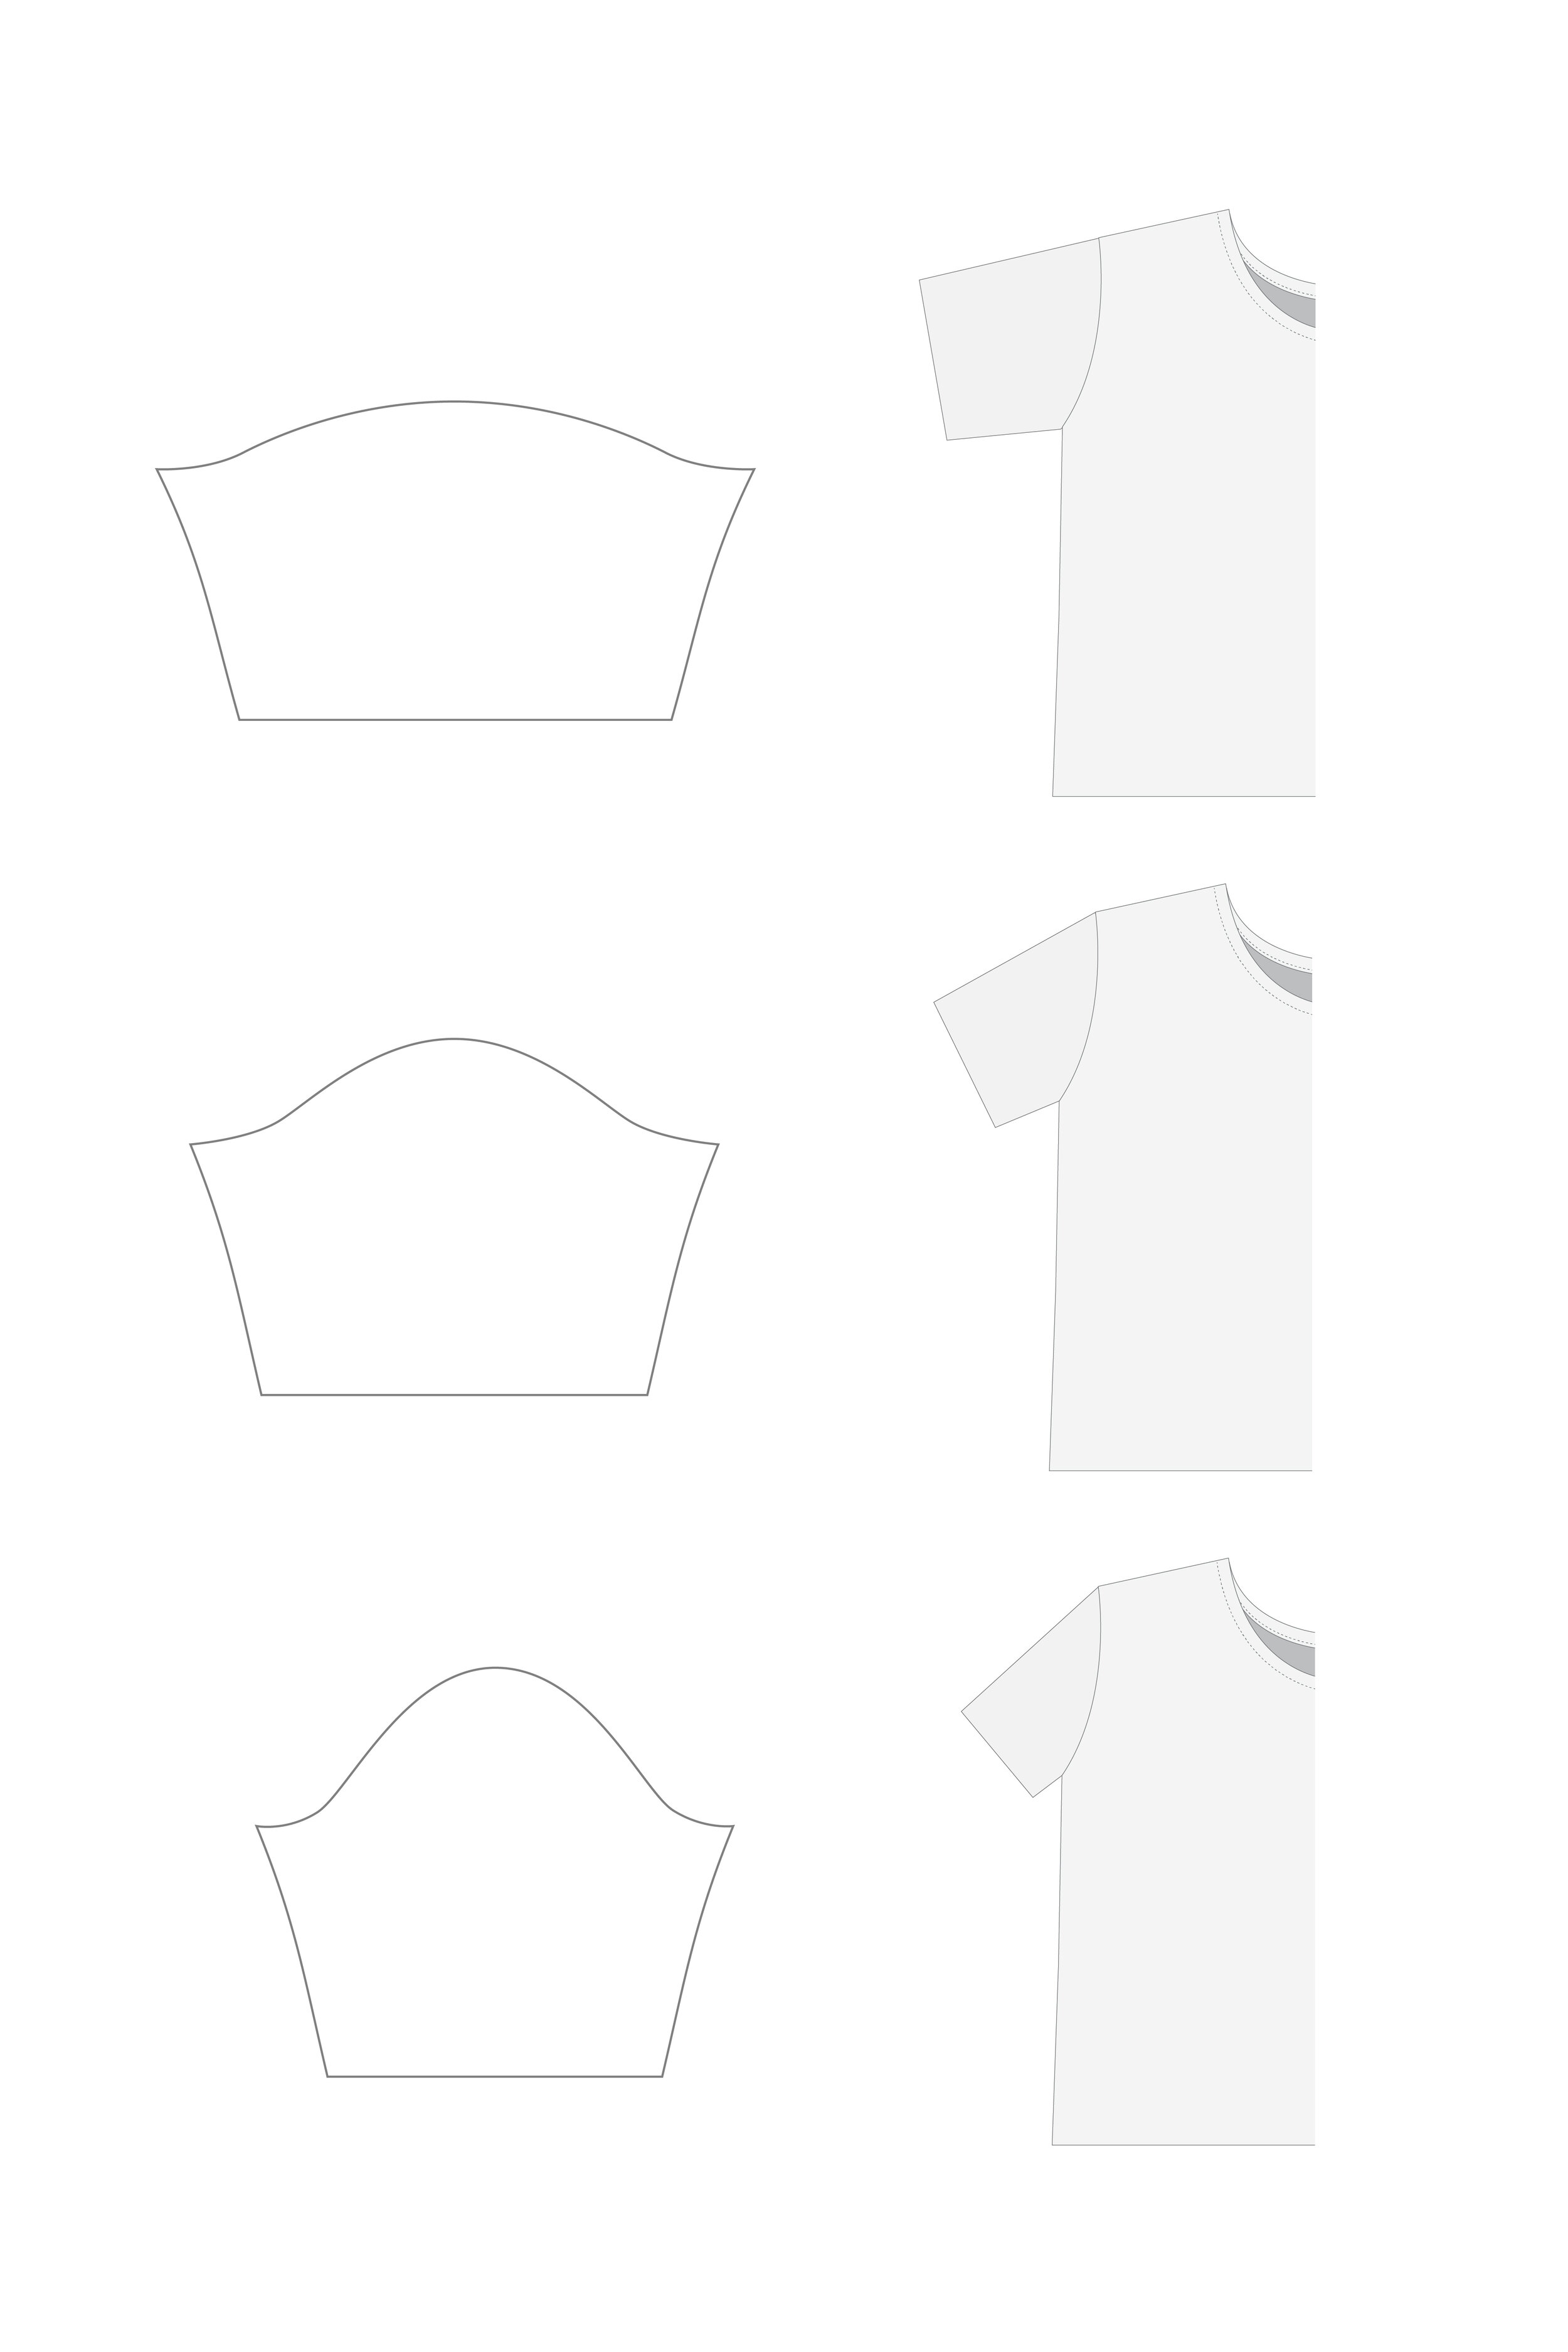
Here are examples of what different triangle angles look like on a shirt.

  • Wide sleeves with short sleeve caps will point out from the shirt. Lots of athletic shirts and casual sweatshirts have this angle because when you raise your arms, it doesn’t pull the whole shirt up with them. When your arms are down, there is excess fabric around your armpits.

  • Medium wide sleeves with medium sleeve caps are similar to a basic t-shirt. They give you room to move, but don’t have too much excess fabric around your armpits when your arms are down.

  • Narrow sleeves with high sleeve caps will point down sharply from the shoulder. Lots of professional clothing uses this angle for a clean profile that doesn’t have a lot of excess fabric around the armpit. It looks nice, but the downside is if you ever do have to raise your arms, your whole shirt is coming up with them!

BlueberryArtboard 3.jpg

What if I want a sleeve that points out but is really narrow?

Good question. If you want a sleeve that points out (has a short sleeve cap) but is also really narrow, here are some things to play with. You can make the armhole smaller on the front and back bodice pattern pieces by raising up the bottom of the armhole and readjusting the armhole curve. Or you can try a drop shoulder and make the shoulder angle whatever you’d like and the width of the sleeve whatever you’d like. There is something to be said for the freedom that drop shoulders offer!

Adjusting Sleeve Patterns

If you have a sleeve pattern already that you want to adjust to fit a different shirt, here are some adjustments you can make.

If you need to add length to the curve, you can either increase the sleeve cap height, increase width, or a combination of both.

BlueberryArtboard 14.jpg

If you need to reduce the length of the curve, you can either decrease the sleeve cap height, decrease width, or a combination of both.

BlueberryArtboard 15.jpg

Sleeves can be frustrating, sleeves can be fun. Don’t let them get the best of you. Give them your best playful attitude of enjoyment.

Tiny Art

One quite busy day, a gentle idea whispered inside and said, “why not make a tiny art show above your shoes?” So I put down whatever I was doing and got out my art supplies.

Here’s one fun way to make a tiny art show for your space

1) Find some paper. Measure out the size you want the finished tiny pieces (this is a 4”x6” card) and draw cut lines.

Tiny Art - Sarah Kirsten

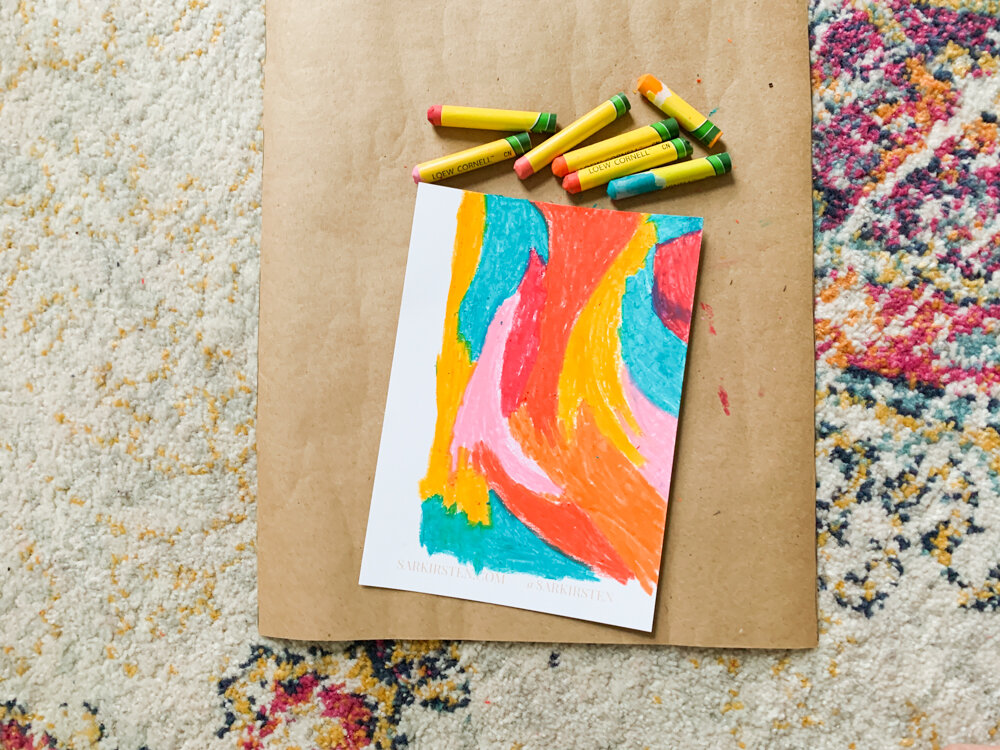
2) Pick out some colors that make you happy. Start drawing on the other side of the paper.

Tiny Art - Sarah Kirsten

3) Draw more.

Tiny Art - Sarah Kirsten

4) And more.

Tiny Art - Sarah Kirsten

5) And more. Until all the spaces you want are filled with color you like.

Tiny Art - Sarah Kirsten

6) Then turn the paper over and cut along the lines.

Tiny Art - Sarah Kirsten

7) Pick out your favorite pieces of the bunch. Stick your favorite pieces to the wall in a place that brings you delight.

Tiny Art - Sarah Kirsten

And after I finished, I went back to my busy day feeling refreshed, fulfilled, and delighted.

How to Make Your Own Quilted Mask Design

Want to make a quilted mask with your own quilt design?

Here’s how to do it!

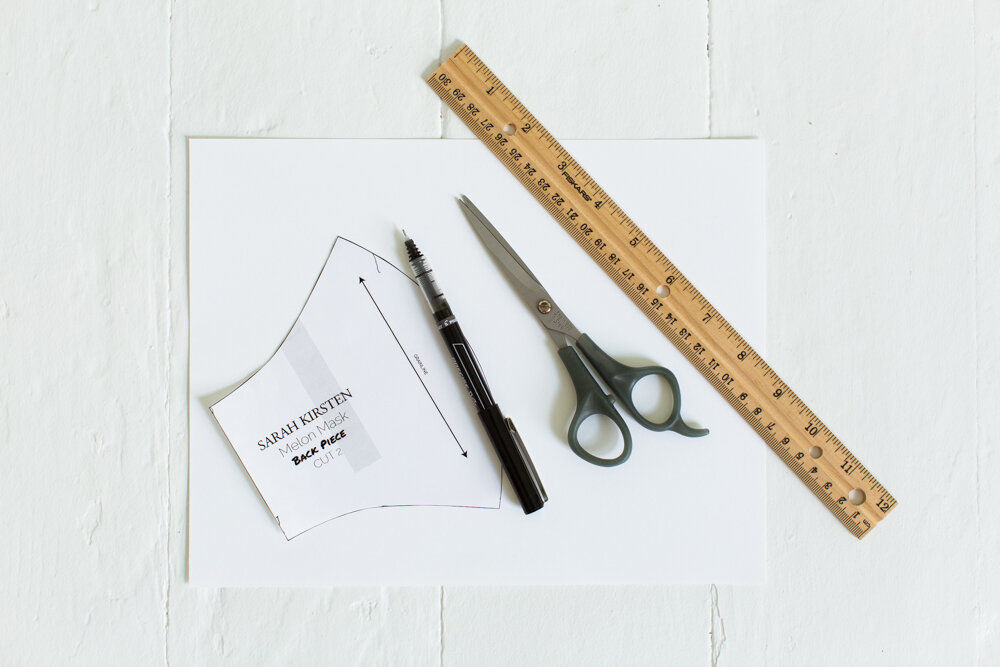
Supplies you’ll need:

  • Mask pattern (a great option is the Melon Mask!)

  • Paper

  • Pen

  • Paper Scissors

  • Ruler

How to Make Your Own Quilted Mask Design - tutorial with tons of photos by Sarah Kirsten

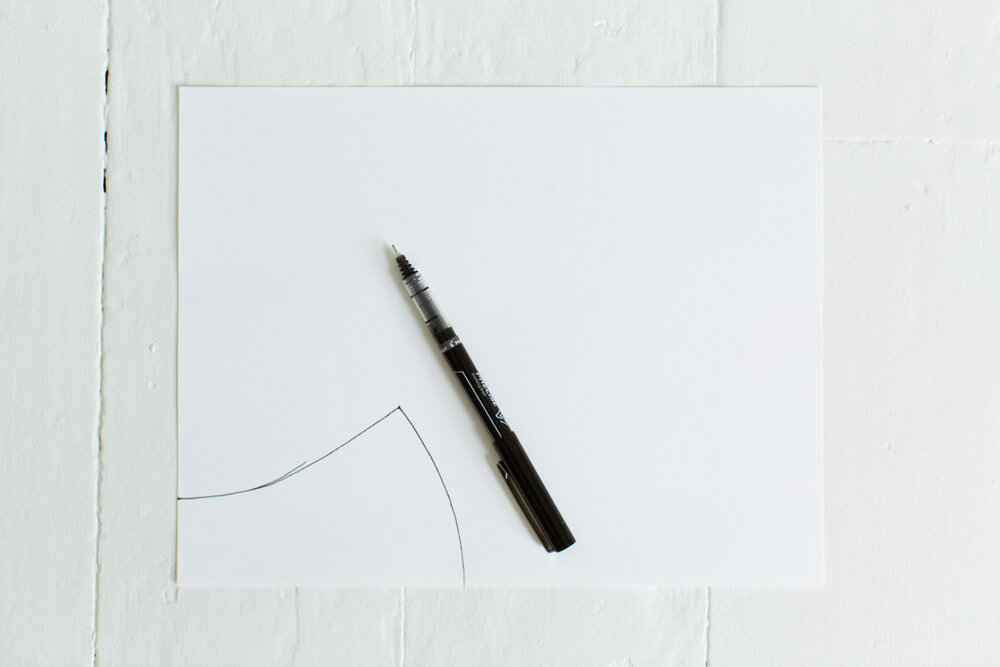
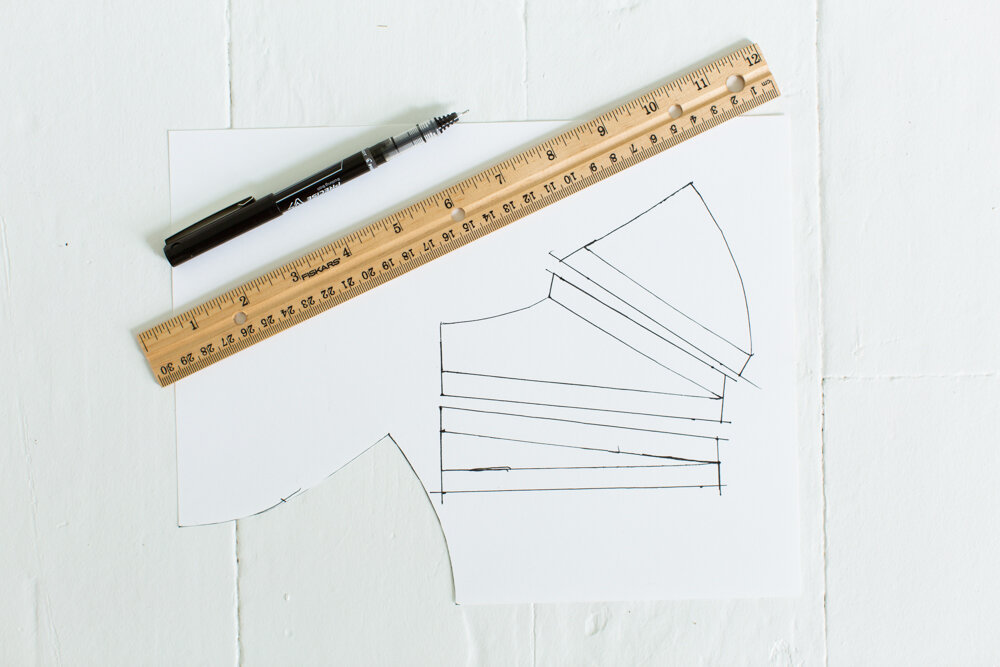
1) Fold the mask pattern in half and trace around it.

How to make your own quilted mask design
How to Make Your Own Mask Quilted Design - Tutorial with tons of photos

2 - the fun step) Draw whatever quilt design you would like to have on the mask.

How to Make Your Own Quilted Mask Design - Sarah Kirsten

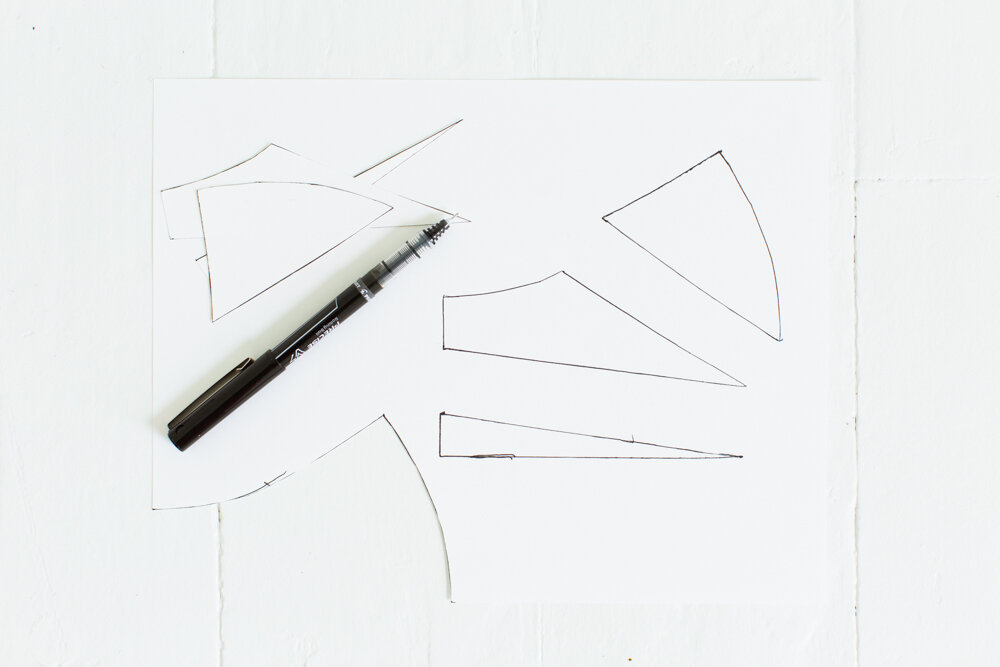
3) Cut along the lines to cut out the individual pieces. In this case there are 3 pieces. Lay them on the paper in the order that they will be sewn together. (Be sure to lay them with plenty of space in between.) Trace around each piece.

How to Make Your Own Quilted Mask Design - Tutorial with tons of photos

4) Add 3/8” (1 cm) seam allowance to all the sides that will be sewn to another piece. (You only need to add the seam allowances where you’re sewing pieces together as a result of your new design. For example, the curved nose piece doesn’t need a seam allowance added because that was already built into the pattern.)

Don’t worry about what the ends of the seam allowances look like for now. You will true them up in a few steps.

How to make your own quilted mask design - Sarah Kirsten

5) Cut out the pieces, seam allowances included. Lay them out in the arrangement they will be sewn.

How to Make Your Own Quilted Mask Design - Tutorial with tons of photos

6) To true up the seams, take the top piece and fold the paper along the seam allowance line. Trim off the tips of the seam allowance so the edges match the edges it’s folded against.

How to Make Your Own Quilted Mask Design - Tutorial with tons of photos
How to make your own quilted mask design - Sarah Kirsten

7) To true up the next piece, lay the first piece on top of the second piece as if you were sewing them together. Trim off the tips of the second piece so the edges of the first piece and second piece match.

How to Make Your Own Quilted Mask Design - Tutorial with tons of photos

8) Follow the same steps to true up the seams of all the pieces. Label the pieces with how many pieces of fabric to cut of each.

How to Make Your Own Quilted Mask Design - Tutorial with tons of photos

That’s it! Good work. You’ve just made your own quilted mask pattern.

To get some tips on how to sew your mask together, check out the Melon Mask Sew Along.

Here’s how the mask design from this tutorial turned out.

How to Make Your Own Quilted Mask Design - Tutorial with tons of photos

If you don’t want to make your own mask design, you can grab my quilted mask pattern here!