The dreaded topstitching of the button fly…. It’s scary because it’s one of the most visible parts of the pants. The good news is there is an easy method to get the stitching looking good every time.
Topstitching the fly was the main thing that held be back from making jeans. I was fearful the fly stitching wouldn’t look good. Had I known how easy this was, I think I would have started my journey of making pants-with-button-flies earlier than I did.
So let me spare you some heartache. Here’s how to nail the topstitching. In this tutorial I’m sewing the lovely Megan Nielsen Dawn Jeans.
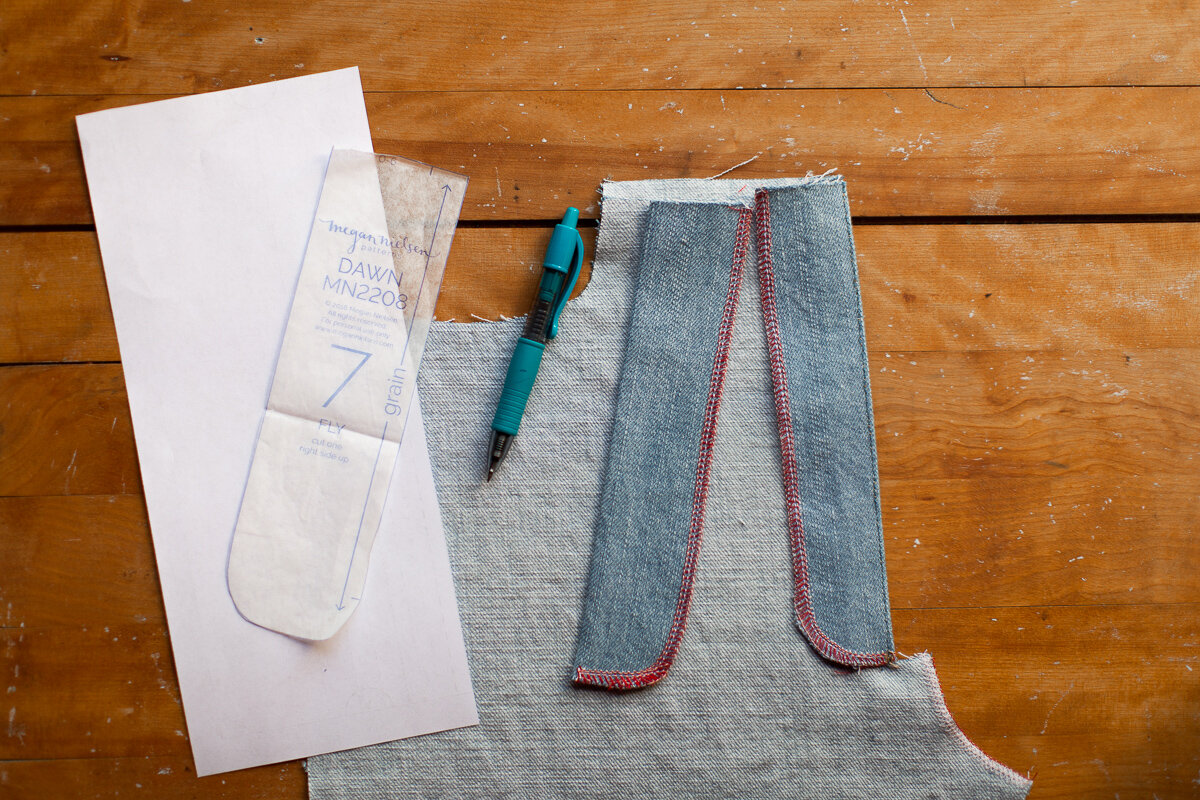
Step 1: Copy the fly pattern out of a piece of scrap paper.
Step 2: Line up the curved edge of the pattern piece right where you want your topstitching to land on the button fly — I want mine to land right along the inside of the serger thread.
(I have an abundance of scrap paper from paper patterns, so I’m using some for this tutorial.)
Step 3: Keeping the paper aligned, flip the paper and button fly over. Using a pen, mark the paper along the top and edge of the button fly.
Step 4: Cut out the stitch guide along the line you just drew. Clip the paper piece in position on top of the pants, with the button fly in position underneath.
Step 5: With everything lined up perfectly, stitch right along the edge of the stitching guide.
Step 6: Unclip, pull off the paper, admire your work.
Step 7: Once you have one line of stitching, you can easily use that line as a guide for sewing another line.
It’s a real joy to sew your own jeans. Thanks for producing this pattern, Megan. Here’s the link again to these Dawn Jeans.
If you enjoyed this post, you may also enjoy…
Step by step illustrated tutorial.
Step by step video tutorial.
Step by step photo tutorial.


