If you’re sewing bias tape in a situation where you can’t sew the ends together before you start, or you aren’t sure how much bias tape will be used, you can still join the ends together mid-project in a neat way.
If you’re new to bias tape, check out this post on how to sew bias tape and other ways to join bias tape together!
How to Join Bias Tape Mid-Project
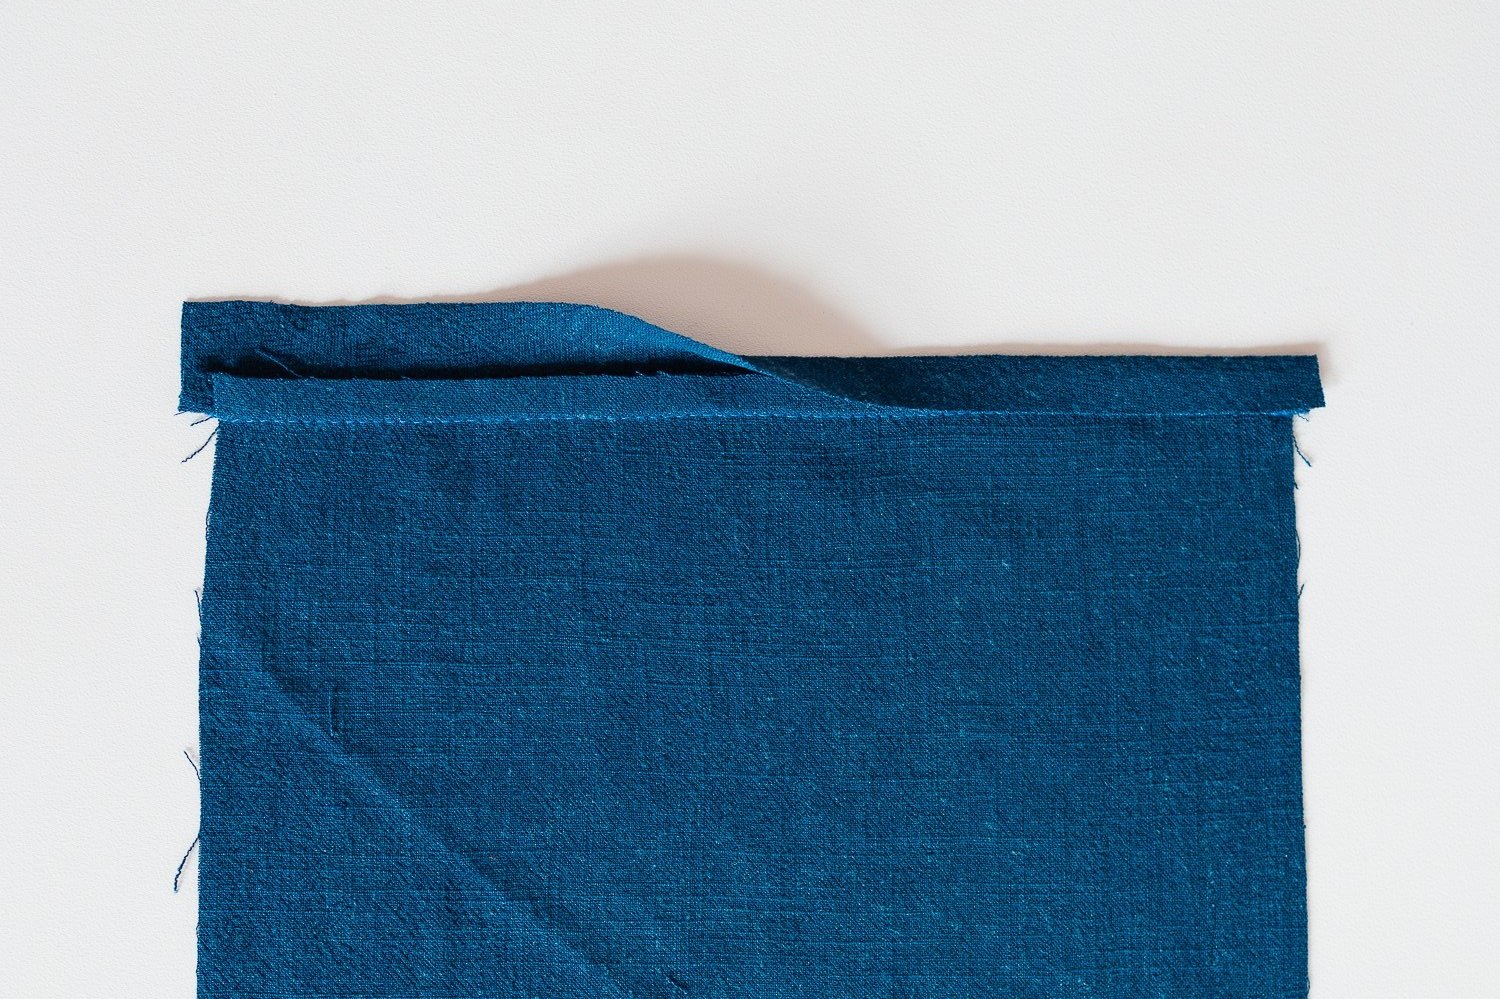
Step 1: Leave a few inches of working room on each end.
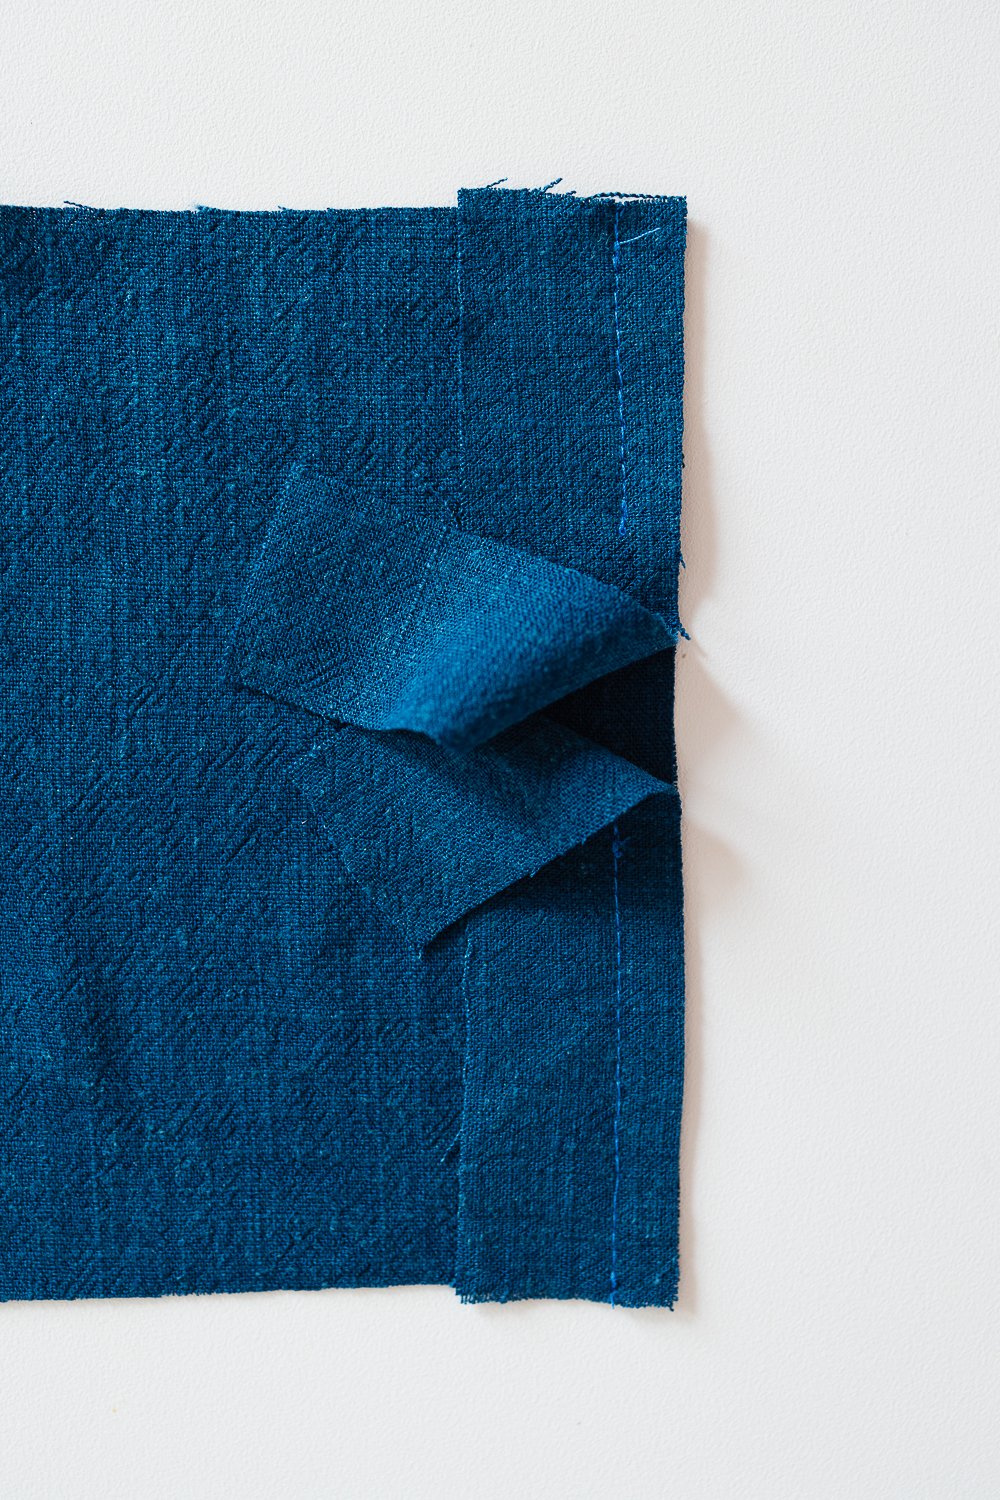
Step 2: Fold the bias tape so the tails are 90 degrees out from each side. Hand press the folds firmly so the fabric is visibly creased.
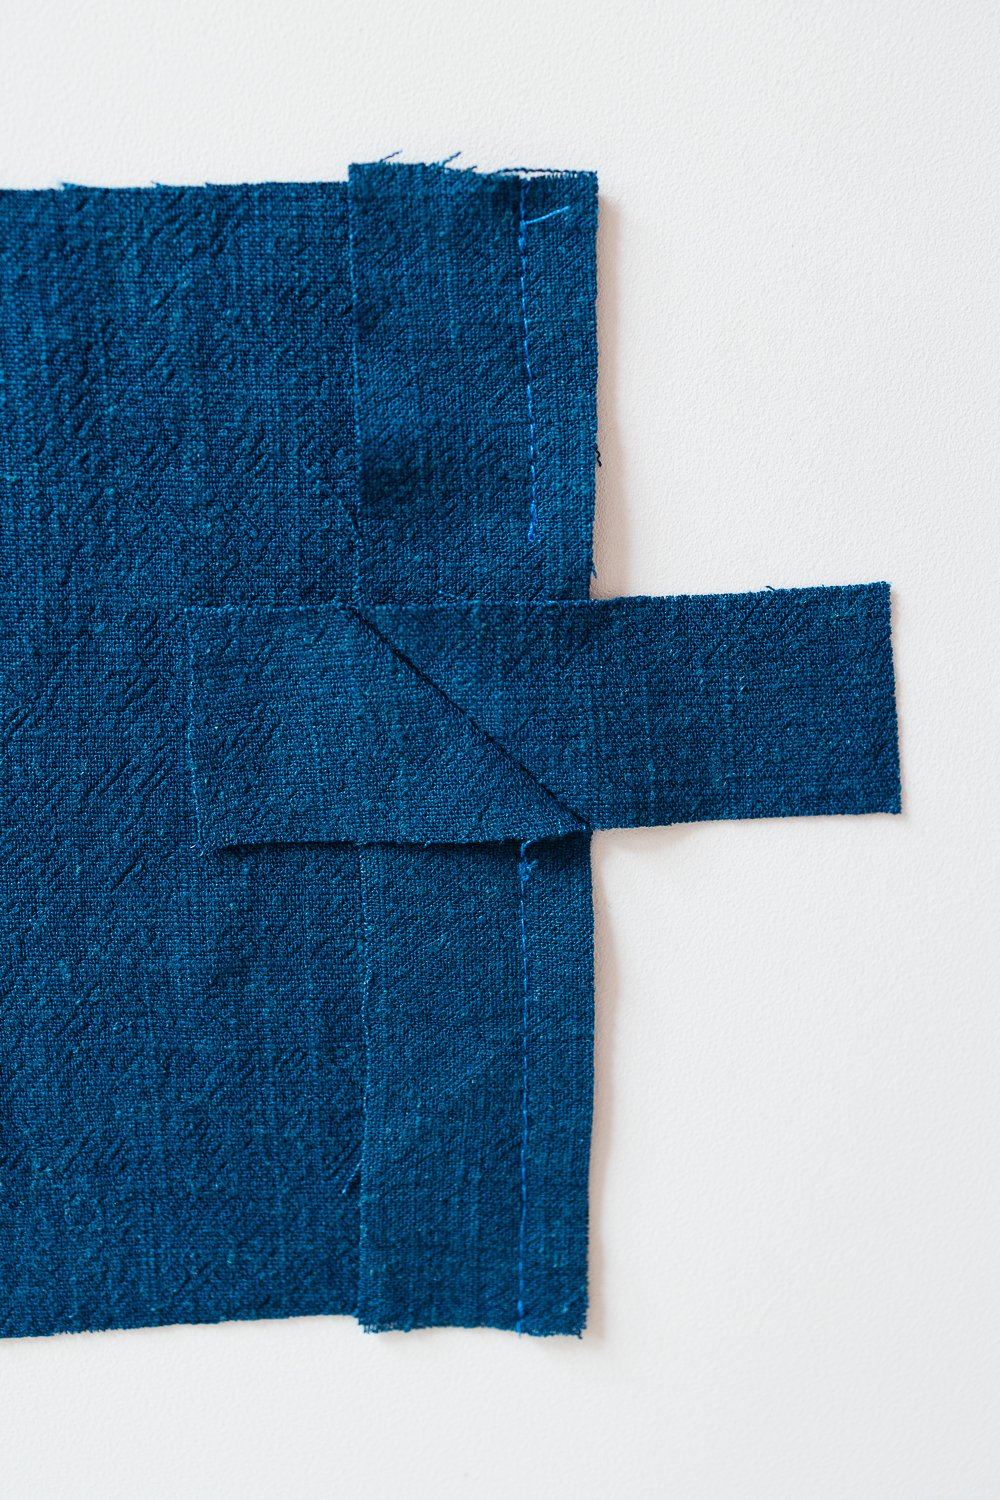
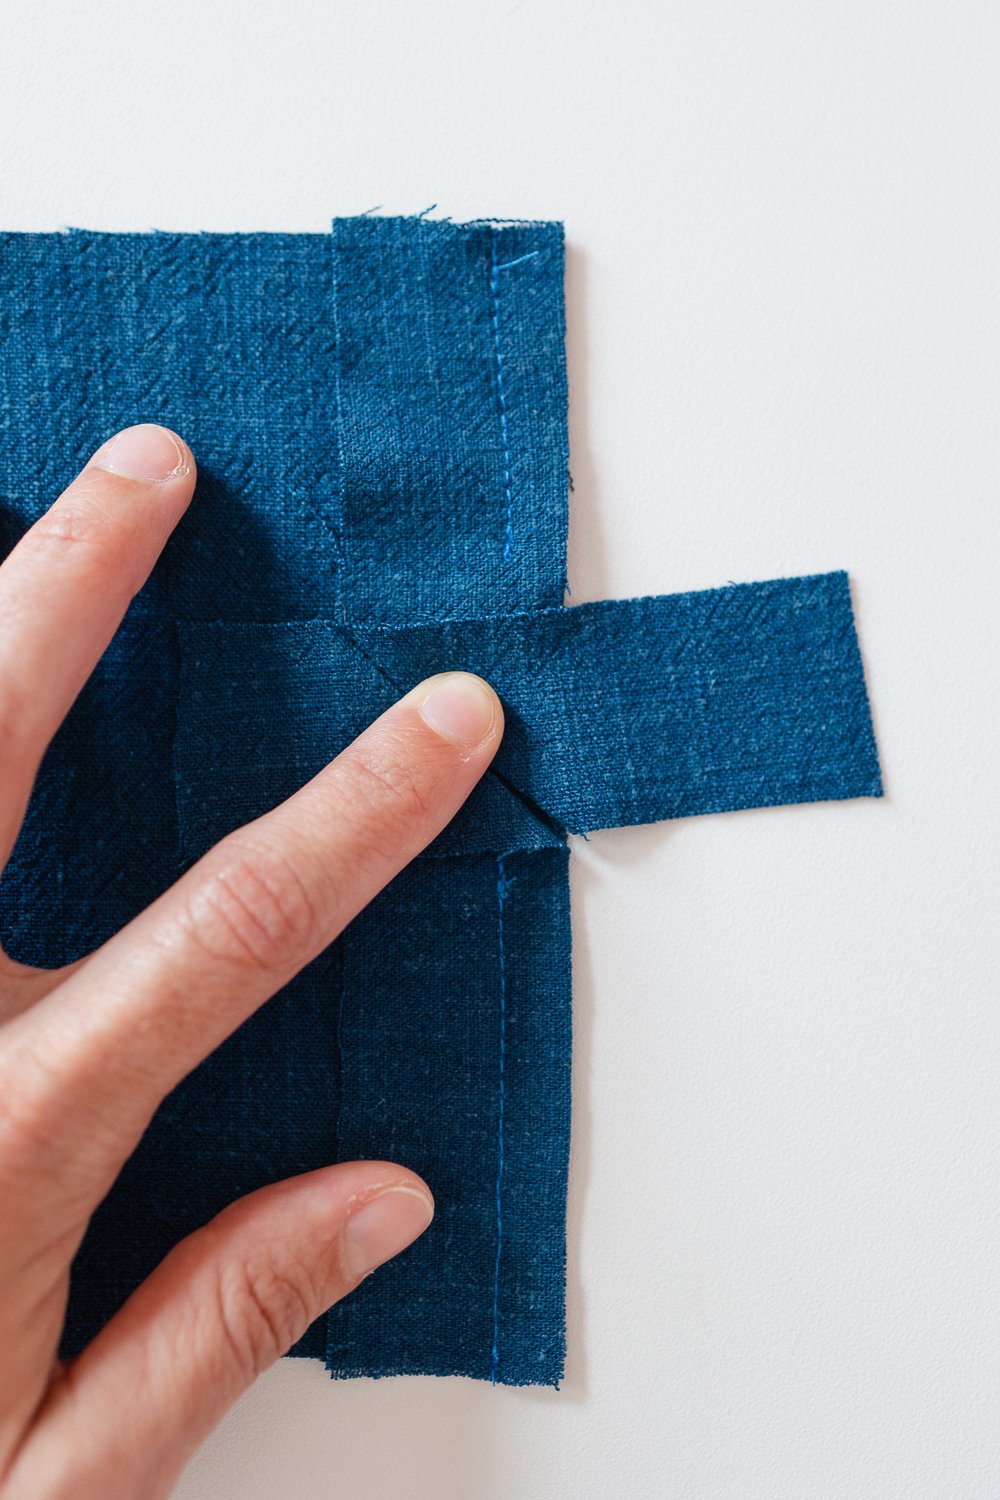
Step 3: Keep the creases aligned and sew directly in the furrow of the creases.
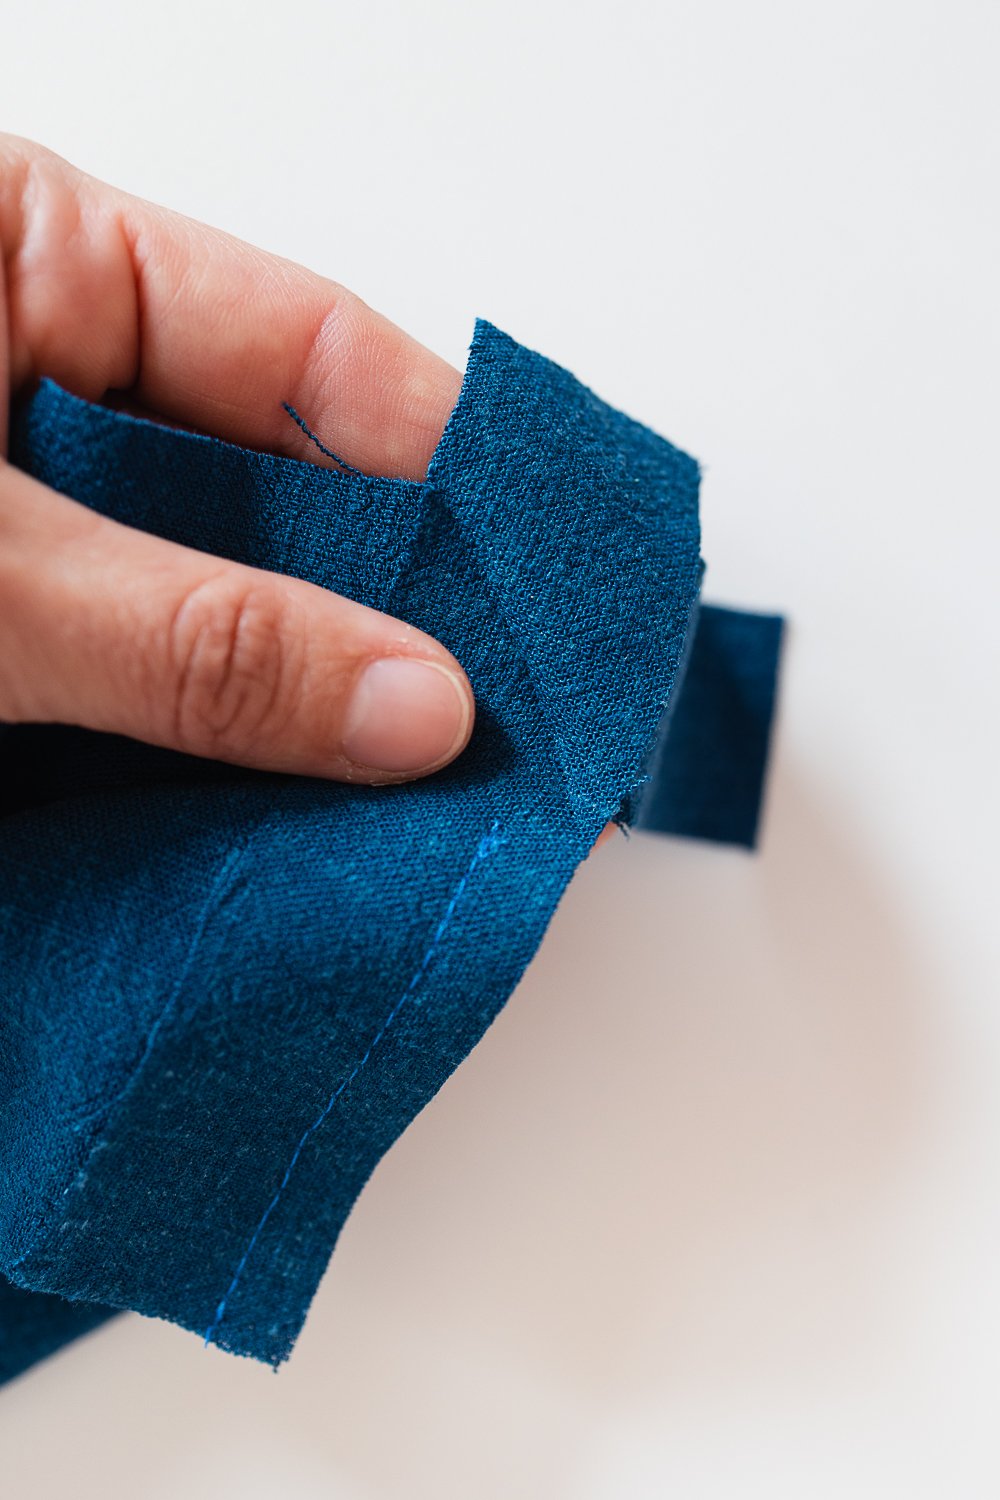
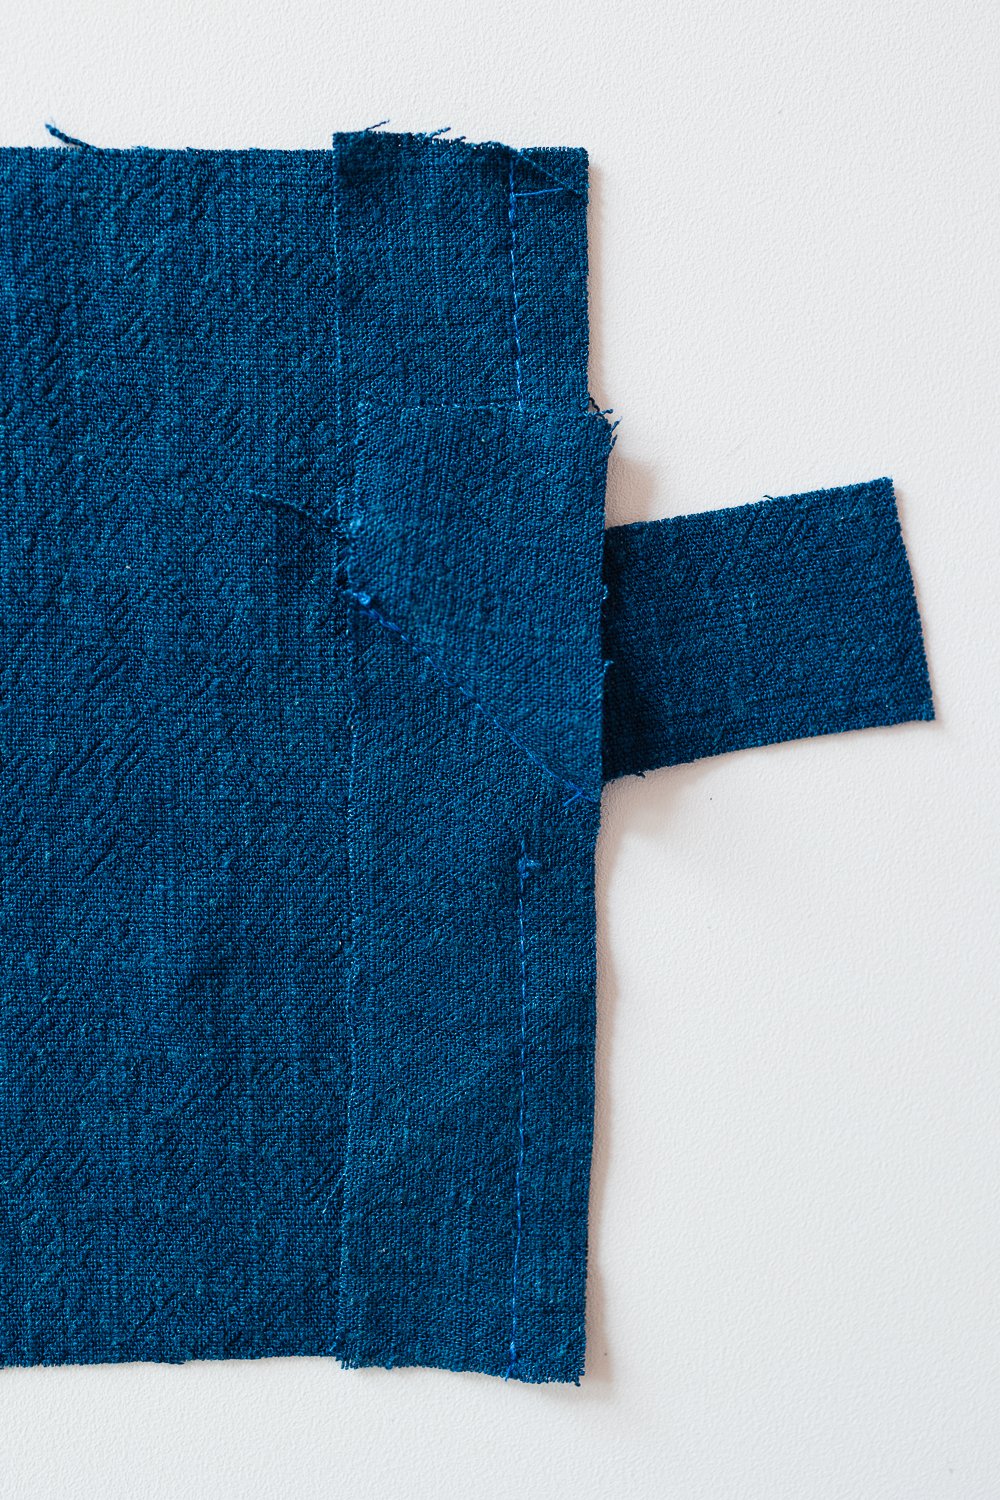
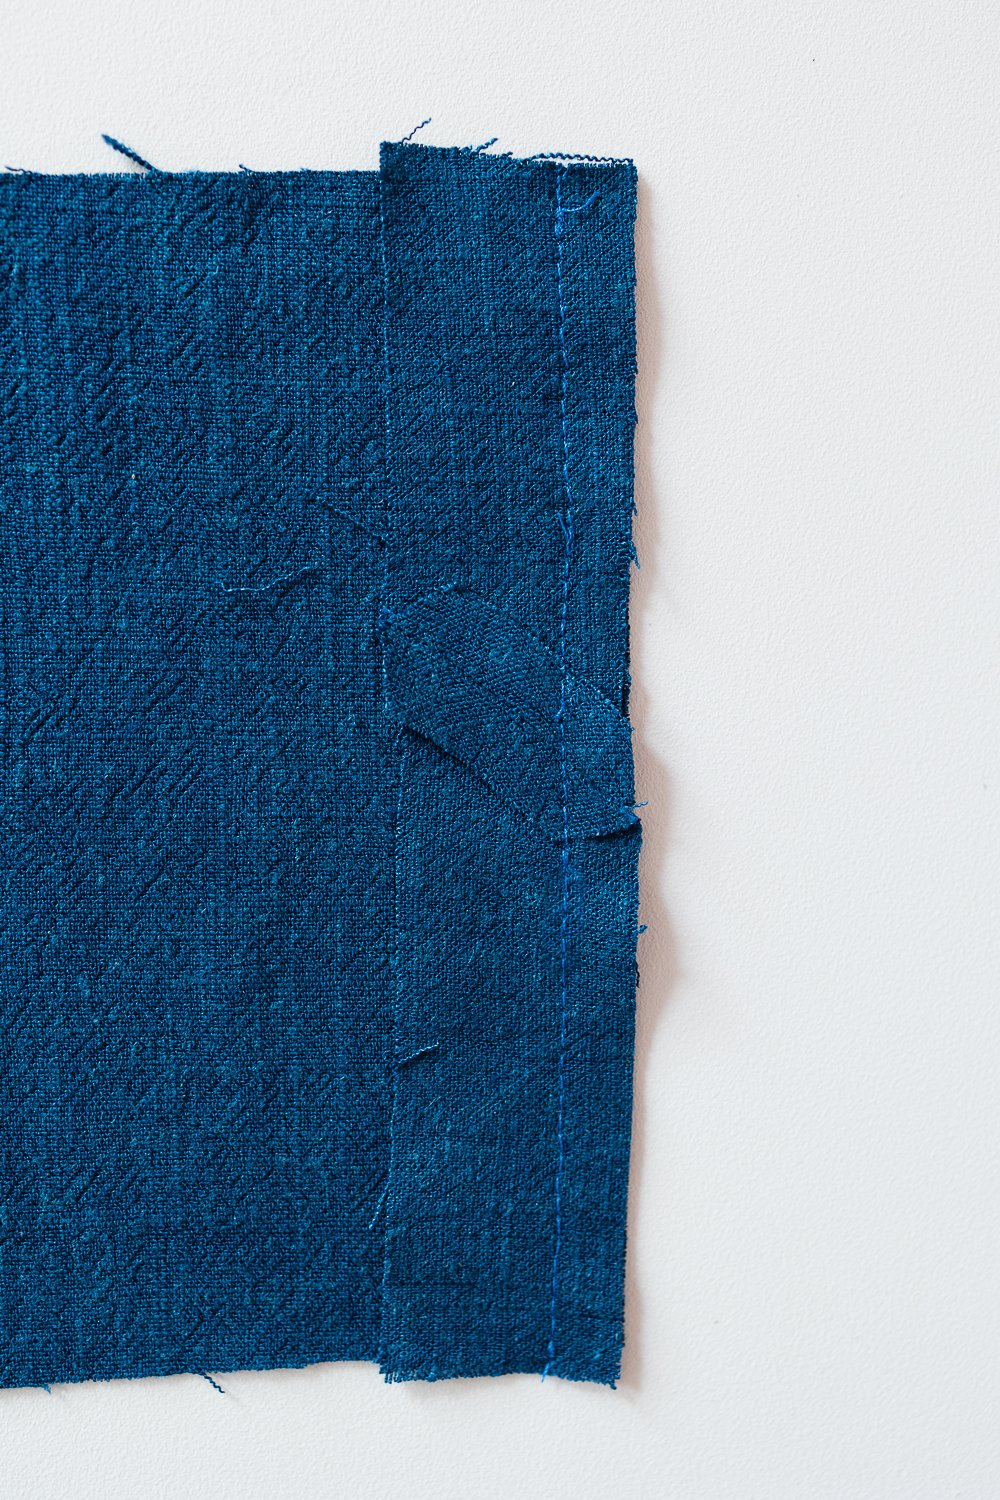
Step 4: Trim the seam allowance. Press seam open. Continue to sew the bias tape as usual.
This method is useful for projects that use a long length of bias tape and you start sewing before knowing exactly how much it’s going to take. Like sewing all the way around the outside perimeter of a quilted jacket. That’s a long way around!
If you enjoyed this post, you may also enjoy…
Step by step tutorial and discussion on bias tape.

Instant PDF pattern download with step by step instructions to make your own quilted jacket.

Step by step illustrated tutorial to add pockets to all your dresses.


