How to Organize and Keep Track of Your PDF Patterns

PDFs can be pesky things. Here’s how I organize my patterns from other pattern makers I love to make sure I don’t lose any and I can find them easily.

I notice for me personally, staying organized is much easier if I put the pattern in my filing system right away after buying it instead of leaving it in my messy downloads folder.

Most patterns come as .zip files. Once the files are extracted, you can delete the .zip file.

So here’s one good option of how to organize patterns

1) Have a folder just for sewing patterns.

How to organize your PDF patterns - Sarah Kirsten

2) In that folder, have a file for each pattern maker.

How to organize your PDF patterns - Sarah Kirsten

3) In each pattern maker’s file, have a file for each pattern you have from them.

How to organize your PDF patterns - Sarah Kirsten

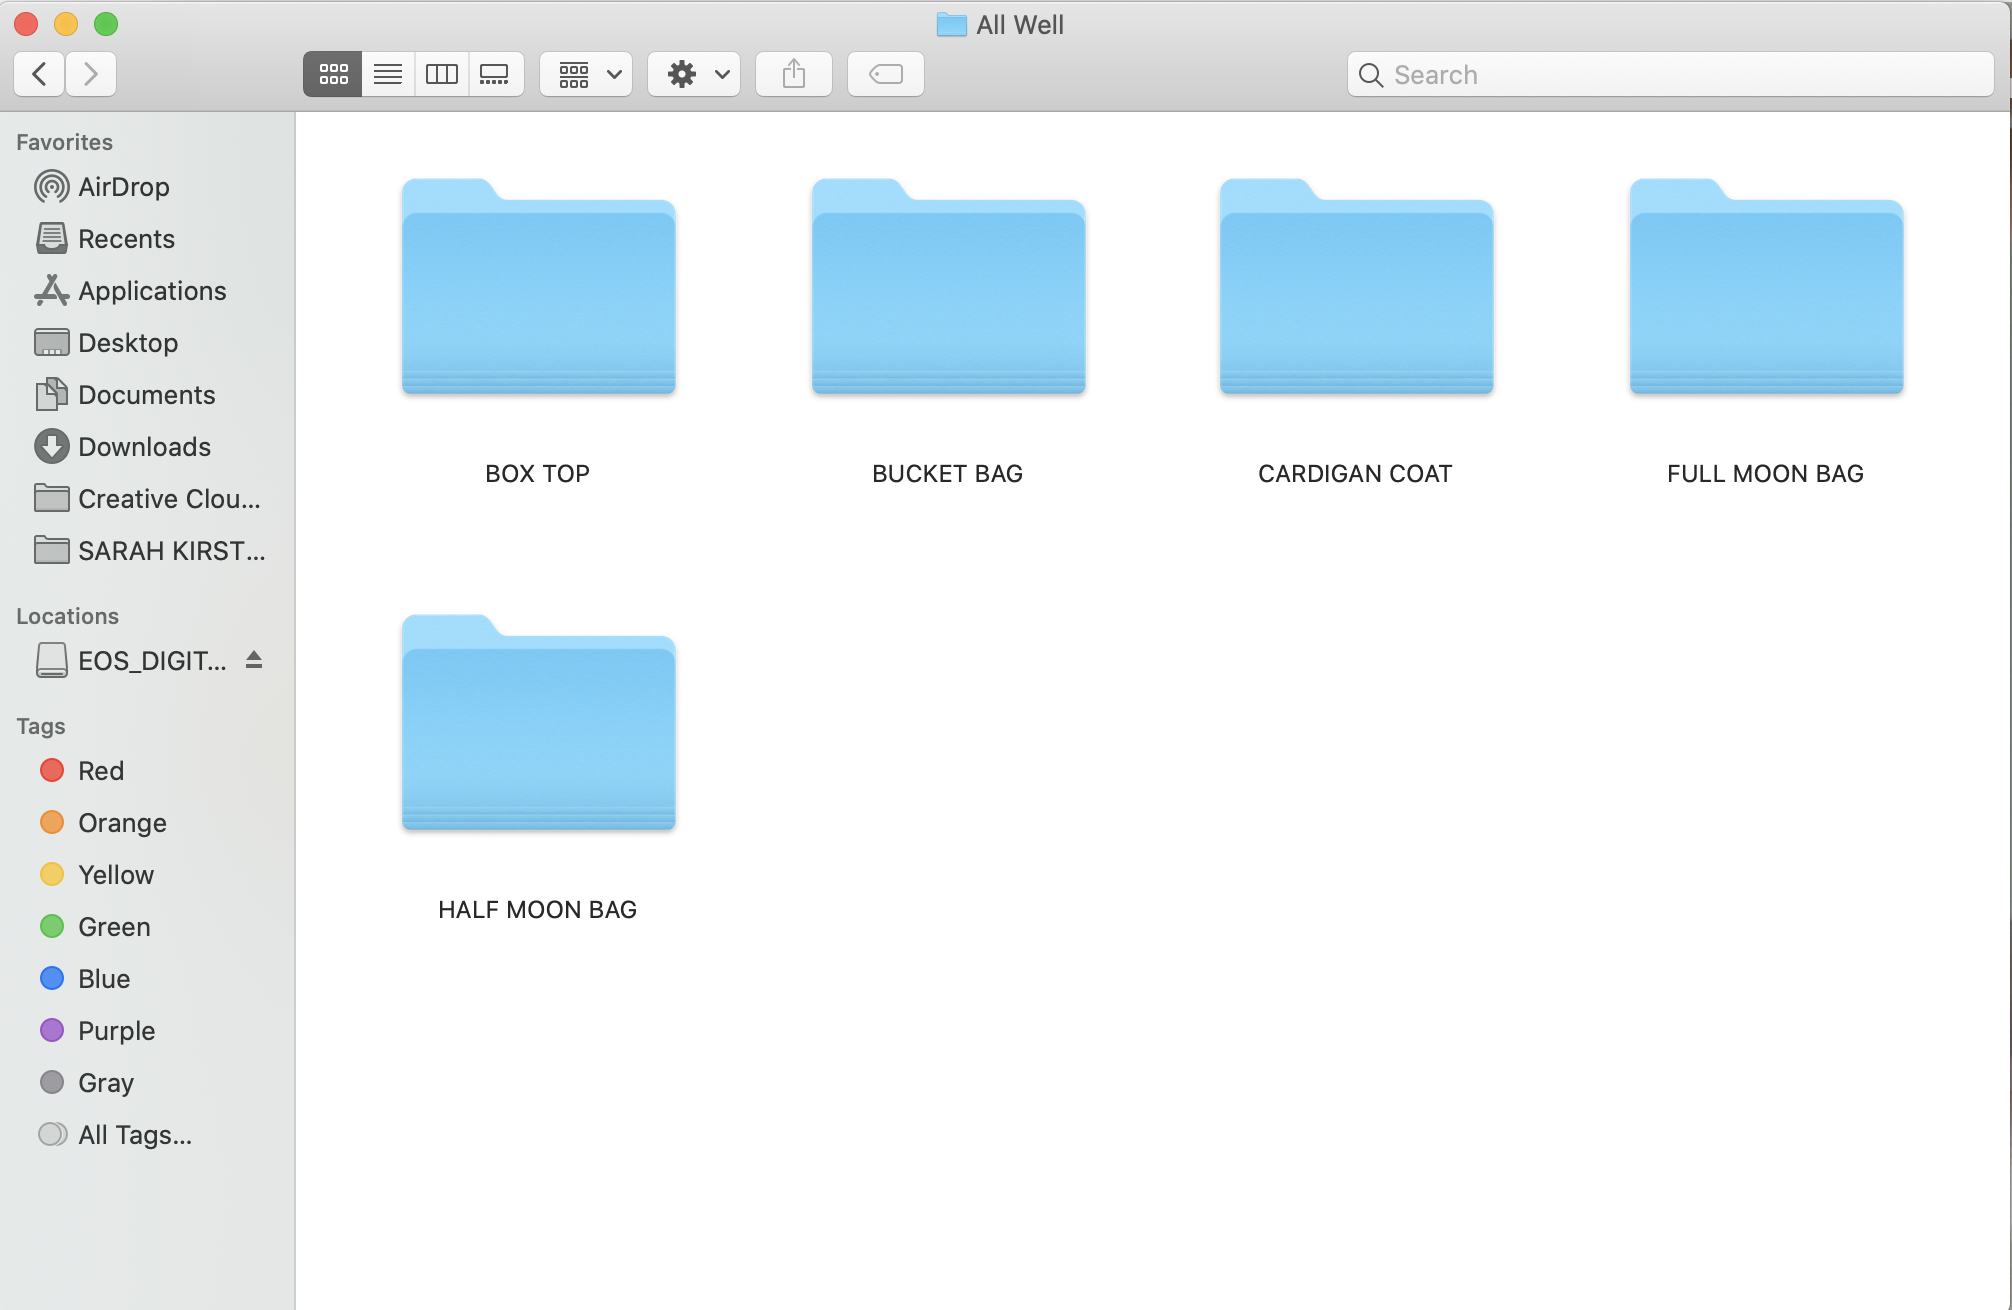
4) In each pattern file, have all the PDFs that go with the pattern.

How to organize your PDF patterns - Sarah Kirsten

Again, once you have the PDFs, you don’t need to keep the .zip file. Declutter and toss it in the digital trashcan.

Pocket Placement Really Does Make a Difference on How Your Bum Looks

I glued pockets in different spots to experiment with the way they can effect the look of your bum. It turns out, it really does make a difference.

1) Small pockets make your bum look bigger.

1) Small pockets can make your bum look bigger.

3) Low pockets make your bum look saggy.

3) Low pockets can make your bum look saggy.

2) Big pockets make your bum look smaller.

2) Big pockets can make your bum look smaller.

4) High pockets can possibly make your bum look lifted (although I don’t think this really works with my bum shape).

4) High pockets can possibly make your bum look lifted (although I don’t think this really works with my bum shape).

5) Narrow pockets can make your bum look narrow and not plump.

5) Narrow pockets can make your bum look narrow and not plump.

6) Wide pockets make your bum look wide, but not necessarily in a good way.

6) Wide pockets can make your bum look wide, but not necessarily in a good way.

The best placement is different for every bum (and how that we can decide where to put our pockets when we sew). For me, I think I like medium sized pockets right in the center (photo 1).

I hope this is helpful for deciding where to place your pockets. Gotta get that bum looking its best!

How to Sew Mitered Corners

How to Sew Mitered Corners - Sarah Kirsten

Here’s how to do it

1) Iron all sides of the fabric at your desired hem width.

How to Sew Mitered Corners - Sarah Kirsten

2) Fold the hem over again with the same width and iron.

How to Sew Mitered Corners - tutorial with lots of photos

3) On the corner, unroll one fold of the hem.

How to Sew Mitered Corners - Sarah Kirsten

4) Fold the corner in diagonally. Align it so the fold creases made from the iron in the previous step match up with the width of the first fold of the hem. Iron the corner down so it makes a diagonal crease in the fabric.

How to Sew Mitered Corners - Sarah Kirsten

5) Mark along that diagonal crease with chalk or pencil or fabric pen.

How to Sew Mitered Corners - Sarah Kirsten

6) Fold the fabric over and sew along the marked diagonal line.

How to Sew Mitered Corners - Sarah Kirsten

7) Trim off the corner, leaving about 3/16” seam allowance.

How to Sew Mitered Corners - Sarah Kirsten

8) Flip the corner right side out. Use a point turner or some other pointy object to press out the corner.

How to Sew Mitered Corners - Sarah Kirsten

9) Edge stitch along the inside edge of the hem.

How to Sew Mitered Corners - Sarah Kirsten

10) Enjoy the beautiful corners with all the extra care and love you put into creating them.

How to Sew Mitered Corners - Sarah Kirsten

This lovely lightweight linen fabric is from Fabrics-Store.com. I enjoy sewing with their fabric. They have a wonderful selection of linens in various weights and colors. Not to mention they are a family company, and their blog is amazing.

How to Sew Mitered Corners - Sarah Kirsten

Rainbow Arch - How to do it

How to paint a rainbow arch in your house - Sarah Kirsten

Before I bought my new house, I was dreaming of how I would decorate. There is this wide beautiful archway, and I knew I wanted to do something with a rainbow. The ideas kept morphing into other ideas, and then this idea hit. It was pretty clear it was the one. (As in, the one you are going to marry, the rainbow you are going to paint.)

The ancient Hebrew texts describe the rainbow as a sign of the Lord’s faithfulness and promises. I love that! Besides rainbows being beautiful in and of themselves, I want to walk under a reminder of the Lord’s faithfulness every day.

Here’s how to do it

1) Paint the arch white.

2) Figure out how wide each rainbow strip is going to be.

3) Mark the lines of each strip in several places along the archway.

4) Following your markings, use 1/4” painters tape to delineate the strips.

 
How to paint a rainbow arch in your house - Sarah Kirsten
 

5) Paint the wall white again over the tape. This seals the cracks and gives a really clean edge when you peel off the tape. This step feels a bit extra, but seriously, do it. It makes a big difference and you’ll be glad you did it.

6) Spend a long time picking out the perfect colors.

 
How to paint a rainbow arch in your house - Sarah Kirsten
 

7) Paint the rainbow. (Somewhat difficult to decide if you want the red on the right or the left….)

 
How to paint a rainbow arch in your house - Sarah Kirsten
 

8) Carefully peel up the tape.

 
How+to+paint+a+rainbow+arch+in+your+house+-+Sarah+Kirsten
 

9) Enjoy rainbow.

How to paint a rainbow arch in your house - Sarah Kirsten

This superior painting method for obtaining crisp lines was taught to me by my friend Nate. Thank you, Nate!