Here’s how to sew a fully lined, reversible tank top.
The fabrics used for this tutorial are two floral print quilting cottons. Quilting cottons are fun to use for tutorials to easily determine right and wrong sides of fabric and to help keep the two layers easily differentiable.
The pattern used for this tutorial is my Chamomile Crop and Dress pattern. Some steps (like specific seam allowances and seam trimming) may differ slightly for other patterns.
Let’s make something!
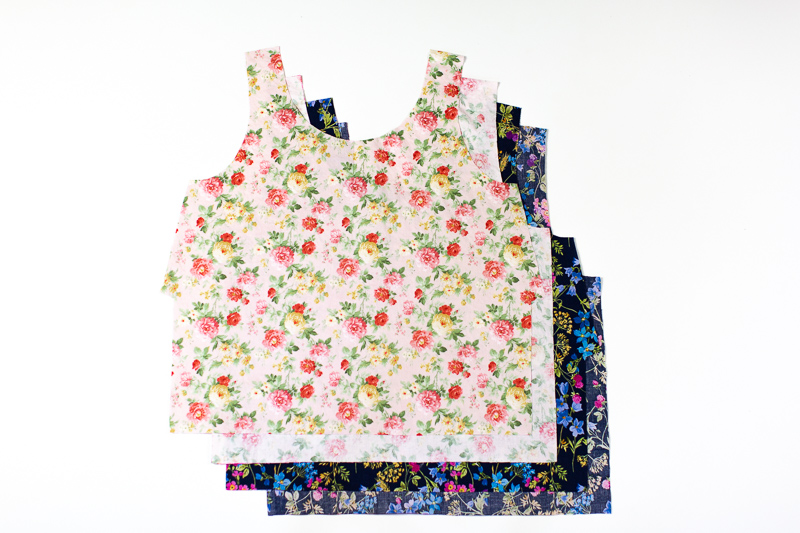
1) Cut out all the pieces. I’m using one front and back in pink floral and one front and back in blue floral. You could have both layers the same fabric if you’d like.
The right side on both of these fabrics is a bit darker and more vibrant, the wrong side is more muted and slightly whiter.
2) Using a fabric pen or chalk, mark a line 2 1/2” (6.4 cm) from the bottom edge on the wrong side of the fabric on all four pieces. This will be used as a guide for sewing the hem later. It’s easiest to mark it now when the pieces can still be laid flat before any sewing.
3) Sew all four darts (two on each front piece) and press darts toward the bottom of the crop top.
4) Sew the front and back pieces of each layer together at the shoulders with a 3/4” (2 cm) seam allowance and right sides together.
Trim seams to 3/8” (1 cm). Explanation: This pattern was drafted for French seams, which requires a large seam allowance, so the extra seam allowance has to be trimmed off for this double layer construction.
Press seams open.
5) Lay the two layers right sides together. Line up and pin or clip the arm openings together.
6) Sew the whole length of the arm openings with 3/8” (1 cm) seam allowance.
7) Clip the seam allowance along the arm opening curves. Clip farther up the length of the arm opening than you might think you need to. (I’ve made the mistake multiple times of not clipping far enough up!)
8) Turn the crop top right side out through the neck opening.
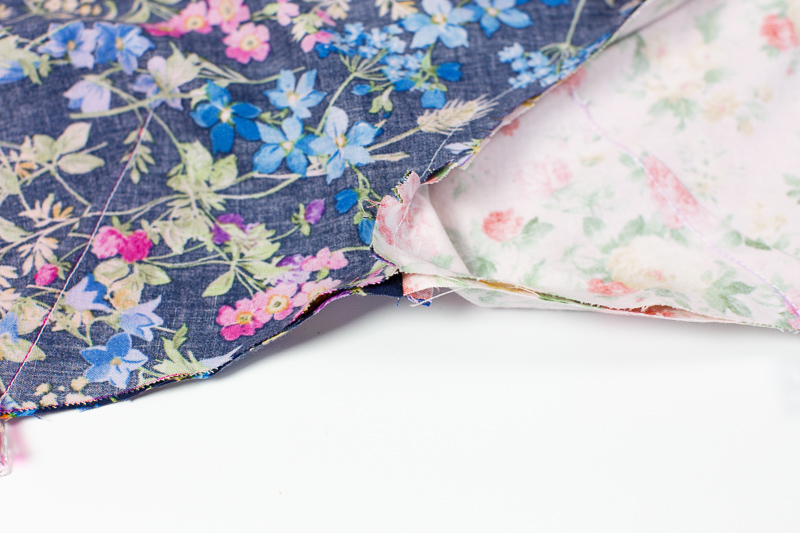
9) Flip the outer layer together and the inner layer together with right sides together.
If this part is tricky to understand, keep playing with it — you’ll get it! See how the two pink floral pieces are together on the right and the two blue floral pieces are together on the left? That’s what you want.
10) Line up the side seams and pin or clip in place. Either fold the seam allowance of the arm opening of the top and bottom layer in opposite directions, or press them both open to reduce bulk around the seam.
I chose to press my seam allowances in opposite directions.
11) Sew the side seams with a 3/4” (2 cm) seam allowance. Backstitch across the darts and the ends of the arm opening seams.
Trim seam allowance to 3/8” (1 cm). Again, because this was drafted for French seams.
Press side seams open with a steamy iron.
12) Now we’re going to sew the neck in two sections. If you look at the necklines, you’ll see there are four layers.
Grab the outermost layers (one is the blue floral fabric, the other is the pink floral fabric) and push the middle layers down away from the edge. These two outermost layers should be already be right sides together.
13) Pin or clip the outermost layers together all the way up to the shoulder seams.
It requires some arranging and finagling to pin all the way up to the shoulder seams, but you’ll want to do that to make sure the two layers are lined up and centered with each other properly.
At this point, the other half of the shoulders are tucked inside the part of the shoulders and neckline you are about to sew.
14) Sew the first half of the neckline from shoulder seam to shoulder seam with a 3/8” (1 cm) seam allowance. Make sure the two layers in between don’t get caught in the stitching.
15) Clip the seam allowance of the curve of the neckline.
16) Flip the tank top over and pull the shoulders/neckline through the opening in the other side of the neckline.
17) Do the same thing to this side. Pin or clip the two outermost layers together up to the shoulder seams. Again, the outermost layers should already be right sides together.
18) Sew with a 3/8” (1 cm) seam allowance and be sure to not catch the in between layers in the stitching.
19) Clip curve of neckline.
Whew! Just take a breather here. You’re done with one of the tricky parts. The neckline is finished!
Okay now on to the final steps…
20) The last thing to sew is the hem. Starting at a side seam, fold the bottom of both layers up so the right sides are facing each other.
21) Line up the bottom raw edges and side seams, and sew the two layers together along the line (2 1/2” (6.4 cm) from the bottom) you marked in the first step.
Start sewing at the side seam and leave a 5” (12.7 cm) gap when you come back around so you can turn the tank top right side out.
The hem will be going in between the blue floral layer and the pink floral layer at this point. You won’t be able to lay the whole thing flat, so get a few inches flat to sew at a time.
If this step feels like a huge confusing mess, hooray! You’re probably doing it right! It always looks like a total mess — one you would never think would actually work out right.
If you’d like to test that you are doing correctly before you start sewing, you can pin along stitching line and then turn the tank top right side out through the hem to see how it works.
It should look something like this at this point. The hem should literally be going in between the blue floral layer and the pink floral layer.
22) Turn the tank top right side out through the 5” (12.7 cm) opening in the hem.
23) Give the bottom seam, neckline, and arm openings a good press.
24) Make sure the wide hem allowance is laying flat between the blue floral and the pink floral layers.
Top stitch 2” (5 cm) from the bottom edge. The hem allowance is 2 1/2” (6.4 cm) wide, so the 2” (5 cm) stitching from the bottom should be about 1/2” from the top edge of the hem allowance.
25) Hand sew the opening in the bottom of the hem shut using a blind stitch. Or leave it unsewed, if you want a secret little compartment in your hem :)
26) Have a cup of chamomile tea. You just made a really cool, double layer, reversible, Chamomile Crop!
If you enjoyed this tutorial, you may also enjoy…
Step by step illustrated tutorial to add pockets to all your summer dresses.
Step by step photo tutorial to sew the Rosemary Wrap Sewing Pattern.
Step by step photo tutorial.


