The Popup Pocket on the Raspberry Rucksack is fully lined and may be the most challenging part of the pattern to sew. So rest assured, if you can sew this, you can sew the rest! I’ve taken lots of photos and broken down each step to aid you in smoothly completing each phase of the Popup Pocket construction.
This tutorial is made specifically to accompany the Raspberry Rucksack, but the techniques are applicable for any bag you wish to add a lined popup pocket!
First, make sure you have all the pieces.
Top Pocket outer layer
Top Pocket lining
Bottom Pocket outer layer
Bottom Pocket lining
Zipper Ends
Single Pull Zip - 7” (17.8 cm) for the Little Raspberry or 9” (22.9 cm) for the Big Raspberry
Fold the Zipper Ends in half and press (you can either press with an iron or just firmly with your fingernail). Then fold both ends in toward the center.
Trim off the tails off your single pull pocket zipper (I’m using a cut-to-length zipper so mine doesn’t have tails). At this point, it’s very important to check if the length of your zipper is actually 7” (17.8 cm) for the Little or 9” (22.9 cm) for the Big with the tails cut off. Some zippers are slightly longer than that and will need to be trimmed. Be sure to use one of your not-so-nice scissors to trim the zipper, especially if using a metal zipper
Place the Zipper End directly against the beginning of the teeth and sew them in place. Be careful navigating your needle through the zipper teeth.
Once the Zipper Ends are sewn on, check again to make sure the length of the zipper is still the same.
Top of the Pocket
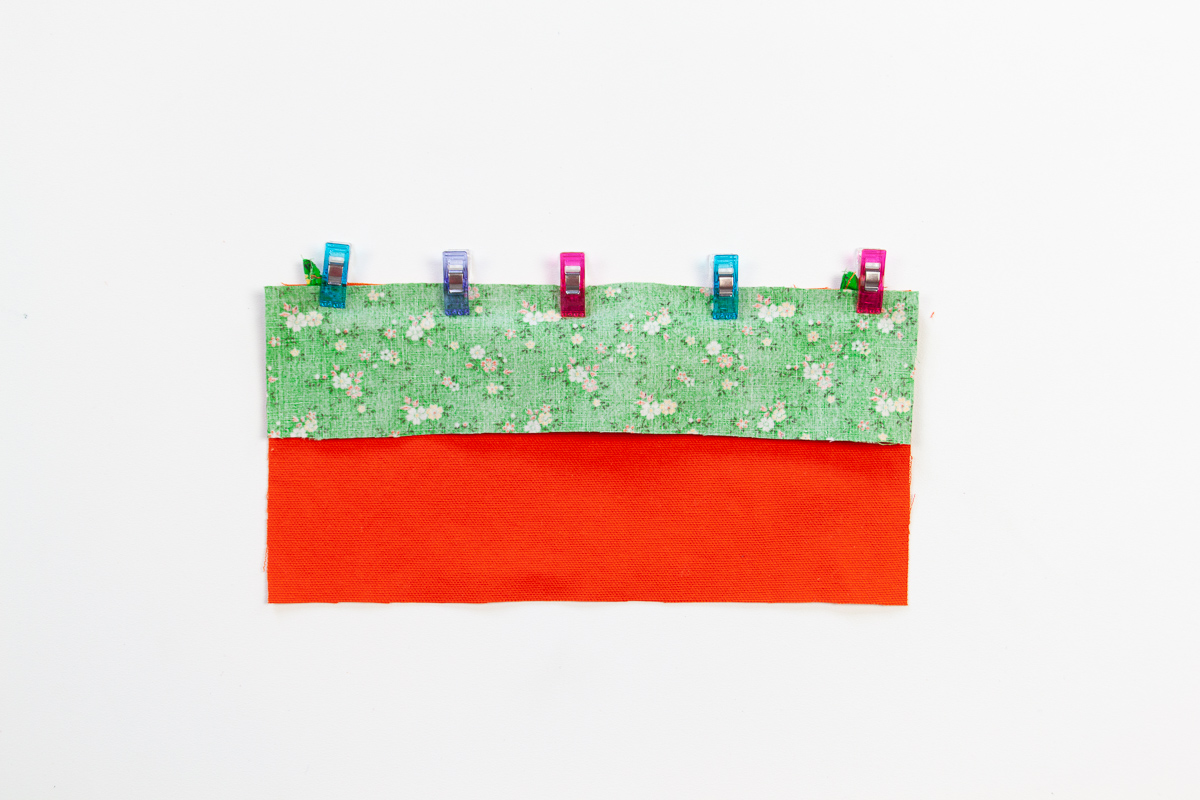
Place the zipper face down on the right side of the Top Pocket outer layer. Make sure the zipper is centered and has about 1/2” (1.3 cm) clearance on each side. Place the Top Pocket Lining right side down on top.
So just to be clear here, the outer layer and lining are right sides together, and the zipper is sandwiched in between facing the outer layer.
Sew the length of the seam through all layers with a 3/8” (1 cm) seam allowance.
Fold the lining back. Press the seam allowance toward the lining and edge stitch through all layers.
Fold each of the four corners right sides together and mark with a fabric pen where the width across is 1 1/2” (3.8 cm). Sew along the line you marked on all four corners.
It should look something like this with all the corners sewn.
Fold both the outer layer corners toward the center of the long side. Edge stitch both of the outer layer corners along the seam.
Trim all four corner’s seam allowances to 1/4” (6 mm).
Fold the whole piece in half with right sides together so that the corners you just sewed are aligned. Here are some photos of what it looks like from different angles.
With the corners aligned, flatten out the folded bottom edge (this is the zipper flap that will cover the zipper when turned right side out) with your fingers. Sew up the sides leaving a 3” (7.6 cm) gap in the middle. Use a 3/8” (1 cm) seam allowance.
It should look something like this.
Tip: When leaving openings where something will be turned right side out, turn a corner and sew the the edge of the seam allowance. This makes for easier turning with less stress on the fabric.
Turn the piece inside out through the opening. Shape it to look like this with the zipper flap cover the zipper. Give it a good press with an iron. Neatly press in the seam allowances of the opening. Those will be sewn shut when the Popup Pocket is attached to the front of the rucksack.
After shaping it and giving it a good press, stitch along the top of the zipper from outer layer side of the piece.
To do this, I move my needle to the far left side of the foot (not all machines have this option - a zipper foot would work well if your machine isn’t able to change the position of the needle). I place the left edge of the foot right along side the zipper (you can just make out the bump under the fabric in the photos) and stitch along the whole length of the piece going slow and steady.
Here’s a view of the outside and inside of the stitching. You can see from the inside that it just barely catches the edge of the lining. Thankfully no one sees this so it doesn’t have to line up perfectly in the inside. For this stitch it matters more what the outside looks like.
The top of the Popup Pocket is done!
Bottom of the Pocket
Fold the zipper flap up (by the way, the ends of those Zipper Ends can be trimmed off at any point).
Place the whole top pocket piece you just sewed face down on the right side of the Bottom Pocket outer layer. Make sure that zipper flap is folded back so you don’t stitch through it.
Place the Bottom Pocket lining right side down on top.
So to clarify, the lining and the outer layer are right sides together, and the zipper of the top pocket piece is sandwiched in between the two facing the outer layer.
Sew the whole length of the seam through all layers with a 3'/8” (1 cm) seam allowance.
Just like the top pocket pieces, fold all four corners with right sides together. Mark where they are 1 1/2” (3.8 cm) wide and stitch along the line.
It should look something like this.
Again, fold both outer layer corners toward the center of the long side and edge stitch along the seam.
Then trim all four corner seam allowances to 1/4” (6 mm).
Fold the whole piece in half so that the corners of the lining and outer layer you just sewed are aligned.
With the corners aligned, sew up the sides with a 3/8” (1 cm) seam allowance and leave a 3” (7.6 cm) opening in the top for turning the piece right side out.
Trim both bottom corners like so and turn the piece right side out.
Shape it with your hands so it takes the shape of a box and give all the edges a good press with an iron.
Fold the zipper flap back and edge stitch along the seam.
Popup Pocket is DONE!


