Raspberry Rucksack

Raspberry Rucksack Sew Along Number Three - Popup Pocket

The Popup Pocket on the Raspberry Rucksack is fully lined and may be the most challenging part of the pattern to sew. So rest assured, if you can sew this, you can sew the rest! I’ve taken lots of photos and broken down each step to aid you in smoothly completing each phase of the Popup Pocket construction.

This tutorial is made specifically to accompany the Raspberry Rucksack, but the techniques are applicable for any bag you wish to add a lined popup pocket!

First, make sure you have all the pieces.

  • Top Pocket outer layer

  • Top Pocket lining

  • Bottom Pocket outer layer

  • Bottom Pocket lining

  • Zipper Ends

  • Single Pull Zip - 7” (17.8 cm) for the Little Raspberry or 9” (22.9 cm) for the Big Raspberry

Raspberry Rucksack Sew Along - Sarah Kirsten

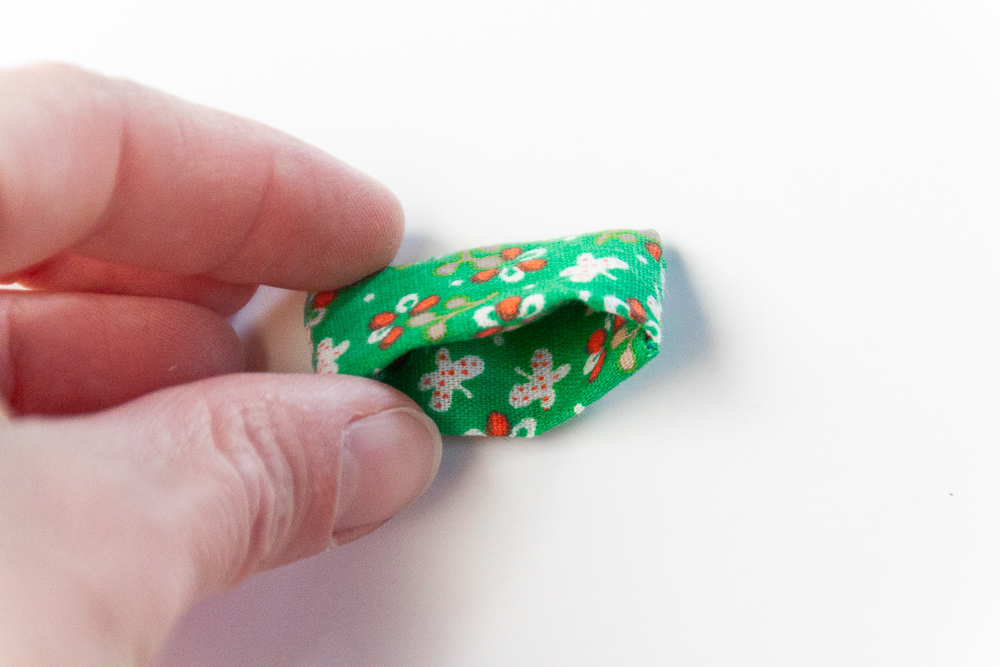
Fold the Zipper Ends in half and press (you can either press with an iron or just firmly with your fingernail). Then fold both ends in toward the center.

Raspberry Rucksack Sew Along - Sarah Kirsten

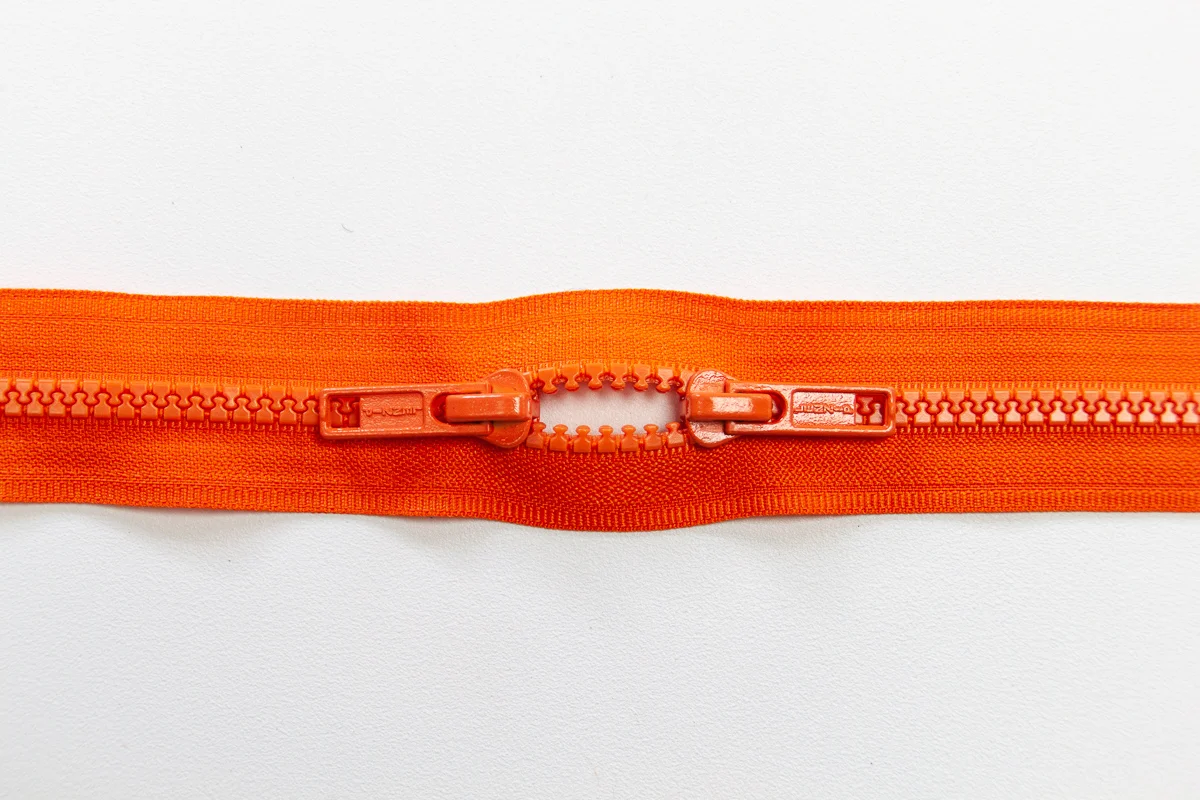
Trim off the tails off your single pull pocket zipper (I’m using a cut-to-length zipper so mine doesn’t have tails). At this point, it’s very important to check if the length of your zipper is actually 7” (17.8 cm) for the Little or 9” (22.9 cm) for the Big with the tails cut off. Some zippers are slightly longer than that and will need to be trimmed. Be sure to use one of your not-so-nice scissors to trim the zipper, especially if using a metal zipper

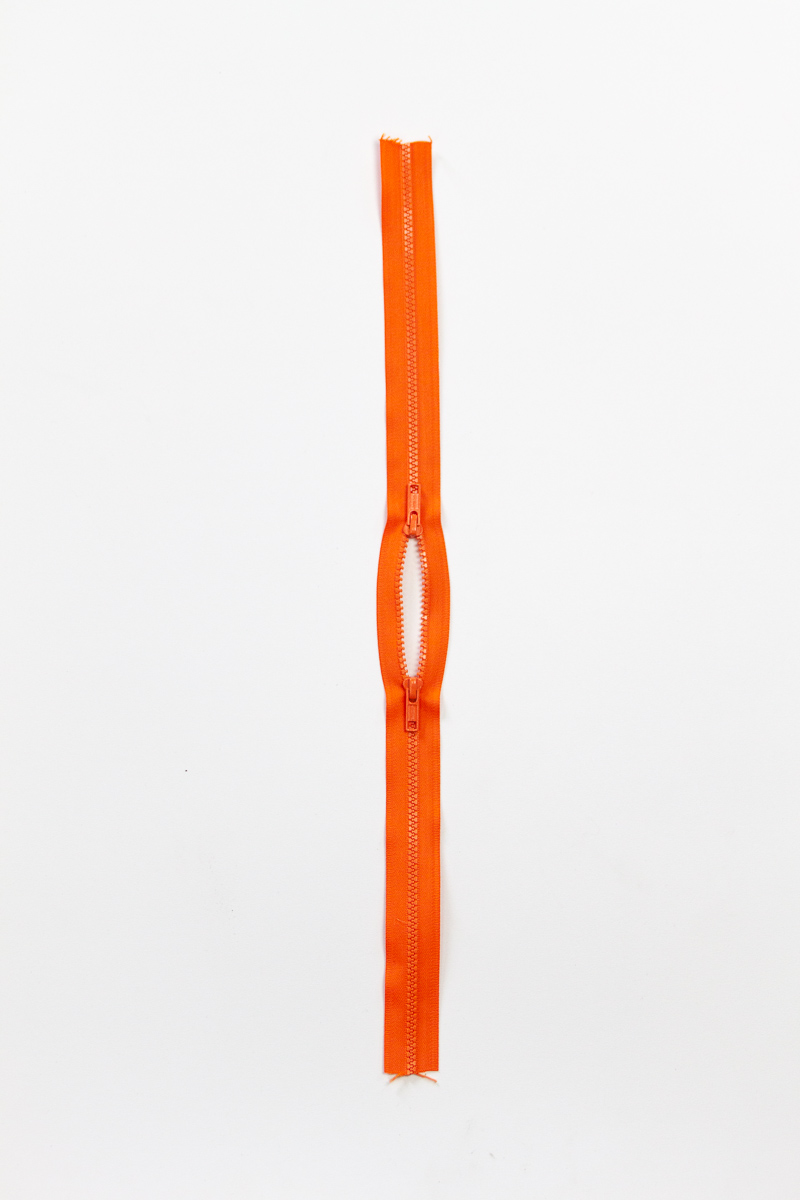
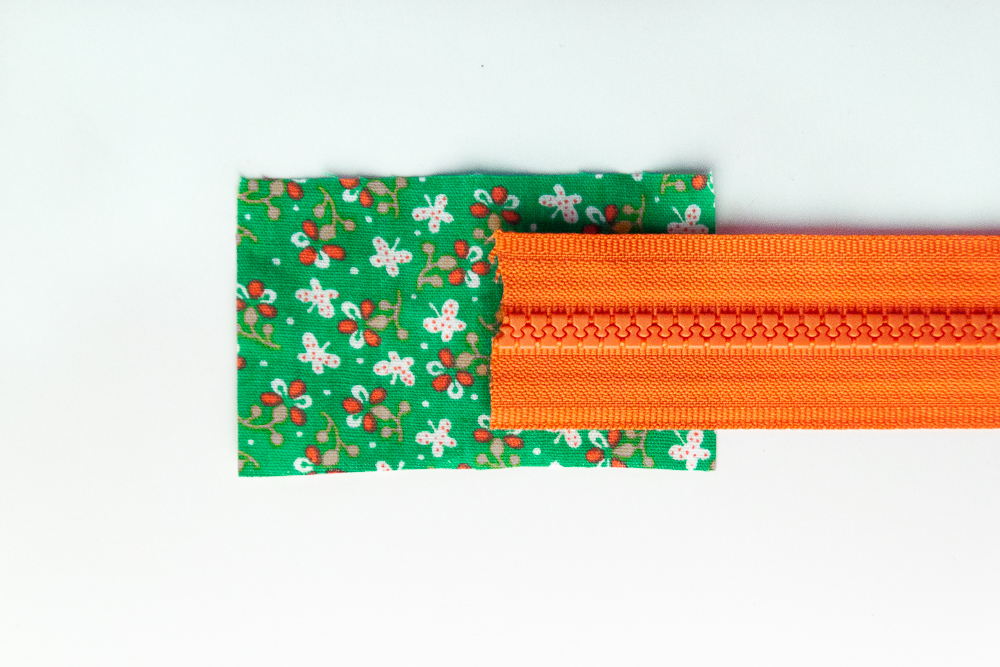
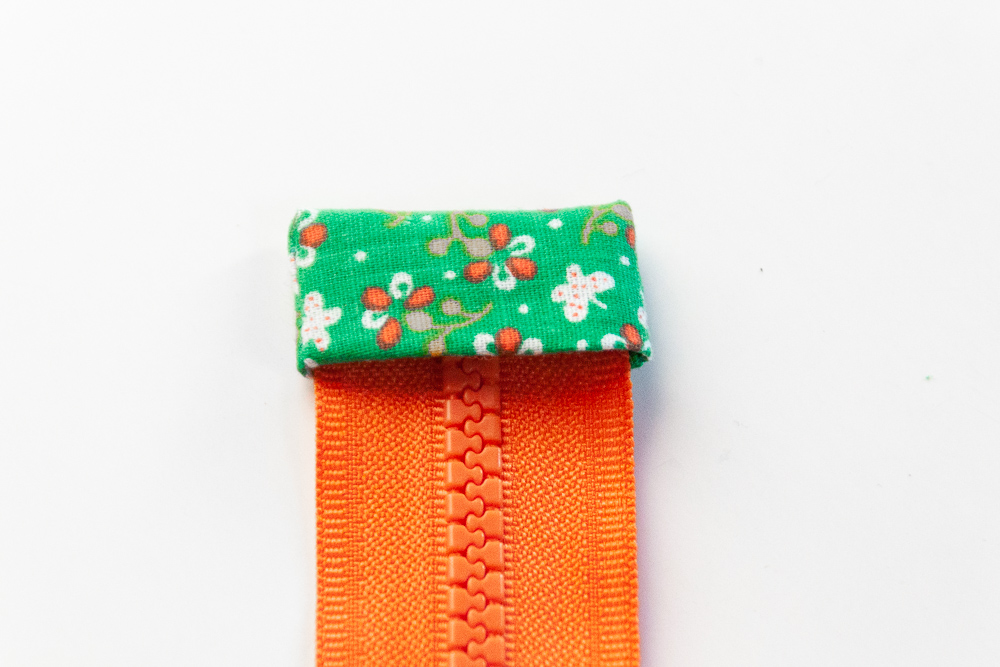
Place the Zipper End directly against the beginning of the teeth and sew them in place. Be careful navigating your needle through the zipper teeth.

Once the Zipper Ends are sewn on, check again to make sure the length of the zipper is still the same.

Raspberry Rucksack Sew Along - Sarah Kirsten
Raspberry Rucksack Sew Along - Sewing a lined popup pocket - Sarah Kirsten

Top of the Pocket

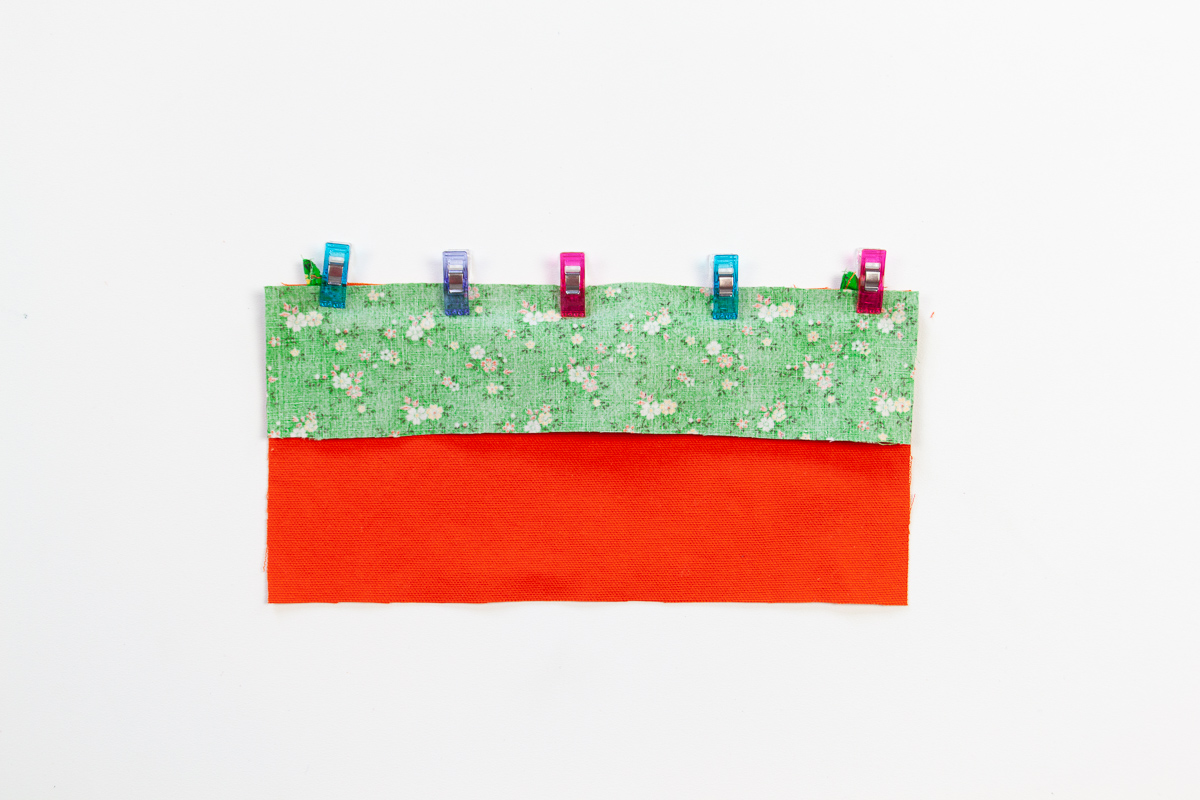
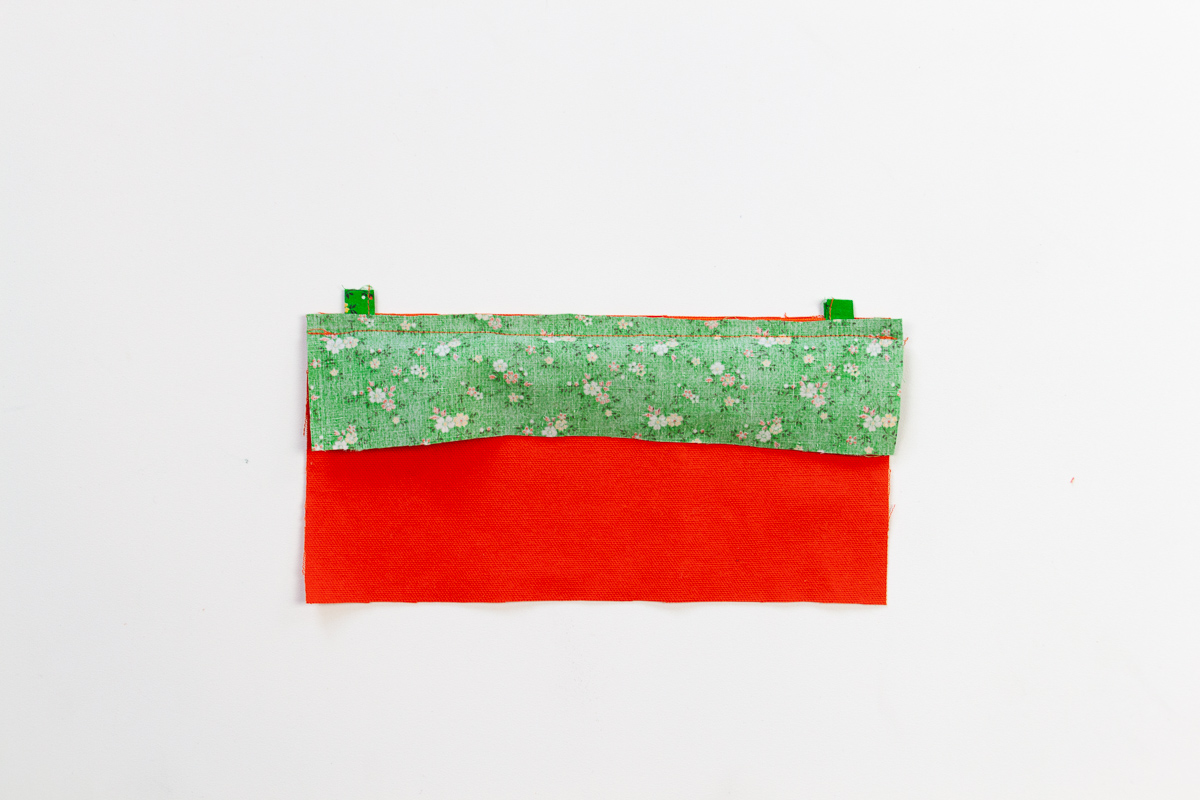
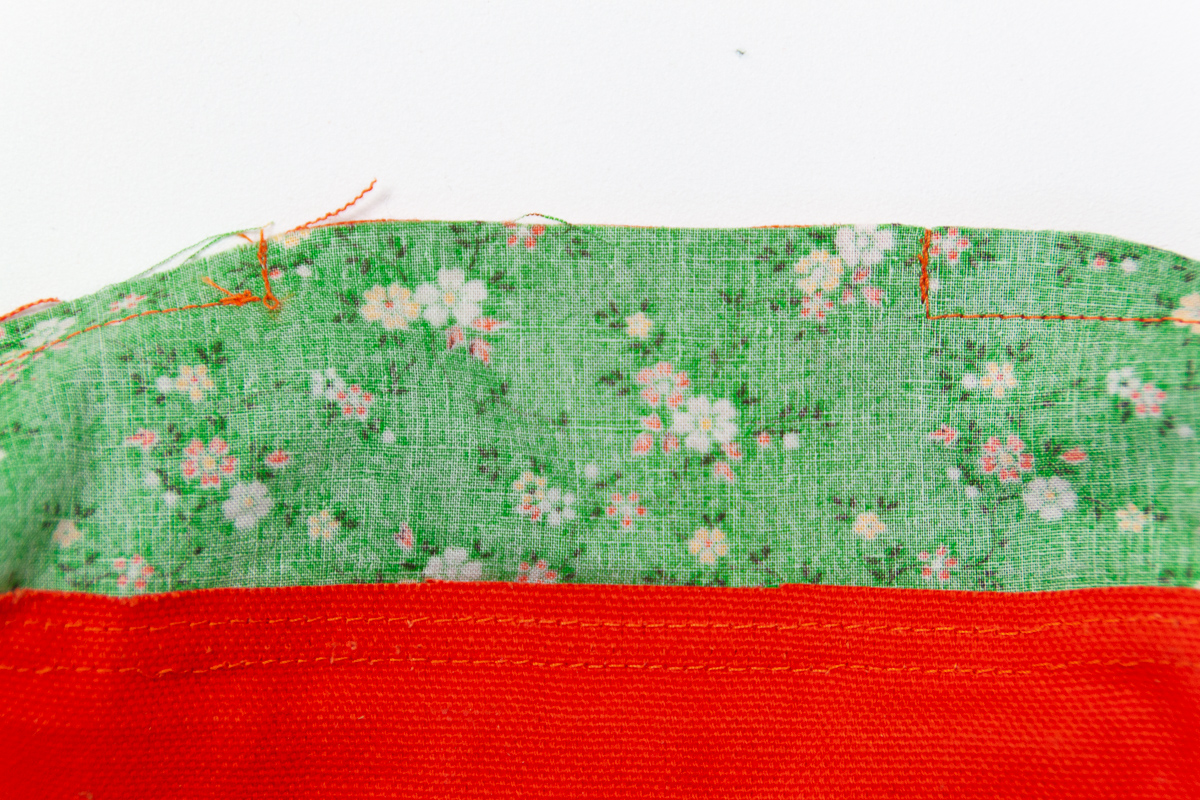
Place the zipper face down on the right side of the Top Pocket outer layer. Make sure the zipper is centered and has about 1/2” (1.3 cm) clearance on each side. Place the Top Pocket Lining right side down on top.

So just to be clear here, the outer layer and lining are right sides together, and the zipper is sandwiched in between facing the outer layer.

Sew the length of the seam through all layers with a 3/8” (1 cm) seam allowance.

Raspberry Rucksack Sew Along - Sewing a lined popup pocket - Sarah Kirsten

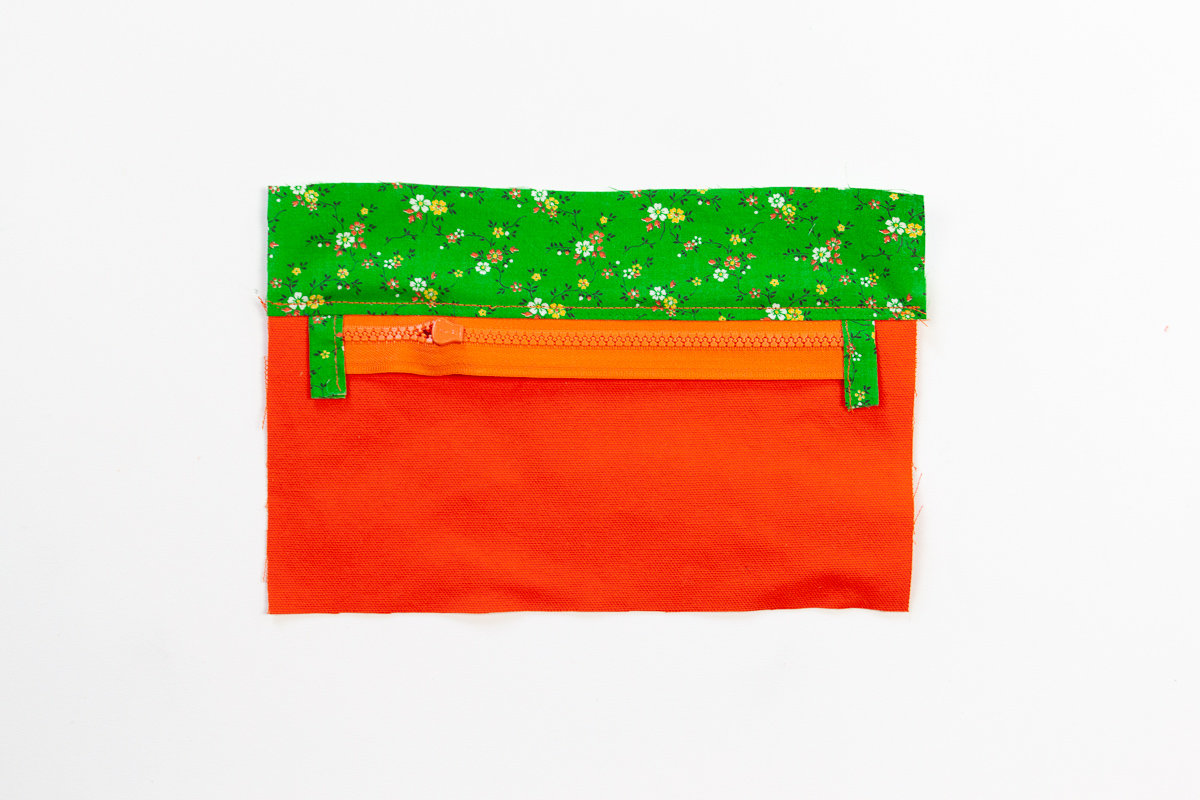
Fold the lining back. Press the seam allowance toward the lining and edge stitch through all layers.

Raspberry Rucksack Sew Along - Sewing a lined popup pocket - Sarah Kirsten

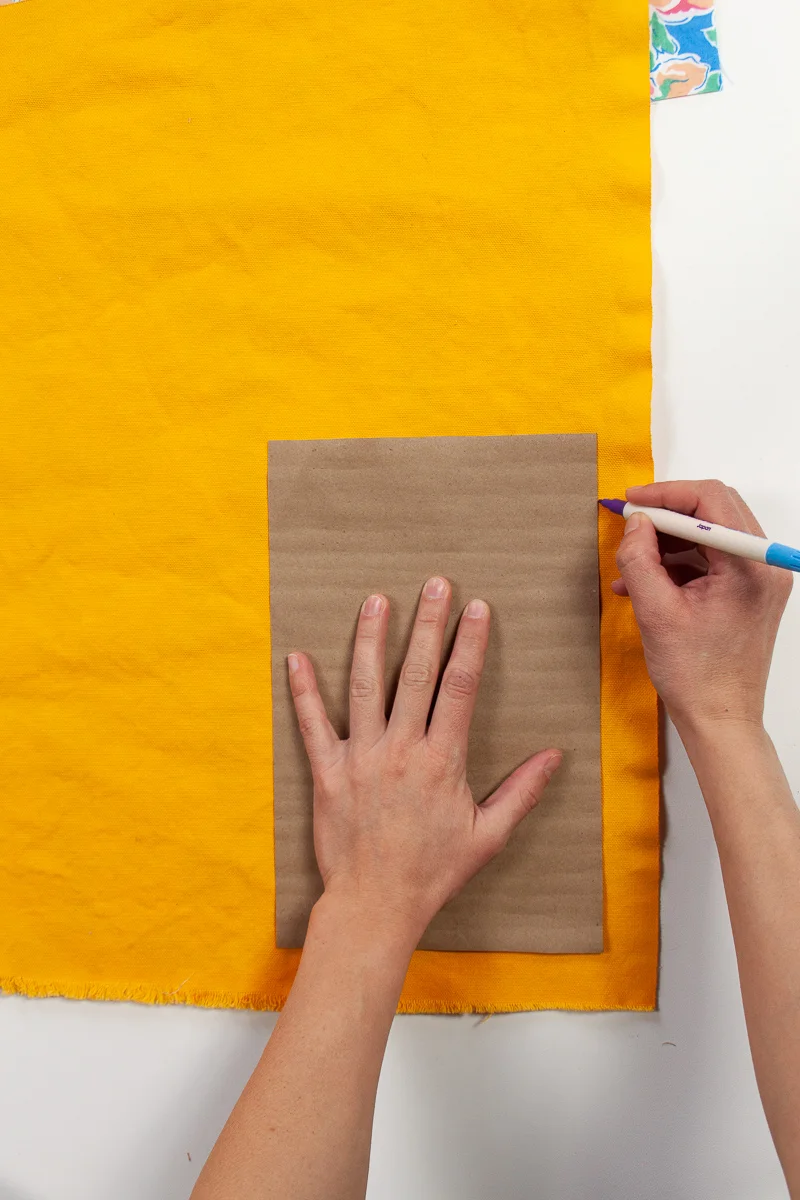
Fold each of the four corners right sides together and mark with a fabric pen where the width across is 1 1/2” (3.8 cm). Sew along the line you marked on all four corners.

It should look something like this with all the corners sewn.

Raspberry Rucksack Sew Along - Sewing a lined popup pocket - Sarah Kirsten

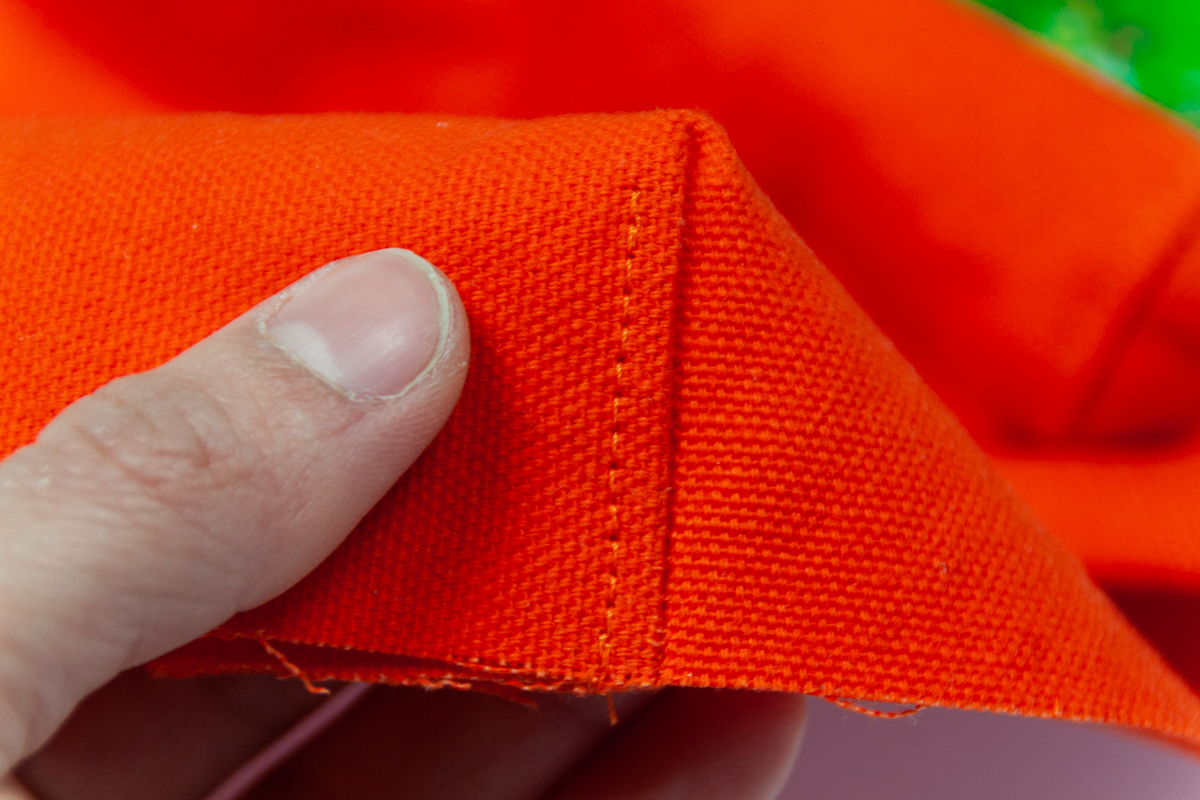
Fold both the outer layer corners toward the center of the long side. Edge stitch both of the outer layer corners along the seam.

Trim all four corner’s seam allowances to 1/4” (6 mm).

Raspberry Rucksack Sew Along - Sewing a lined popup pocket - Sarah Kirsten

Fold the whole piece in half with right sides together so that the corners you just sewed are aligned. Here are some photos of what it looks like from different angles.

Raspberry Rucksack Sew Along - Sewing a lined popup pocket - Sarah Kirsten

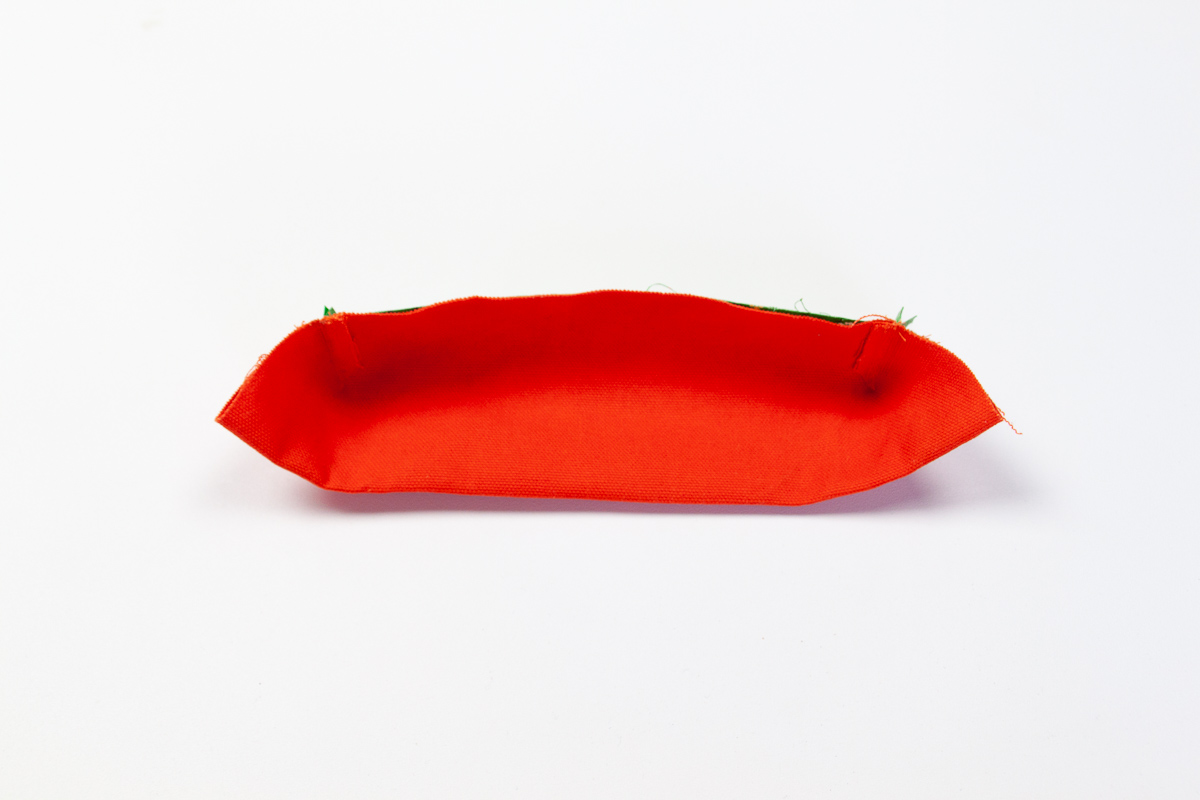
With the corners aligned, flatten out the folded bottom edge (this is the zipper flap that will cover the zipper when turned right side out) with your fingers. Sew up the sides leaving a 3” (7.6 cm) gap in the middle. Use a 3/8” (1 cm) seam allowance.

Raspberry Rucksack Sew Along - Sewing a lined popup pocket - Sarah Kirsten

It should look something like this.

Tip: When leaving openings where something will be turned right side out, turn a corner and sew the the edge of the seam allowance. This makes for easier turning with less stress on the fabric.

Raspberry Rucksack Sew Along - Sewing a lined popup pocket - Sarah Kirsten

Turn the piece inside out through the opening. Shape it to look like this with the zipper flap cover the zipper. Give it a good press with an iron. Neatly press in the seam allowances of the opening. Those will be sewn shut when the Popup Pocket is attached to the front of the rucksack.

Raspberry Rucksack Sew Along - Sewing a lined popup pocket - Sarah Kirsten

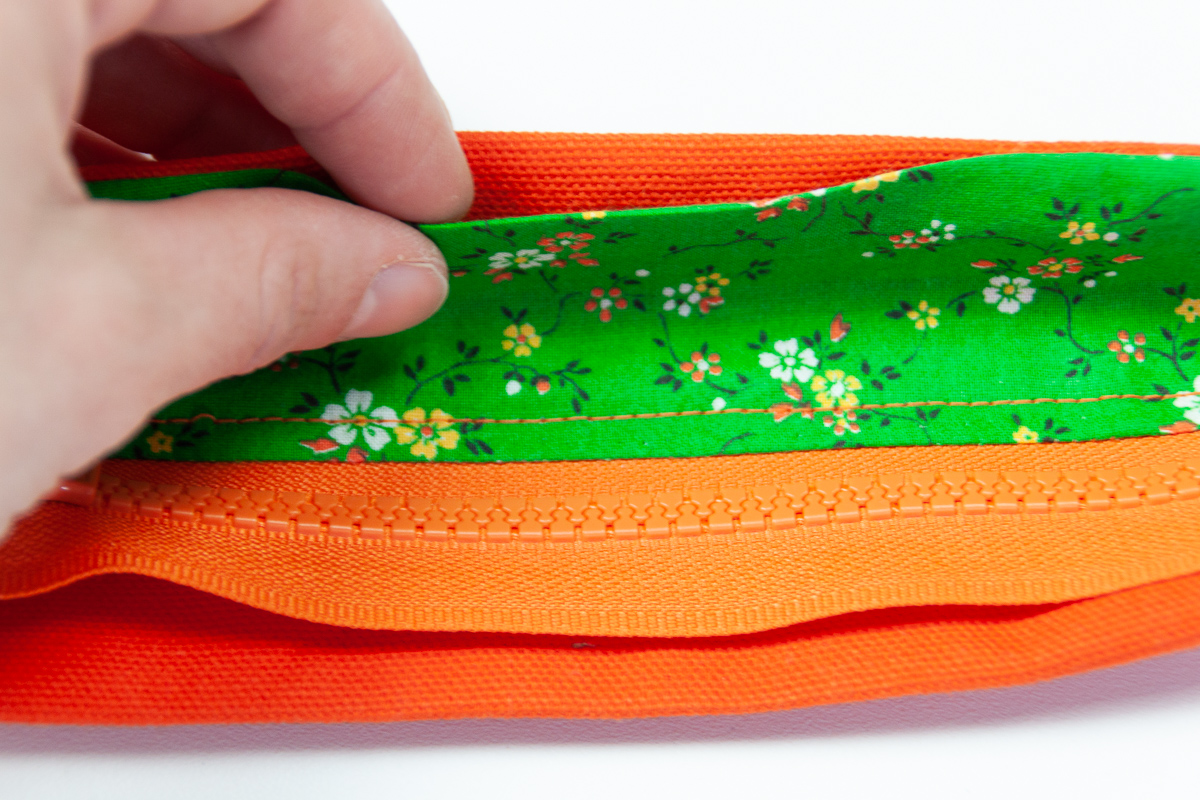
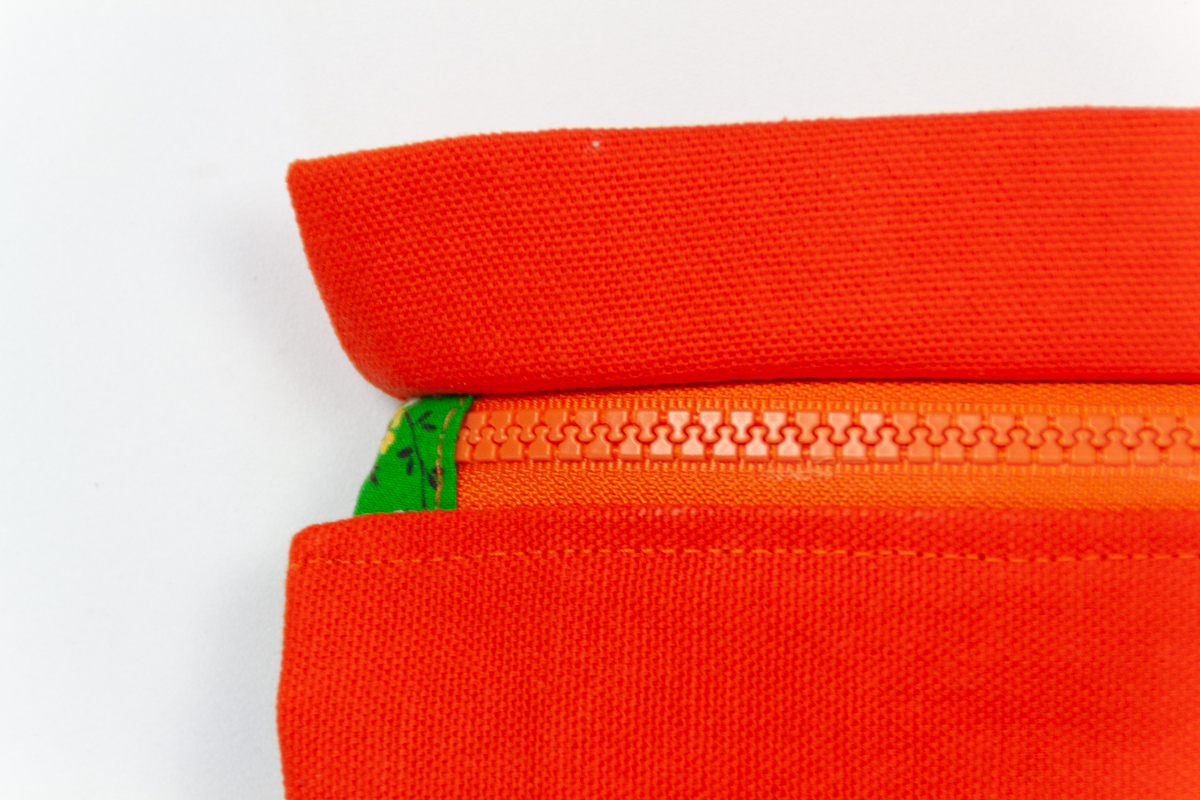
After shaping it and giving it a good press, stitch along the top of the zipper from outer layer side of the piece.

To do this, I move my needle to the far left side of the foot (not all machines have this option - a zipper foot would work well if your machine isn’t able to change the position of the needle). I place the left edge of the foot right along side the zipper (you can just make out the bump under the fabric in the photos) and stitch along the whole length of the piece going slow and steady.

Raspberry Rucksack Sew Along - Sewing a lined popup pocket - Sarah Kirsten

Here’s a view of the outside and inside of the stitching. You can see from the inside that it just barely catches the edge of the lining. Thankfully no one sees this so it doesn’t have to line up perfectly in the inside. For this stitch it matters more what the outside looks like.

The top of the Popup Pocket is done!

Raspberry Rucksack Sew Along - Sewing a lined popup pocket - Sarah Kirsten

Bottom of the Pocket

Fold the zipper flap up (by the way, the ends of those Zipper Ends can be trimmed off at any point).

Raspberry Rucksack Sew Along - Sewing a lined popup pocket - Sarah Kirsten

Place the whole top pocket piece you just sewed face down on the right side of the Bottom Pocket outer layer. Make sure that zipper flap is folded back so you don’t stitch through it.

Place the Bottom Pocket lining right side down on top.

So to clarify, the lining and the outer layer are right sides together, and the zipper of the top pocket piece is sandwiched in between the two facing the outer layer.

Sew the whole length of the seam through all layers with a 3'/8” (1 cm) seam allowance.

Raspberry Rucksack Sew Along - Sewing a lined popup pocket - Sarah Kirsten

Just like the top pocket pieces, fold all four corners with right sides together. Mark where they are 1 1/2” (3.8 cm) wide and stitch along the line.

It should look something like this.

Raspberry Rucksack Sew Along - Sewing a lined popup pocket - Sarah Kirsten

Again, fold both outer layer corners toward the center of the long side and edge stitch along the seam.

Then trim all four corner seam allowances to 1/4” (6 mm).

Raspberry Rucksack Sew Along - Sewing a lined popup pocket - Sarah Kirsten

Fold the whole piece in half so that the corners of the lining and outer layer you just sewed are aligned.

With the corners aligned, sew up the sides with a 3/8” (1 cm) seam allowance and leave a 3” (7.6 cm) opening in the top for turning the piece right side out.

Raspberry Rucksack Sew Along - Sewing a lined popup pocket - Sarah Kirsten

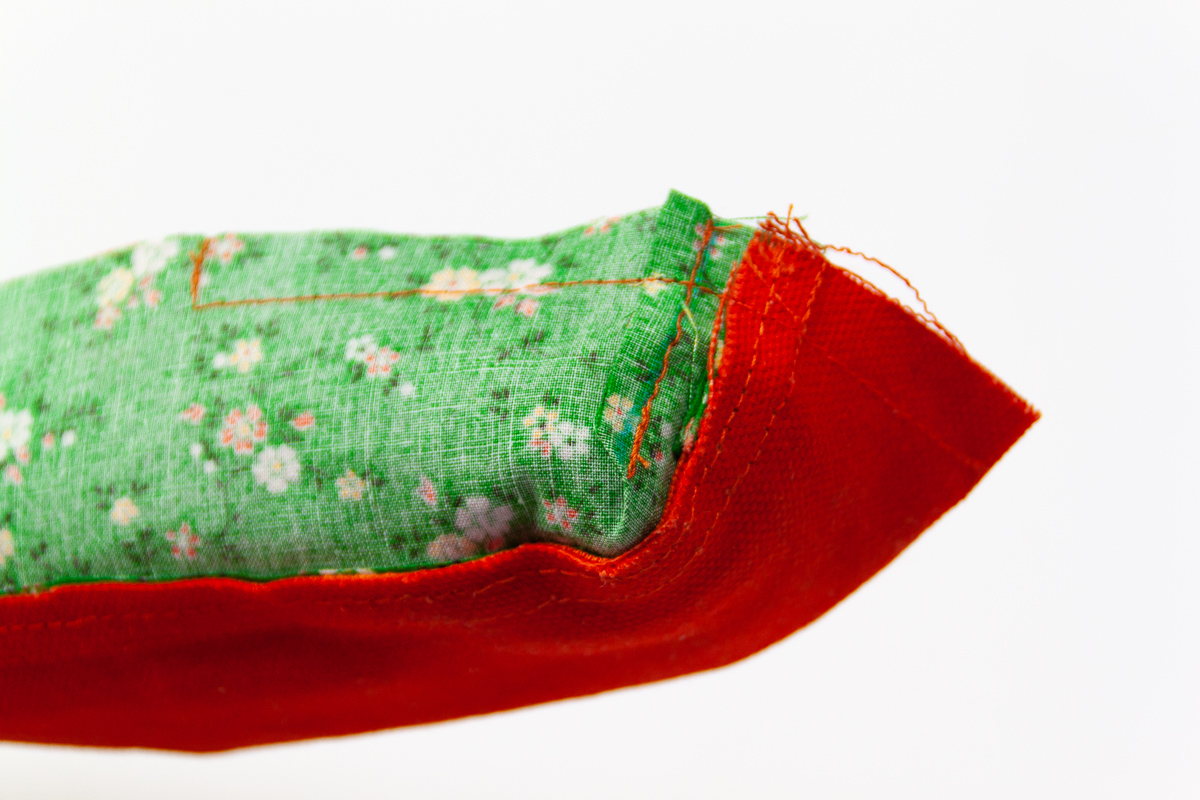
Trim both bottom corners like so and turn the piece right side out.

Raspberry Rucksack Sew Along - Sewing a lined popup pocket - Sarah Kirsten

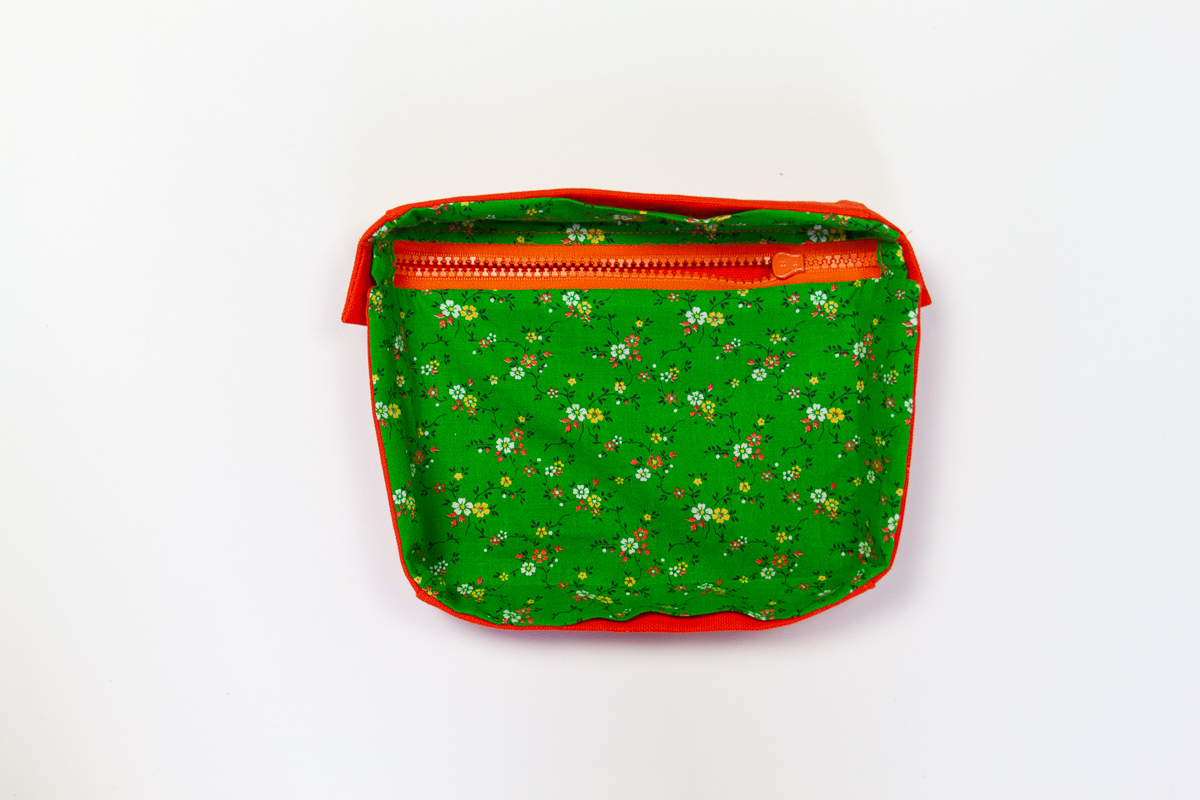
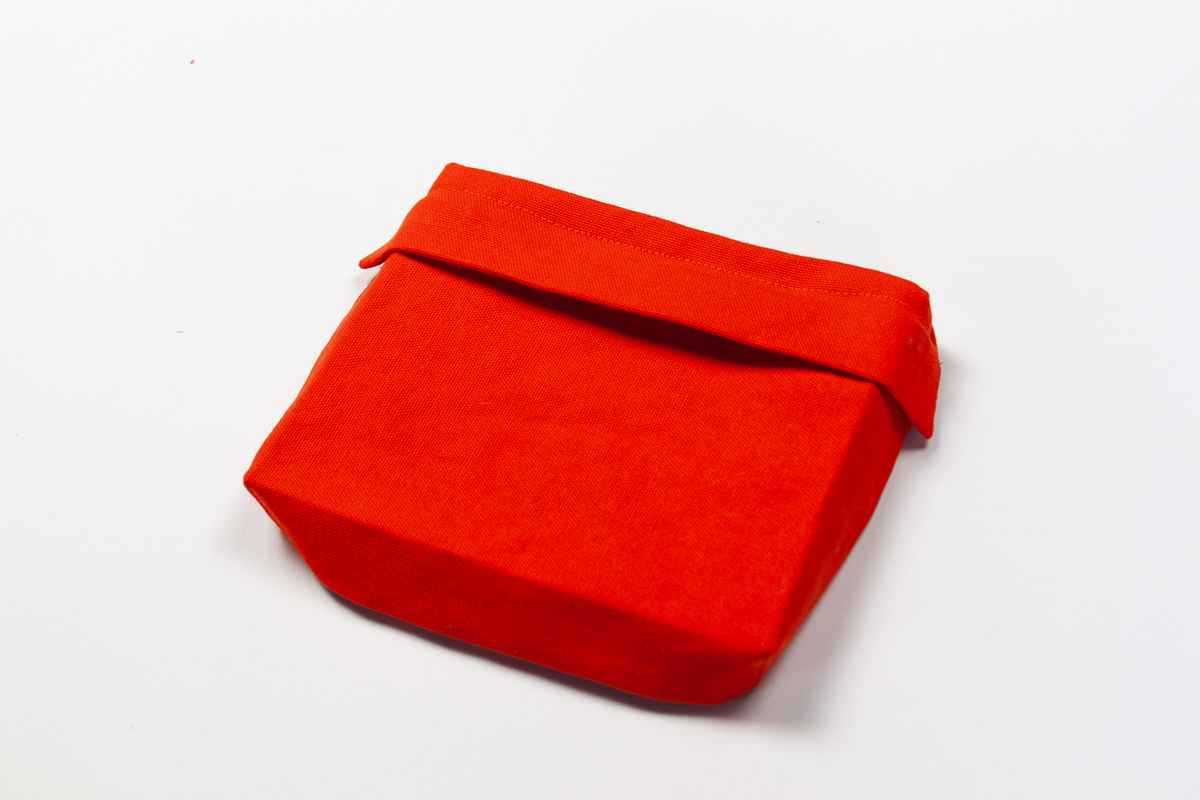
Shape it with your hands so it takes the shape of a box and give all the edges a good press with an iron.

Raspberry Rucksack Sew Along - Sewing a lined popup pocket - Sarah Kirsten

Fold the zipper flap back and edge stitch along the seam.

Raspberry Rucksack Sew Along - Sewing a lined popup pocket - Sarah Kirsten

Popup Pocket is DONE!

Raspberry Rucksack Sew Along - Sewing a lined popup pocket - Sarah Kirsten

Raspberry Rucksack Sew Along Number Two - Cutting Pattern Pieces and Fabric

All the pattern pieces of the Raspberry Rucksack are simple rectangles! Here’s what you need to make the pattern pieces.

Firstly, it’s nice to have sturdy paper so the pattern pieces are durable and can be used multiple times. I like to use this brown packaging paper you can find at Joann’s or Walmart or other basic stores. Another good option is freezer paper or any paper that is large enough for the pattern pieces.

Secondly, use a ruler that has a true 90 degree angle. You don’t need to have one of these fiberglass quilter’s rulers, you can use a simple straight edge ruler combined with a piece of typing paper or a book. It’s just helpful to have something that you can use to check if your angles are exactly 90 degrees.

Thirdly, you’ll need a pen and paper cutting scissors.

Raspberry Rucksack Sew Along - Sarah Kirsten

Starting on a straight edge of whatever paper you are using, make a line perfectly perpendicular to the paper’s straight edge. Once you have one straight line horizontally (the papers edge) and vertically (the line you just drew), you can base all of your measurements off of these two lines.

Using the measurements provided in the pattern and these two lines, cut out all the pattern pieces.

Raspberry Rucksack Sew Along - Sarah Kirsten

Once all the paper pattern pieces are cut, you can trace them out on your fabric. Trace around one pattern piece and then lay another piece right next to it so they can share the same line. Less marking, less cutting, less fabric!

You can also be strategic about cutting out the fabric pieces. You can lay the lining and outer layer on top of each other and cut both pieces at the same time. Just be sure to check that both pieces have their grainlines going the same direction. You can get away with cutting two layers stacked on top of each other like this, especially if the lining is a thin material like quilting cotton. I wouldn’t recommend also trying to stack interfacing on however. Cut the interfacing separately.

Raspberry Rucksack Sew Along - Sarah Kirsten

Once all your pattern pieces are cut you can move on to sewing!

Raspberry Rucksack Sew Along Number One - Collecting Supplies

The Raspberry Rucksack pattern is due to arrive March 6th! I’m so excited to release this pattern, and I wanted to give you a head start on the supplies needed. This pattern comes in two sizes, Little and Big. Here is the supply list for each.

Little Raspberry

  • ½ yard (0.5 m) - outer layer

  • ½ yard (0.5 m) - lining

  • 1 yard (1 m) - interfacing

  • 3 ½ yards (3.2 m) cotton webbing 1” (2.5 cm) wide

  • 2 rectangle D rings for 1” (2.5 cm) webbing

  • 2 slide adjusters (non-adjustable) for 1” (2.5 cm) webbing

  • 7” (18 cm) single pull zipper

  • 22” (56 cm) double pull bag zipper

  • 40” (1 m) double fold bias tape 1/2” (12.7mm)

Big Raspberry

  • ¾ yard (0.75 m) - outer layer

  • ¾ yard (0.75 m) - lining

  • 1 ½ yard (1.5 m) -interfacing

  • 3 ½ yards (3.2 m) cotton webbing 1” (2.5 cm) wide

  • 2 rectangle D rings for 1” (2.5 cm) webbing

  • 2 slide adjusters (non-adjustable) for 1” (2.5 cm) webbing

  • 9” (23 cm) single pull zipper

  • 32” (81 cm) double pull bag zipper

  • 1 ½ yards (1.4 m) double fold bias tape 1/2” (12.7mm)

Outer Layer

The outer layer should be a heavyweight fabric such as cotton canvas, waxed cotton canvas, heavyweight denim or corduroy, or upholstery fabric.

This bright yellow is 10 oz duck canvas from Joann’s Fabric and Craft.

Raspberry Rucksack Sew Along - Sarah Kirsten

Lining

Using simple quilting cotton works well for the lining. You can use any woven fabric as long as it’s fairly lightweight and brings you joy! It’s nice to use a bright fabric on the inside of bags so it’s easier to find things and it’s like sunshine whenever you peak inside.

Raspberry Rucksack Sew Along - Sarah Kirsten

Interfacing

It’s easy to get overwhelmed in the interfacing department. Don’t over think it. Just choose something medium to thick in stiffness. You want something that has a stiffness similar to thick, nice paper (like card stock) but not something that feels like cardboard. This pattern requires sewing through many layers at one time, so you don’t want to overwhelm your machine with too thick of interfacing.

If you’re using waxed canvas or another stiff outer layer, interfacing may not be needed.

Raspberry Rucksack Sew Along - Sarah Kirsten

Webbing

It’s nice to use thick webbing for this pattern because it gives the bag a really durable and sturdy feel. Pick your favorite color of 1” (2.5 cm) webbing and make sure it’s the same size as the hardware you’re getting! I like to use cotton webbing because of the nice feel, but you can use nylon or other webbing.

Raspberry Rucksack Sew Along - Sarah Kirsten

Hardware

Two rectangle D rings and two (non-adjustable) slide adjusters. You can find these in a bunch of styles and colors and materials. Have fun picking something that matches your fabric and is the right size for your webbing.

Raspberry Rucksack Sew Along - Sarah Kirsten

Zippers

Last and not least, zippers! You need two zippers - a single pull zip for the front popup pocket, and a double pull bag zip for the main compartment. You can use any style of zipper you would like - metal, molded plastic, or coil. This pattern was drafted for a zipper that is 1 1/4” wide (a common zipper width - if you’re ordering online, #5 is the gauge you want to go with.)

Here are some things to know about zippers:

The length of the zipper is defined by the length of the zipper teeth, not the length of the total zipper including the tails on the ends. So if you’re using a cut-to-length zipper, you will want to add an additional 1/2” or 3/4” to each end for some extra breathing room on the double pull bag zip. For the pocket zip, it needs to be exactly 7” (Little) or 9” (Big) and the tails actually get cut off anyway, so you don’t have to worry about adding extra.

It can be somewhat difficult to locate double pull bag zips. Surprisingly difficult actually. Jacket zips are much more common. The good news is that many jacket zips can be turned into bag zips. Let me show you how.

Raspberry Rucksack Sew Along - Sarah Kirsten

Here is a visual of the difference between bag zips and jacket zips. Bag zips are open in the middle and are closed on the sides (just think of how a duffle bag zips!). A jacket zip is open on the sides and is closed in the middle.

Raspberry Rucksack Sew Along - Sarah Kirsten

Not all zippers can be changed like this - but molded plastic can! If you have a jacket zip you want to change to a bag zip, simply zip one of the zipper pulls right off the end (you may have to cut the end of the zipper). Then turn the zipper around so you’re holding the open teeth on the other end. Turn the zipper pull around so the wide end is facing the open teeth. Insert each side of the teeth into the wide end of the zipper pull and then slide it on. Be sure to check if the teeth are lined up properly. Sometimes one end gets longer or shorter than the other. Simply take the zipper pull off and reinstall if the teeth aren’t even on the first try.

Raspberry Rucksack Sew Along - Sarah Kirsten

One more note about zippers. You see how the red zip on the left is 1 1/2” wide and the orange zip on the right is 1 1/4” wide? That has to do with their gauge. See how much larger the teeth are on the red zipper? Online you often see zippers advertised by a number. Something like “Lime green coil zipper #7.”

The red zipper on the left is #10 molded plastic and the orange zipper is #5 molded plastic. For this pattern, #5 is what you want.

Most longish zippers you find in the stores are #5, so I don’t worry too much if you’re shopping local. But if you’re ordering online the numbers can be confusing so bare that #5 in mind.

If you like this orange molded plastic zipper in all these photos, I am going to be offering it for sale when I release the Raspberry Rucksack Pattern!

Here’s another online zip resource with a wide variety of good options and an easy ordering process: Zipper Source.

Bias tape

Bias tape is used to bind the raw edges of the very last seam in the Raspberry Rucksack. You can either make your own out of your lining material, or you can buy double fold 1/2” (12.7 mm) bias tape in a matching or contrasting color! The seam it’s going on has a seam allowance of 3/8” (1 cm. If you’re making your own, the strip should be 1 1/2” (3.8 cm) wide.

That’s it!

You’re well on your way to having your own Raspberry Rucksack! More posts in the sew along series will be trickling on in the next few days as I get ready to launch. Release date is March 6th!

The Easiest Way to Sew Zipper Ends

Whether you are using a cut-to-length zipper (my personal favorite) or a regular zipper, the need sometimes arises to sew a nice fabric patch on the end of the zipper. Of all the ways to do this (most are terribly frustrating), this is the best method I’ve used. It’s reliable - works every time. It’s quick - only takes about a minute total. It looks neat - no raw edges which makes it good for a variety of applications. And best of all, it’s the least fussy - it’s easy to get the fabric lined up and sewn straightly.

Here’s how to do it.

1) Cut a rectangle of fabric about 4” (10 cm) long and 1/2” (1.3 cm) wider than the width of the zipper.

The easiest way to sew zipper ends - Tutorial by Sarah Kirsten

2) Fold the rectangle in half with right sides together. Sew both sides with a 1/4” (0.64 cm) seam allowance.

The easiest way to sew zipper ends - Tutorial by Sarah Kirsten

3) Turn the fabric right side out.

_MG_0765.jpg

4) Fold the top inside the little pouch so that the top of the fabric reaches all the way to the bottom.

The easiest way to sew zipper ends - Tutorial by Sarah Kirsten

5) Make sure the folded edge of the pouch is even all the way around. Insert the zipper inside. (Note: Depending on the application you’re using it for and the type of zipper, you may want to remove some zipper teeth so you don’t sew over them.)

The easiest way to sew zipper ends - Tutorial by Sarah Kirsten

6) Stitch near the top of the pouch through all layers.

The easiest way to sew zipper ends - Tutorial by Sarah Kirsten

That’s it! You’re done.

In my free Pear Pouch Pattern I use a different method, but this would be an excellent alternative. In fact, this is, simply put, a better method. More reliable and less fussy all around.