


Tiny Art
One quite busy day, a gentle idea whispered inside and said, “why not make a tiny art show above your shoes?” So I put down whatever I was doing and got out my art supplies.
Here’s one fun way to make a tiny art show for your space
1) Find some paper. Measure out the size you want the finished tiny pieces (this is a 4”x6” card) and draw cut lines.

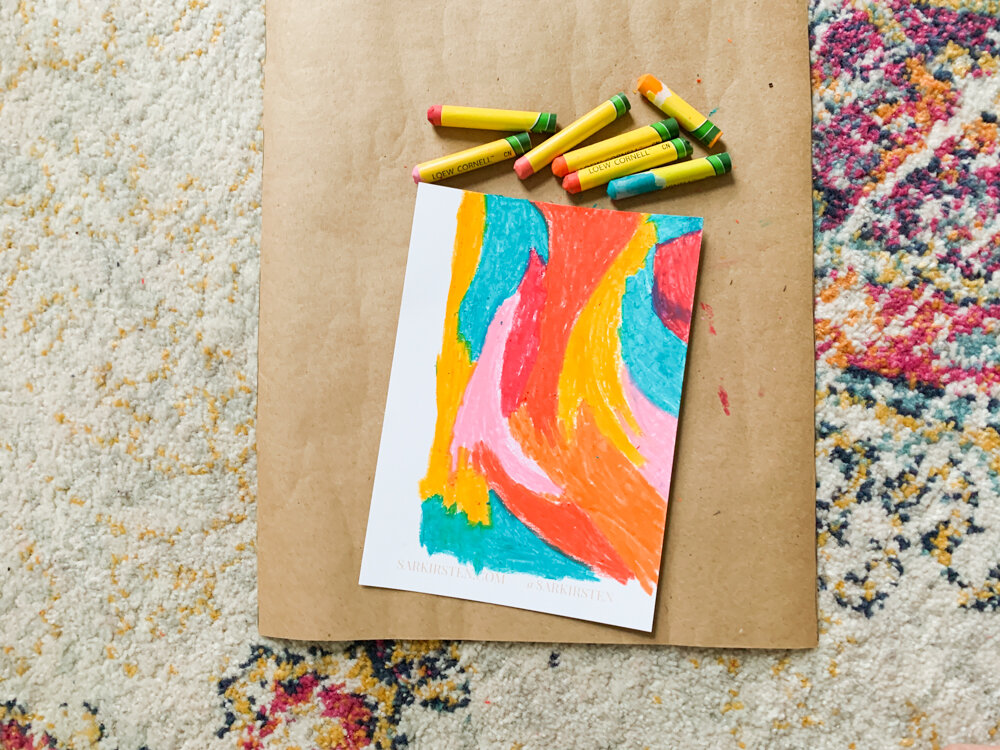
2) Pick out some colors that make you happy. Start drawing on the other side of the paper.

3) Draw more.

4) And more.

5) And more. Until all the spaces you want are filled with color you like.
6) Then turn the paper over and cut along the lines.


7) Pick out your favorite pieces of the bunch. Stick your favorite pieces to the wall in a place that brings you delight.

And after I finished, I went back to my busy day feeling refreshed, fulfilled, and delighted.
Painting Wall
One of my friends, in reference to a small gathering I hosted, recently said, “it was a nice reminder that your house doesn’t have to be done for it to feel warm and welcoming.”
Hosting is kind of scary to me. Will they like my food? Will it be awkward? Will everyone leave feeling heard and built up and encouraged? Will I make a fool of myself in some way?
I don’t know. But at least I have my wall of paintings. Perhaps that’s enough.


How to Make Your Own Quilted Mask Design
Want to make a quilted mask with your own quilt design?
Here’s how to do it!
Supplies you’ll need:
Mask pattern (a great option is the Melon Mask!)
Paper
Pen
Paper Scissors
Ruler

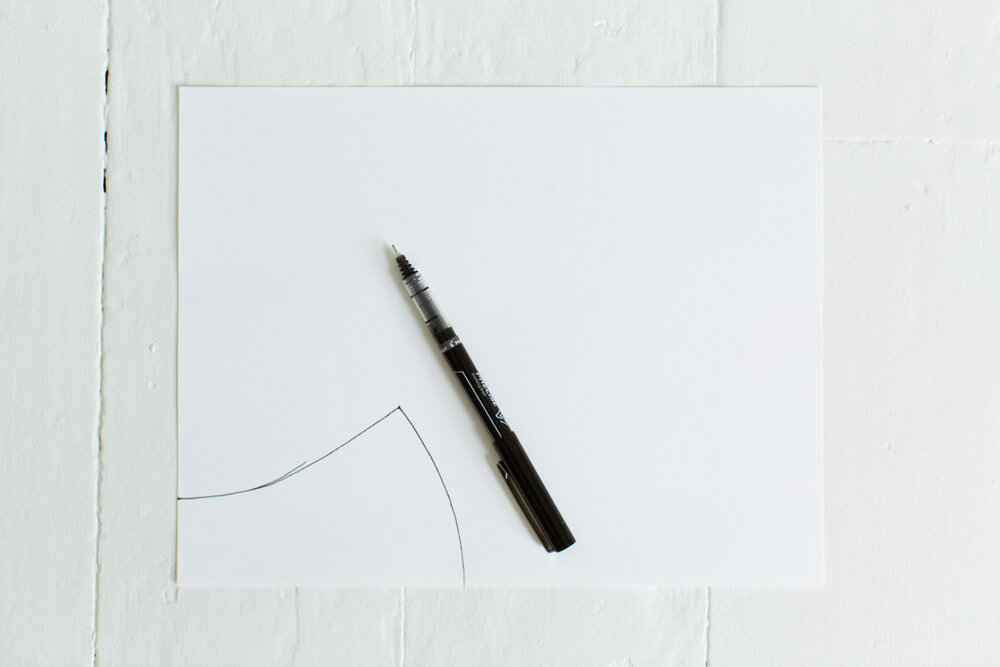
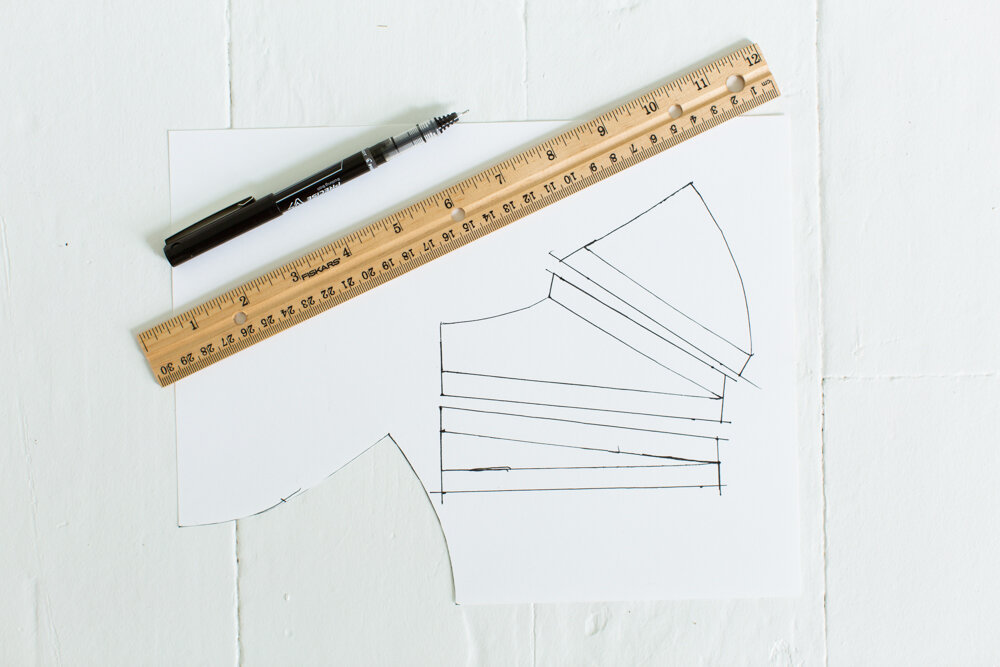
1) Fold the mask pattern in half and trace around it.

2 - the fun step) Draw whatever quilt design you would like to have on the mask.

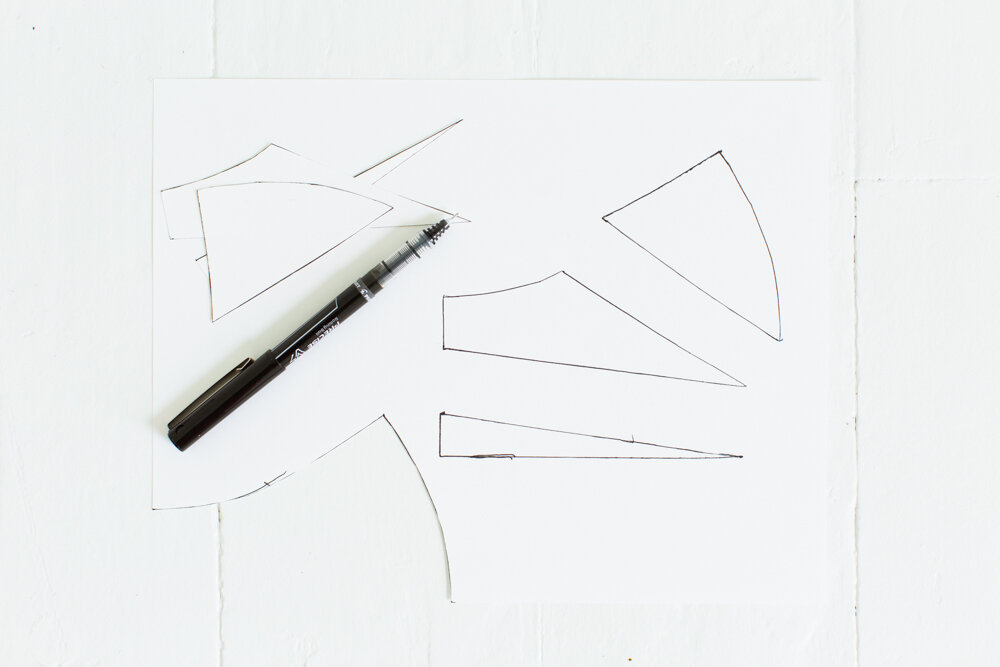
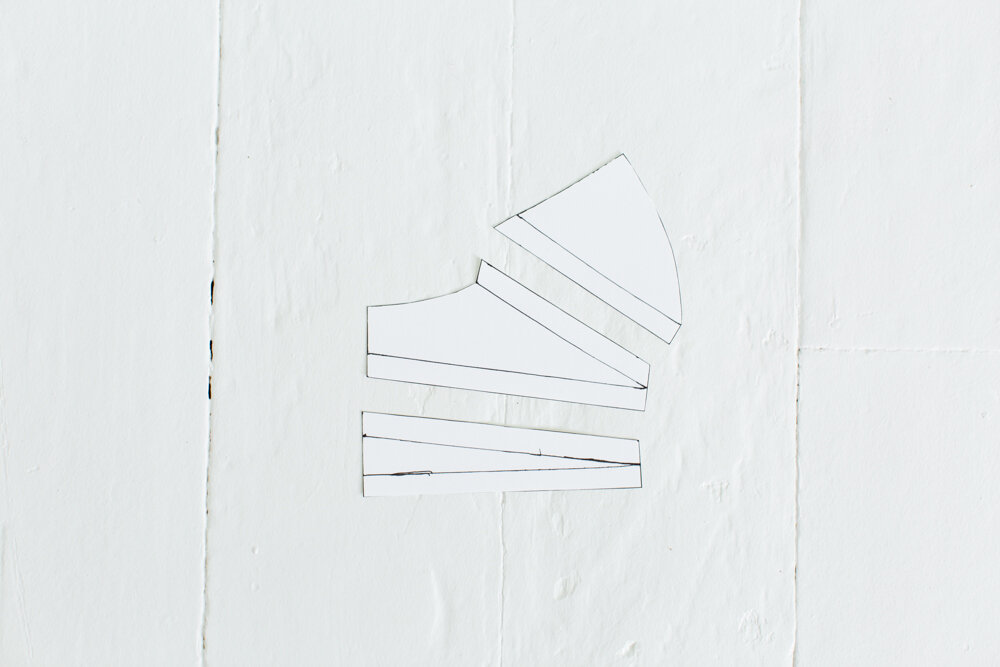
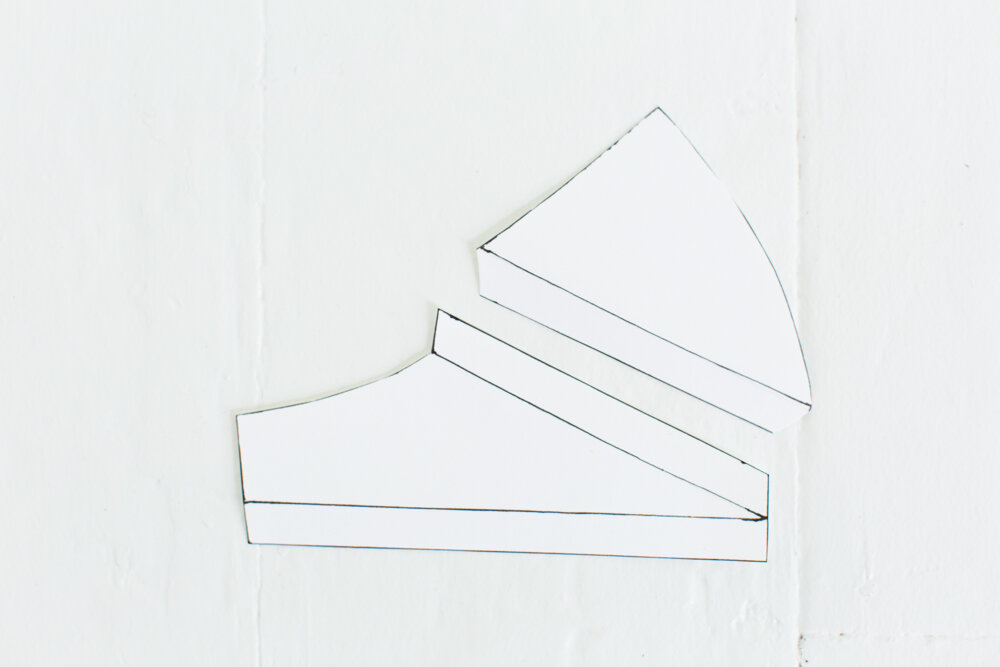
3) Cut along the lines to cut out the individual pieces. In this case there are 3 pieces. Lay them on the paper in the order that they will be sewn together. (Be sure to lay them with plenty of space in between.) Trace around each piece.
4) Add 3/8” (1 cm) seam allowance to all the sides that will be sewn to another piece. (You only need to add the seam allowances where you’re sewing pieces together as a result of your new design. For example, the curved nose piece doesn’t need a seam allowance added because that was already built into the pattern.)
Don’t worry about what the ends of the seam allowances look like for now. You will true them up in a few steps.
5) Cut out the pieces, seam allowances included. Lay them out in the arrangement they will be sewn.
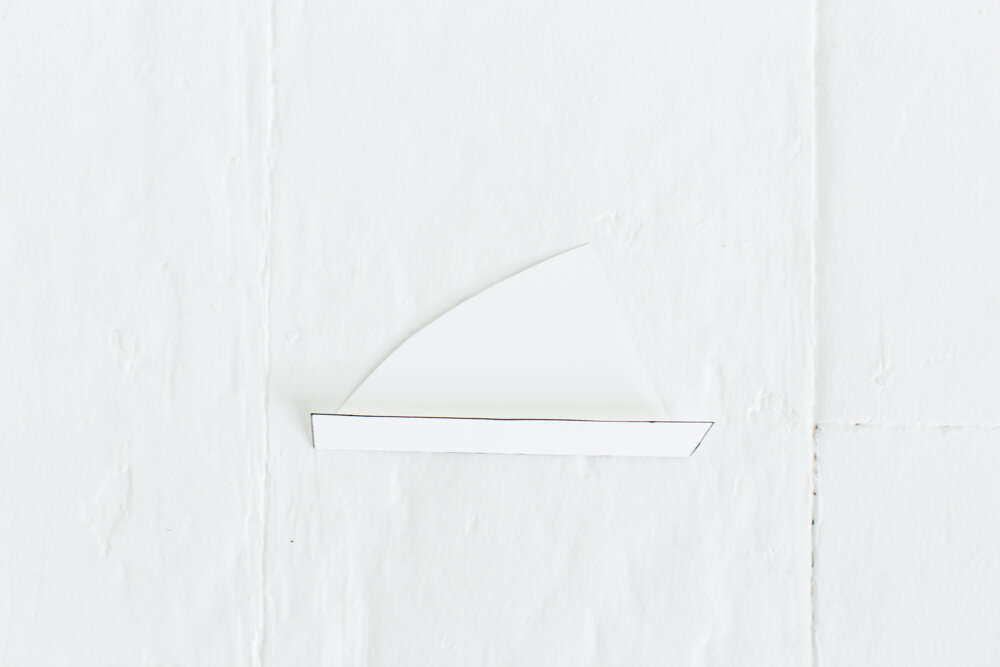
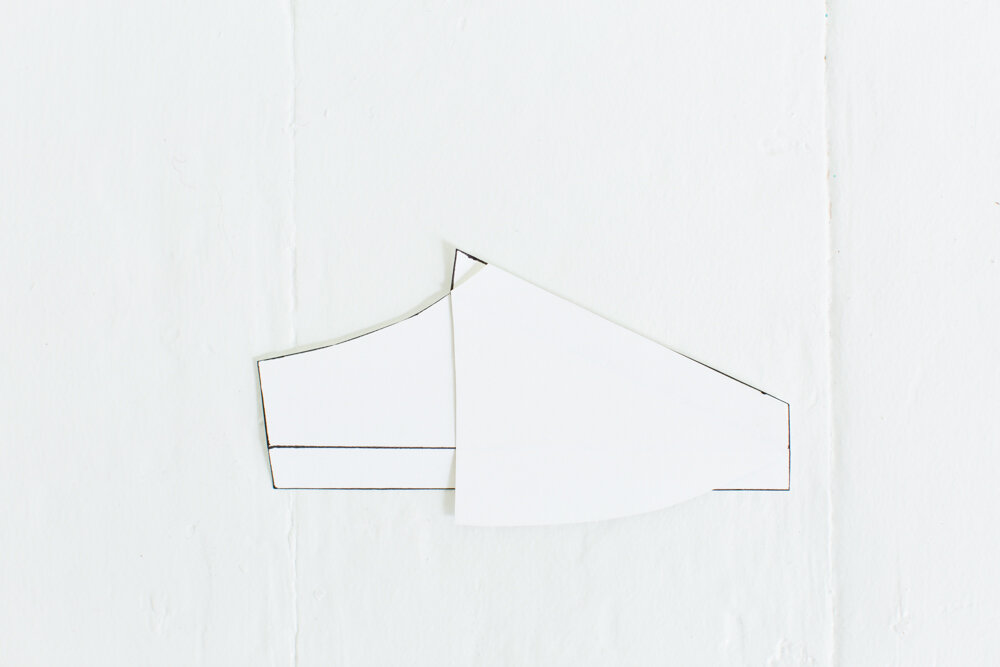
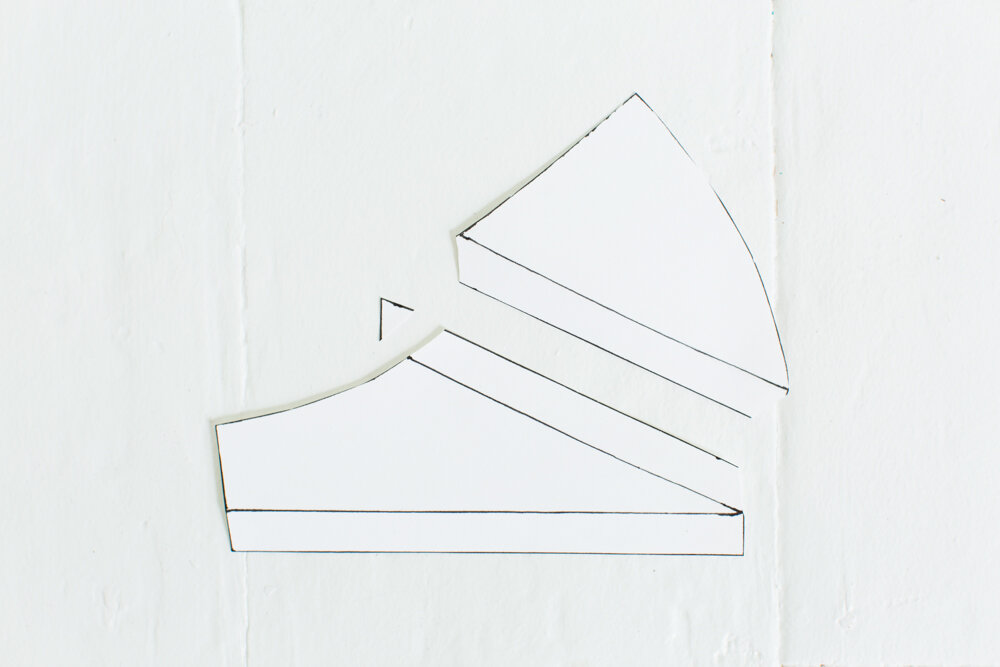
6) To true up the seams, take the top piece and fold the paper along the seam allowance line. Trim off the tips of the seam allowance so the edges match the edges it’s folded against.
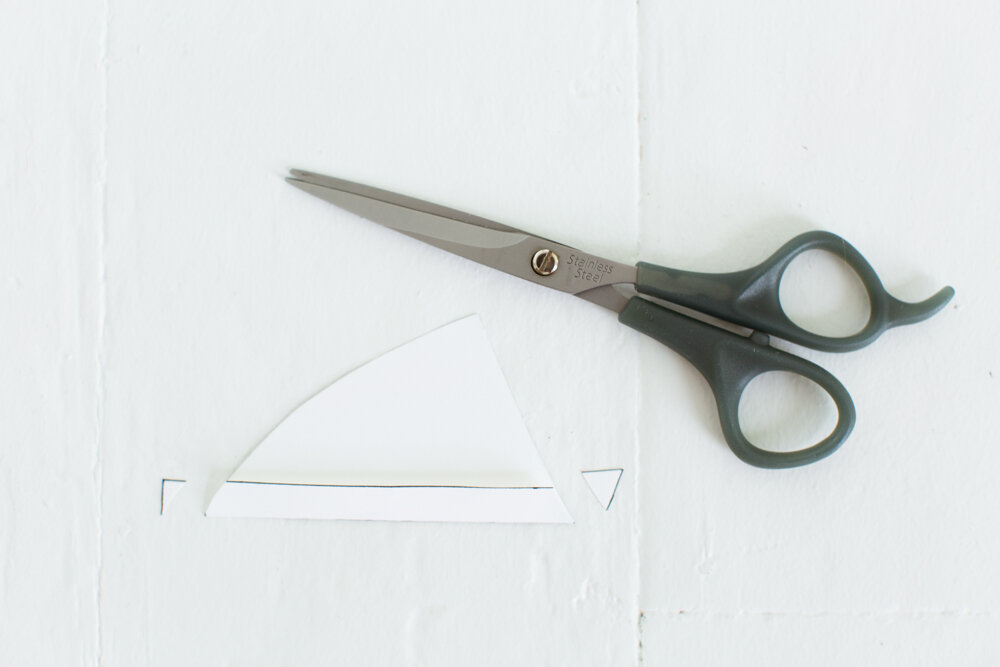
7) To true up the next piece, lay the first piece on top of the second piece as if you were sewing them together. Trim off the tips of the second piece so the edges of the first piece and second piece match.
8) Follow the same steps to true up the seams of all the pieces. Label the pieces with how many pieces of fabric to cut of each.
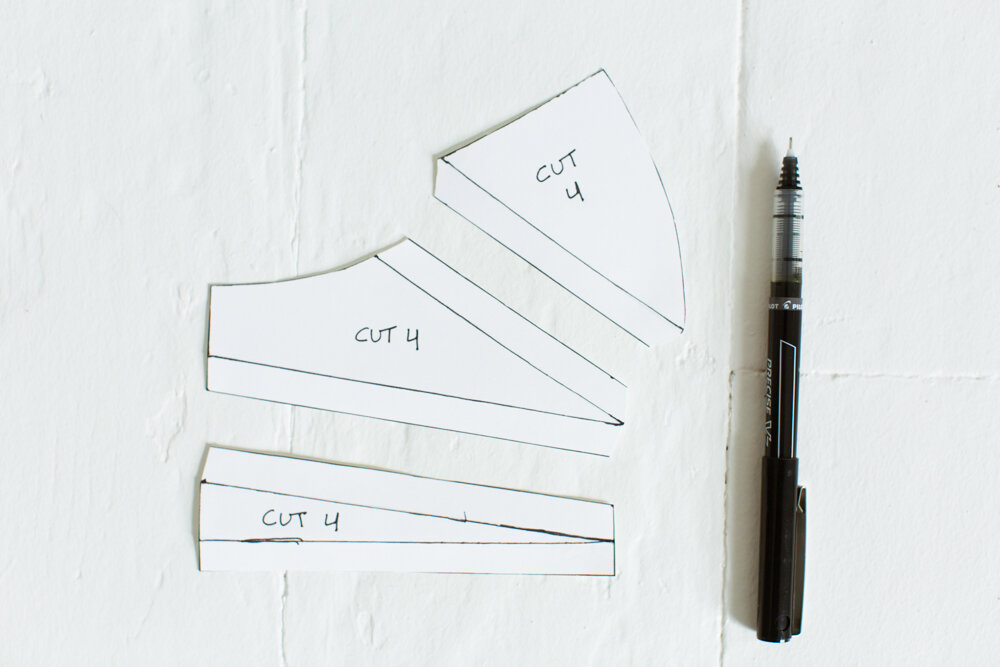
That’s it! Good work. You’ve just made your own quilted mask pattern.
To get some tips on how to sew your mask together, check out the Melon Mask Sew Along.
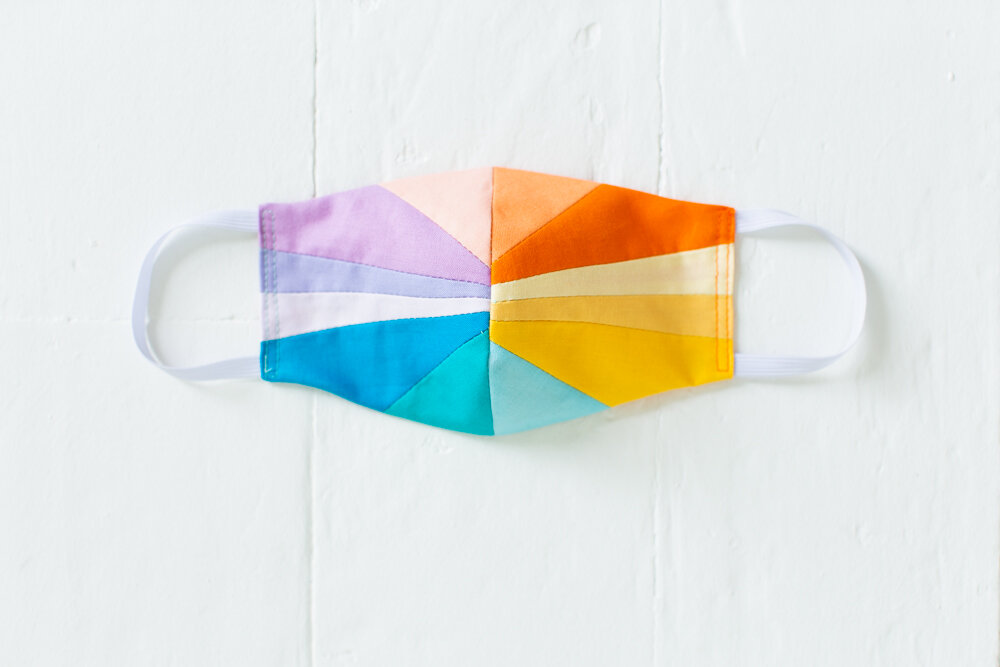
Here’s how the mask design from this tutorial turned out.
If you don’t want to make your own mask design, you can grab my quilted mask pattern here!
Melon Mask Sew Along
The Melon Mask is here to bring you some joy. Here’s a photo version of how to sew it.
Let’s jump in…
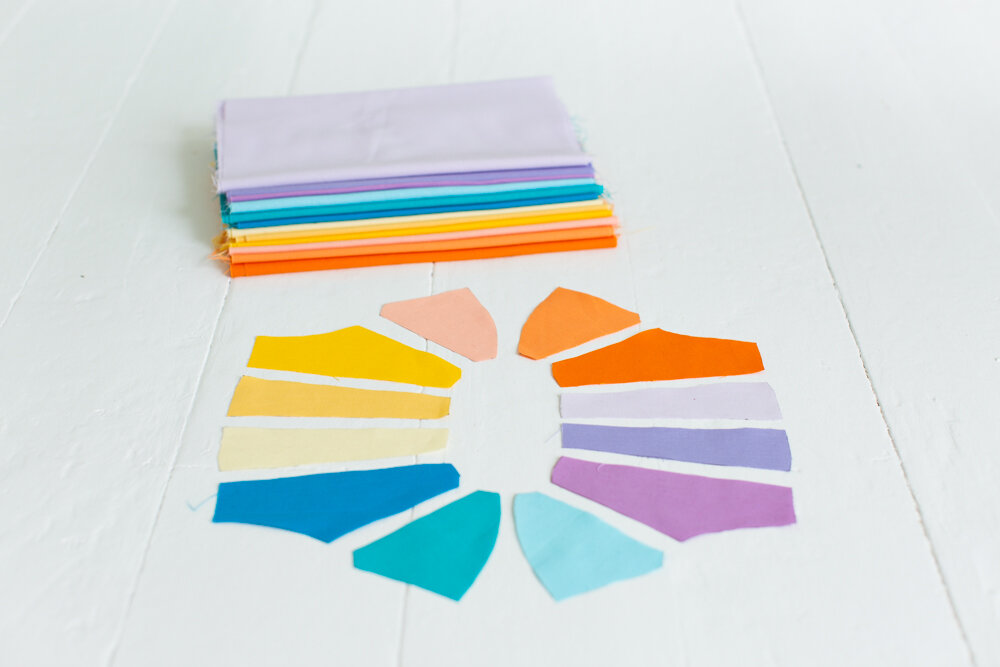
Step 1: Pick out your favorite colors. If you want a coloring sheet to help plan colors, download the PDF here.

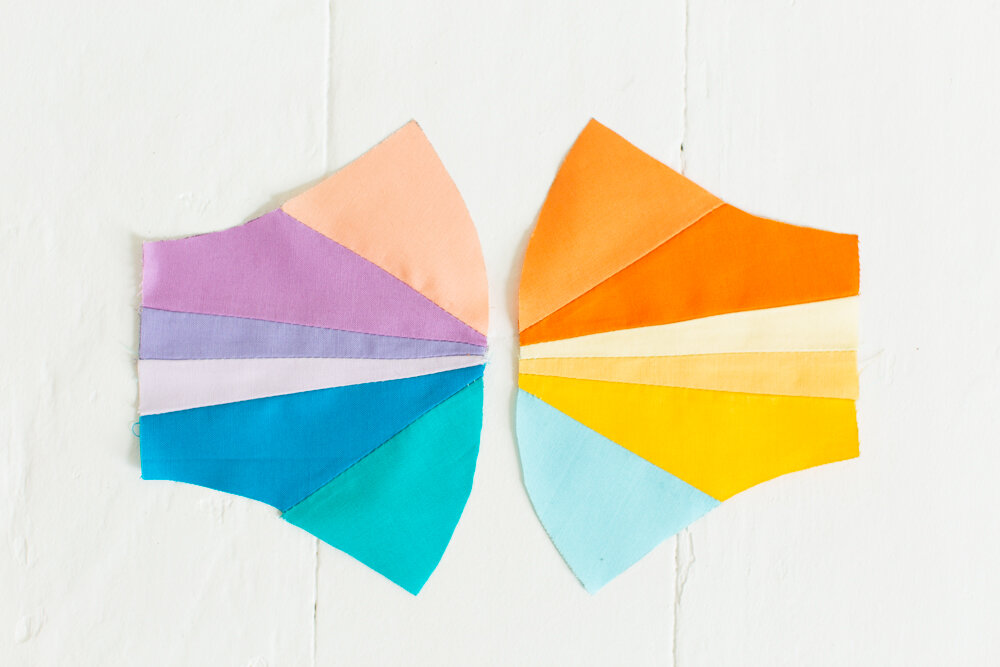
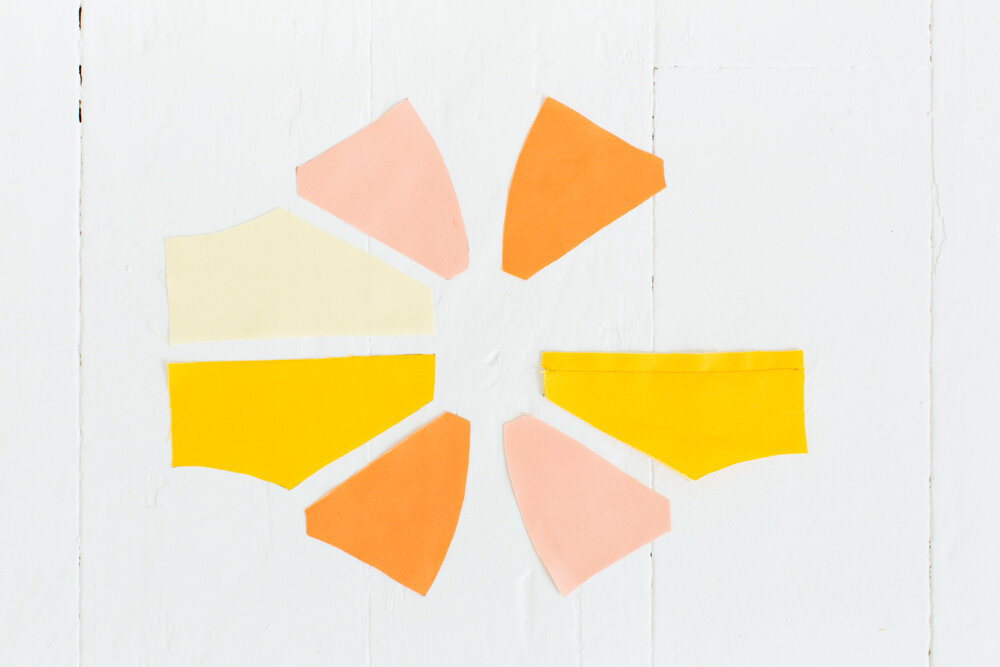
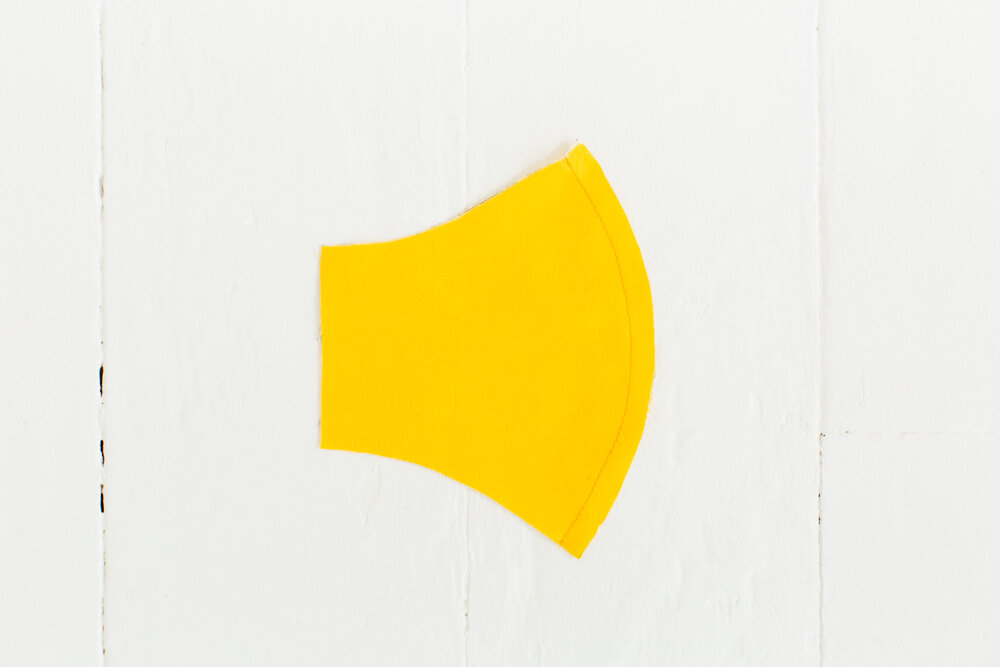
Step 2: Cut out all the pieces. Lay the front pieces out in the arrangement you want them on the finished mask.

We’ll start by sewing the right side of the mask together first.
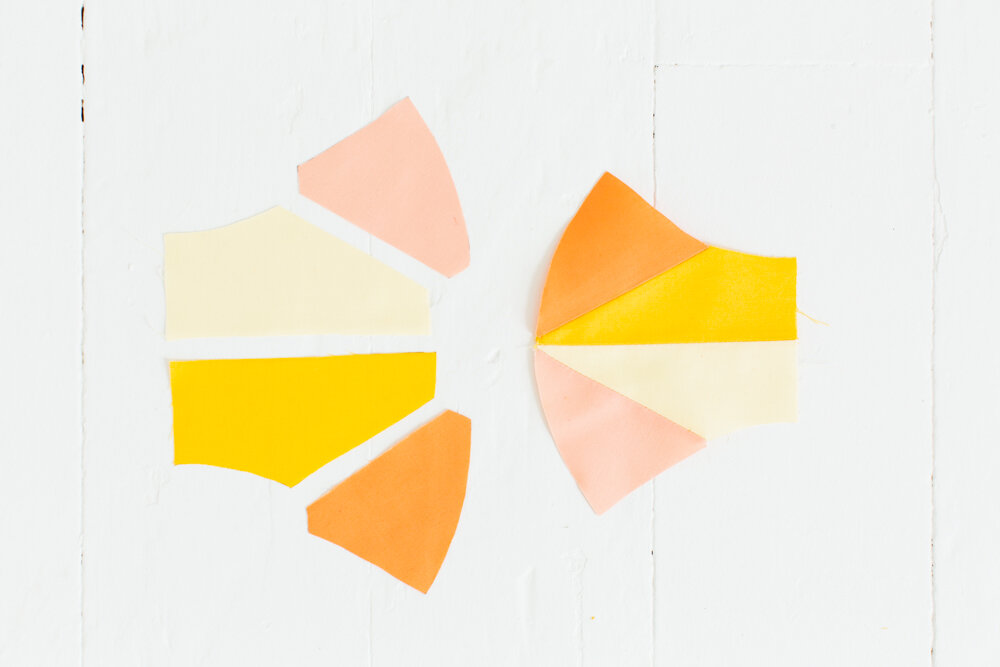
Step 3: Sew the two right center pieces with right sides together. 3/8” (1 cm) seam allowance.

Step 4: Sew on the top right nose piece with right sides together. 3/8” (1 cm) seam allowance.
Be sure to move the seam allowance of the center pieces out of the way so they don’t get caught in the stitching.

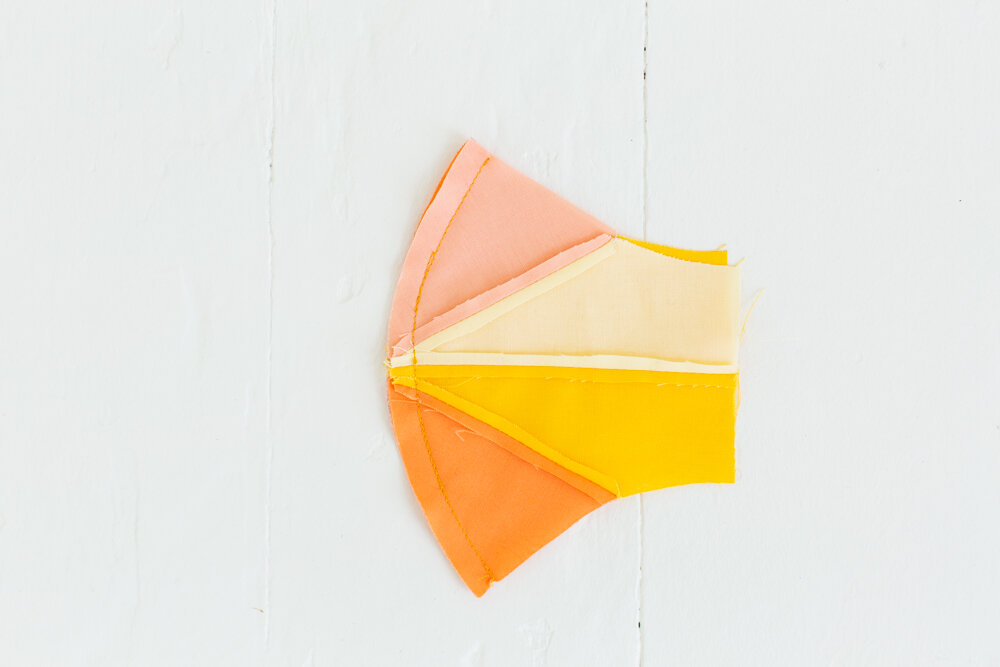
Step 5: Sew on the bottom right nose piece with right sides together. 3/8” (1 cm) seam allowance.
Be sure to move the seam allowance of the center pieces out of the way again so they don’t get stitched through.

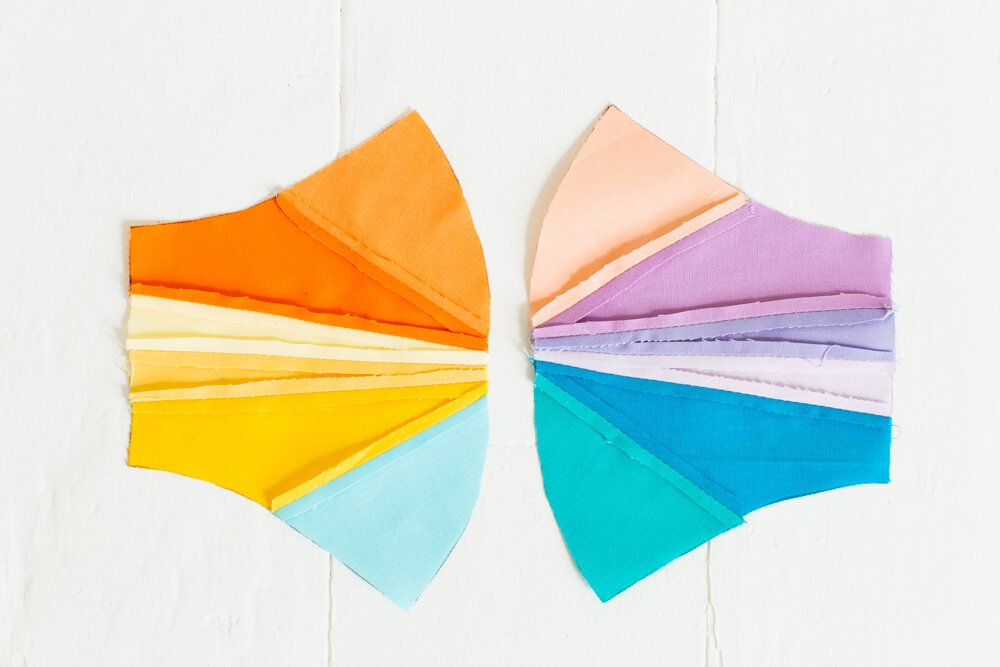
Take a moment to admire how lovely it’s coming together.
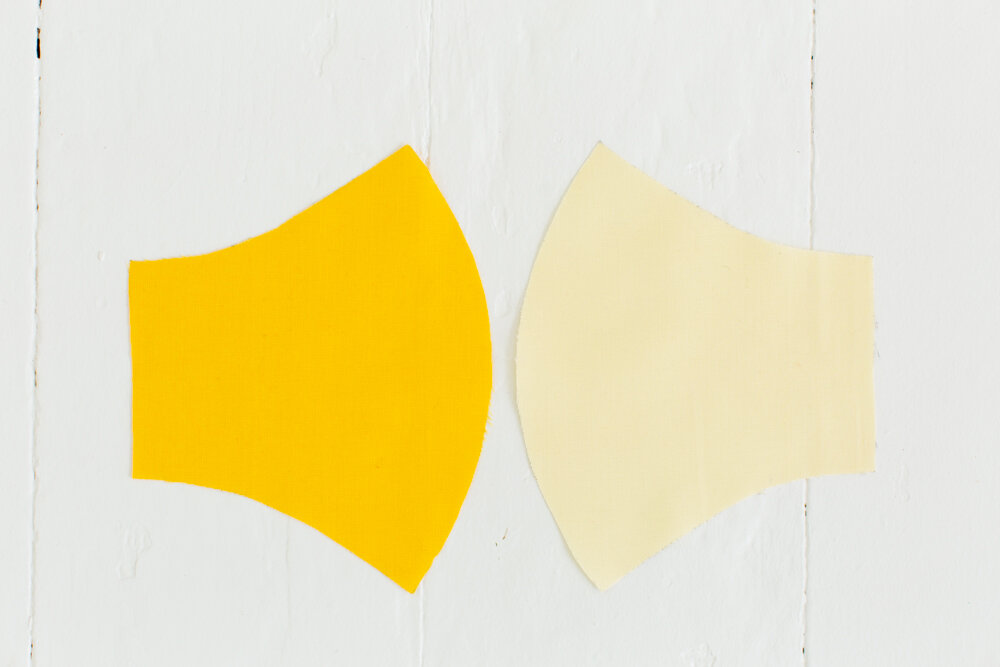
Step 6: Repeat steps to sew the left side of the mask together.

Step 7: Trim seam allowances in half. Press seams open with a steamy iron.

Step 8: Sew right and left sides of the mask with right sides together. 3/8” (1 cm) seam allowance.
Be extra mindful here of matching up the center seams!
Step 9: Trim seam allowance in half. Clip into seam allowance along the curve. Press seam open.

Step 10: Sew back pieces with right sides together. 3/8” (1 cm) seam allowance.
Step 11: Trim seam allowance in half. Clip into seam allowance along the curve. Press seam open.
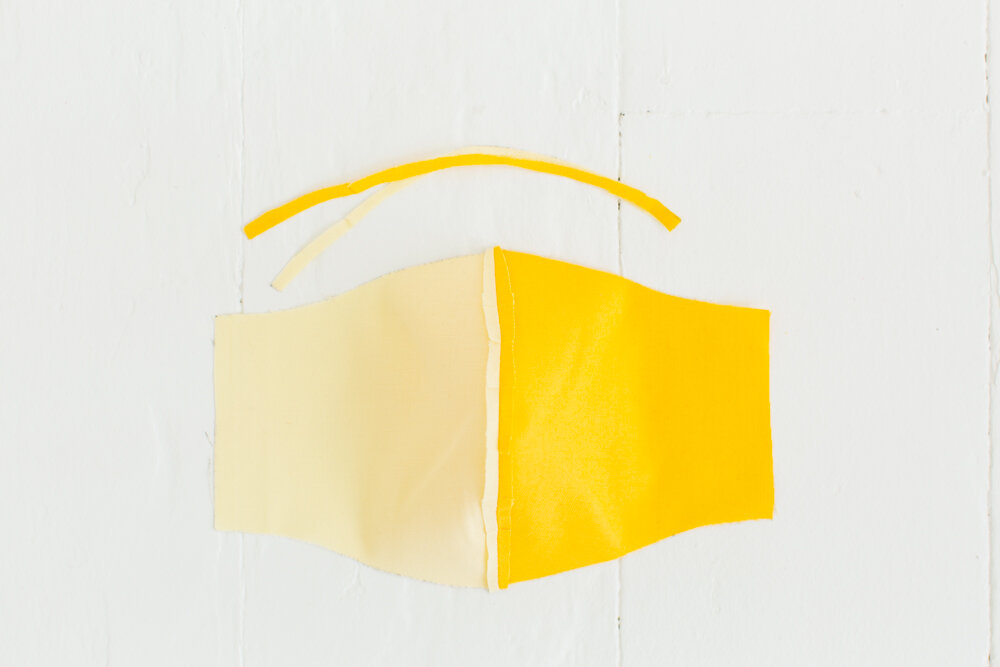
Step 12: Place the front and back with right sides together. The front should be slightly larger than the back.

Step 13: Sew along the top and bottom edge. 3/8” (1 cm) seam allowance.
Step 14: Clip into seam allowances along the curve.

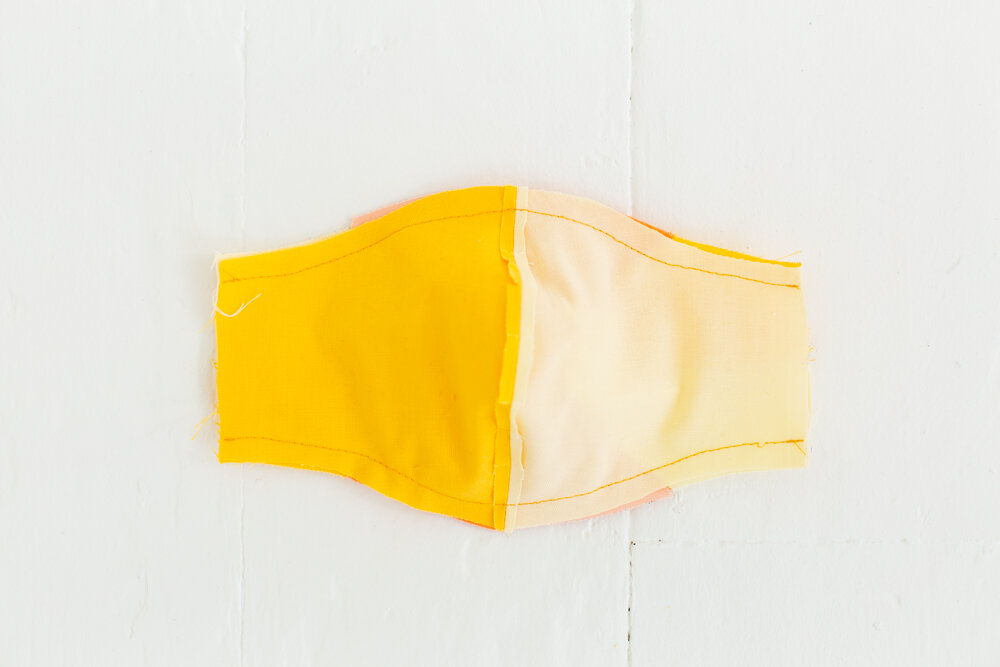
Step 15: Turn mask right side out. Press edges with steam iron.

Step 16: Fold the ends in 3/8'“ (1 cm). Press with steamy iron.

Step 17: Pin one end of elastic 1/2” (1.3 cm) deep on one side of the mask. Try it on and determine what length is right for your ears (plus the seam allowance!). Cut two pieces of elastic that length.

Step 18: Stick the ends of the elastic in 1/2” (1.3 cm) deep. Sew a 1/4” (0.6 cm) wide rectangle along the edge of the fabric.

Rejoice! What a good job you’ve done! #SKmelonmask

If you haven’t grabbed the pattern yet, you can get it here.
If you enjoyed this sew along, check out the Olive Undies sew along!


