The No Sweat Guide to Selecting Sweatshirt Fabric

Sweatshirt fabric guide - Sarah Kirsten

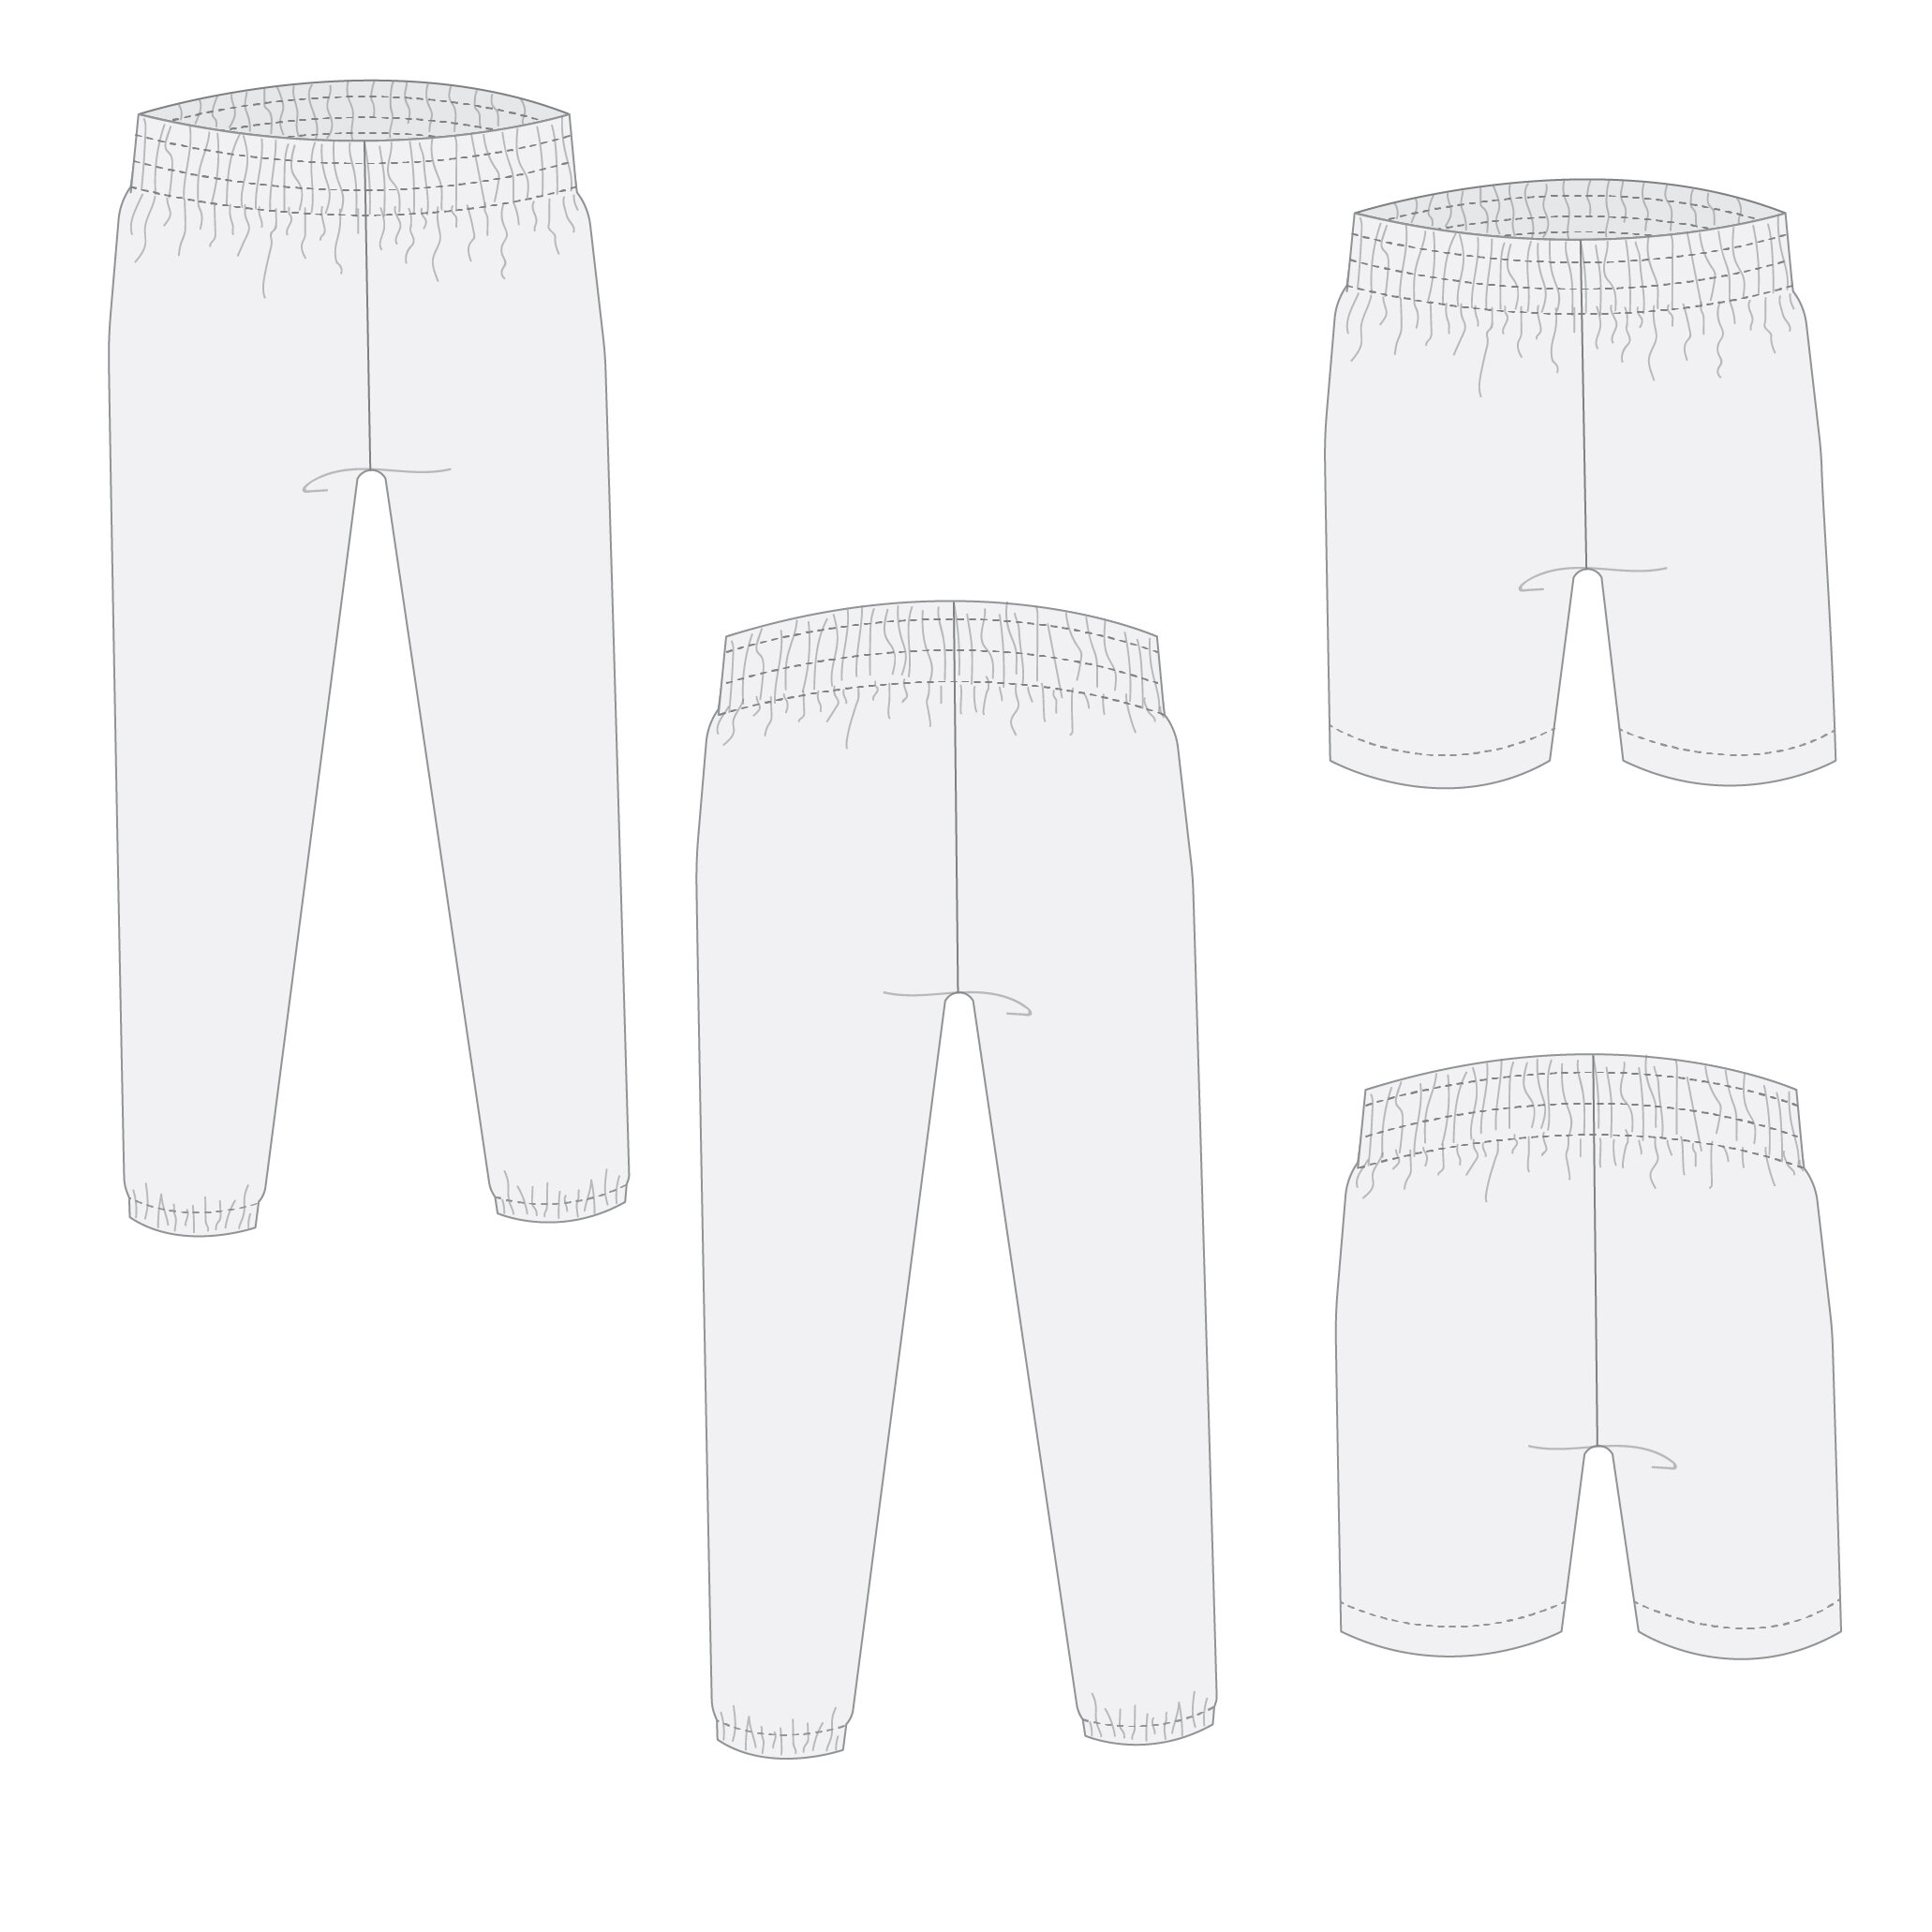
Here is a fun guide for selecting the perfect fabric to make your ideal Sweet Pea Sweatsuit vision a reality.

What is this fabric called?

It’s called sweatshirt fabric (even if making pants) and is in the knit category on websites and in stores.

Stretchy vs non stretchy

There are stretch and non stretch sweatshirt fabrics. The non stretch is easier to manage on the sewing machine. If you are a beginner, I recommend getting non stretch.

Fabric descriptions don’t always say if it has stretch or not, so don’t sweat it too much if you can’t find it in the description. It will turn out beautifully either way, just an extra good challenge to sew when it has some stretch.

Fabric weight

Here are some descriptions to serve as a starting point for figuring out weight.

10 oz — This is on the light side of the sweatshirt fabric spectrum. It’s heavier than a t-shirt weight, but quite a light sweatshirt. It barely crosses over into sweatshirt-land from long-sleeve-shirt-land.

I don’t recommend this weight for the Sweet Pea Sweatsuit and mention it mostly for the context of understanding sweatshirt fabric weight, but if you want a really lightweight sweatsuit, this would be a good option.

14 oz — This is solidly in the middle of sweatshirt-land. Not one you wear on the coldest of winter nights, but one you grab to go on a picnic on a cool summer evening, or use to layer underneath a puffy jacket as you fly down the hillside on your childhood sled.

20 oz - The most delicious of all fabrics in sweatshirt-land. Thick, firmly soft, confidently durable, wears beautifully with time. This is the one to go with if you want a long lasting sweatsuit that makes you feel extra held together and hugged. A sweatsuit to go through years of memories with you. Think of the thickest hoodie you’ve ever owned or wanted to steal from your sister. This is it.

Fabric content

I recommend 100% cotton fabrics because they age well with wear. Have you ever found one of those cool thick sweatshirts from a thrift store or family member that is 20 or 30 years old and maybe has some holes and the trim is a little tattered but you love it and wear it anyway because it’s so soft? Those are usually 100% cotton sweatshirts.

Ribbing

Ribbing is used for the cuffs, waistband, and neckband on sweatshirts. Although ribbing is it’s own category within knit fabrics and works the best, you can use any thick-ish knit fabric that has 20% or more stretch.

The ideal fabric for the cuffs, waistband, and neckband is high stretch and high recovery knit. “Recovery” is when a fabric goes back to its original width and shape after being stretched.

This is 100% cotton sweatshirt fabric in 16 oz weight.

This is 100% cotton sweatshirt fabric in 16 oz weight.

This is 100% cotton sweatshirt fabric in 16 oz weight. Cuffs, waistband, and neckband is high stretch, high recovery ribbing.

This is 100% cotton sweatshirt fabric in 16 oz weight. Cuffs, waistband, and neckband is high stretch, high recovery ribbing.

This is 100% cotton sweatshirt fabric in 20 oz weight.

This is 100% cotton sweatshirt fabric in 20 oz weight.

This is 100% cotton sweatshirt fabric in 20 oz weight.

This is 100% cotton sweatshirt fabric in 20 oz weight.

All of the fabric used to make samples for these patterns came from Nick of Time Textiles. They have a delicious selection. (Not sponsored)

Tiny Art

One quite busy day, a gentle idea whispered inside and said, “why not make a tiny art show above your shoes?” So I put down whatever I was doing and got out my art supplies.

Here’s one fun way to make a tiny art show for your space

1) Find some paper. Measure out the size you want the finished tiny pieces (this is a 4”x6” card) and draw cut lines.

Tiny Art - Sarah Kirsten

2) Pick out some colors that make you happy. Start drawing on the other side of the paper.

Tiny Art - Sarah Kirsten

3) Draw more.

Tiny Art - Sarah Kirsten

4) And more.

Tiny Art - Sarah Kirsten

5) And more. Until all the spaces you want are filled with color you like.

Tiny Art - Sarah Kirsten

6) Then turn the paper over and cut along the lines.

Tiny Art - Sarah Kirsten

7) Pick out your favorite pieces of the bunch. Stick your favorite pieces to the wall in a place that brings you delight.

Tiny Art - Sarah Kirsten

And after I finished, I went back to my busy day feeling refreshed, fulfilled, and delighted.

Painting Wall

One of my friends, in reference to a small gathering I hosted, recently said, “it was a nice reminder that your house doesn’t have to be done for it to feel warm and welcoming.”

Hosting is kind of scary to me. Will they like my food? Will it be awkward? Will everyone leave feeling heard and built up and encouraged? Will I make a fool of myself in some way?

I don’t know. But at least I have my wall of paintings. Perhaps that’s enough.

My House - Sarah Kirsten

How to Make Your Own Quilted Mask Design

Want to make a quilted mask with your own quilt design?

Here’s how to do it!

Supplies you’ll need:

  • Mask pattern (a great option is the Melon Mask!)

  • Paper

  • Pen

  • Paper Scissors

  • Ruler

How to Make Your Own Quilted Mask Design - tutorial with tons of photos by Sarah Kirsten

1) Fold the mask pattern in half and trace around it.

How to make your own quilted mask design
How to Make Your Own Mask Quilted Design - Tutorial with tons of photos

2 - the fun step) Draw whatever quilt design you would like to have on the mask.

How to Make Your Own Quilted Mask Design - Sarah Kirsten

3) Cut along the lines to cut out the individual pieces. In this case there are 3 pieces. Lay them on the paper in the order that they will be sewn together. (Be sure to lay them with plenty of space in between.) Trace around each piece.

How to Make Your Own Quilted Mask Design - Tutorial with tons of photos

4) Add 3/8” (1 cm) seam allowance to all the sides that will be sewn to another piece. (You only need to add the seam allowances where you’re sewing pieces together as a result of your new design. For example, the curved nose piece doesn’t need a seam allowance added because that was already built into the pattern.)

Don’t worry about what the ends of the seam allowances look like for now. You will true them up in a few steps.

How to make your own quilted mask design - Sarah Kirsten

5) Cut out the pieces, seam allowances included. Lay them out in the arrangement they will be sewn.

How to Make Your Own Quilted Mask Design - Tutorial with tons of photos

6) To true up the seams, take the top piece and fold the paper along the seam allowance line. Trim off the tips of the seam allowance so the edges match the edges it’s folded against.

How to Make Your Own Quilted Mask Design - Tutorial with tons of photos
How to make your own quilted mask design - Sarah Kirsten

7) To true up the next piece, lay the first piece on top of the second piece as if you were sewing them together. Trim off the tips of the second piece so the edges of the first piece and second piece match.

How to Make Your Own Quilted Mask Design - Tutorial with tons of photos

8) Follow the same steps to true up the seams of all the pieces. Label the pieces with how many pieces of fabric to cut of each.

How to Make Your Own Quilted Mask Design - Tutorial with tons of photos

That’s it! Good work. You’ve just made your own quilted mask pattern.

To get some tips on how to sew your mask together, check out the Melon Mask Sew Along.

Here’s how the mask design from this tutorial turned out.

How to Make Your Own Quilted Mask Design - Tutorial with tons of photos

If you don’t want to make your own mask design, you can grab my quilted mask pattern here!