Tutorials

How to Make Easy Fabric Pouch Packs for Travel, Storage, and Organization

These little pouch packs are ideal for storing and organizing flat things like clothes. They can be made in any size, but the small ones make excellent usage of fabric scraps.

Simple and quick to make. Here’s how to do it:

(PS - Yes, a PS in the middle of a blog post! These pouch packs are great for flat things, but if you’re looking for pouches for non-flat things, check out my free Boxy Pouch Pattern Calculator and instructions and Pear Pouch Pattern.)

1) Cut fabric to your chosen length and width. (Details and instructions on how to get the right measurements for any object at the bottom of the post!)

How to make an easy pouch for travel and organizing clothes - Tutorial by Sarah Kirsten

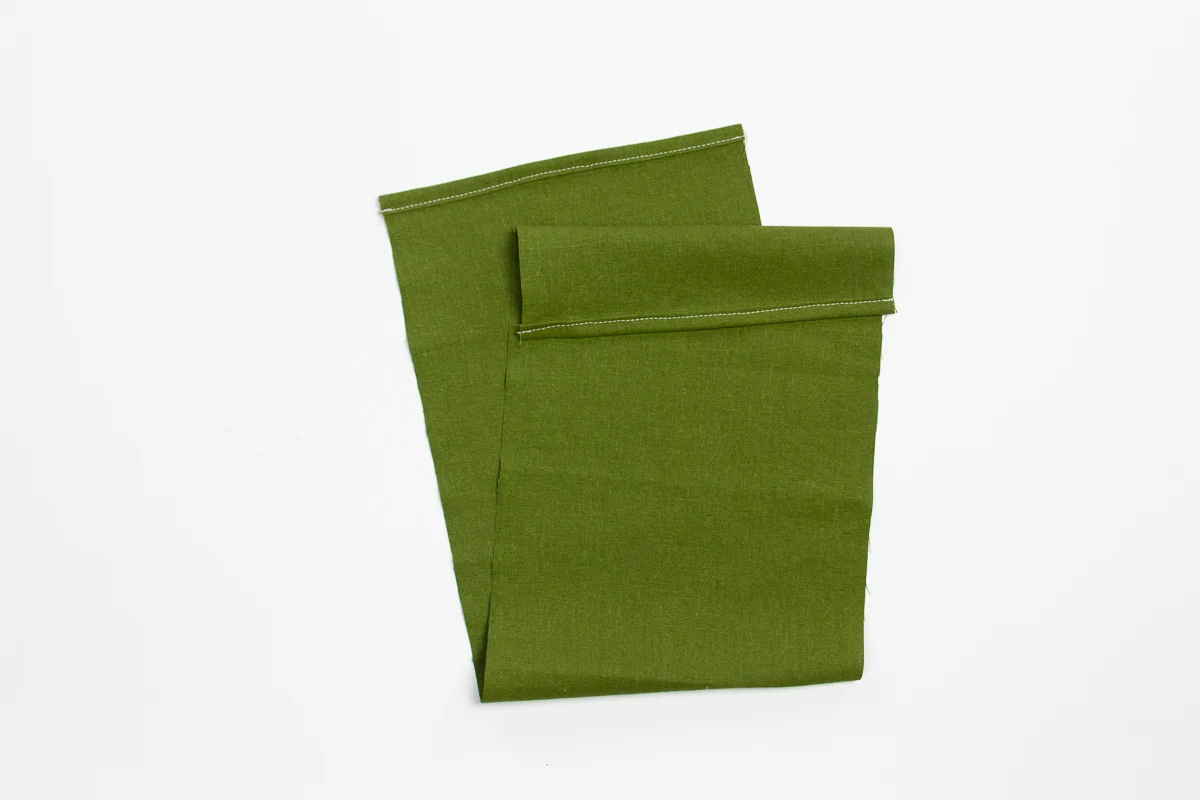
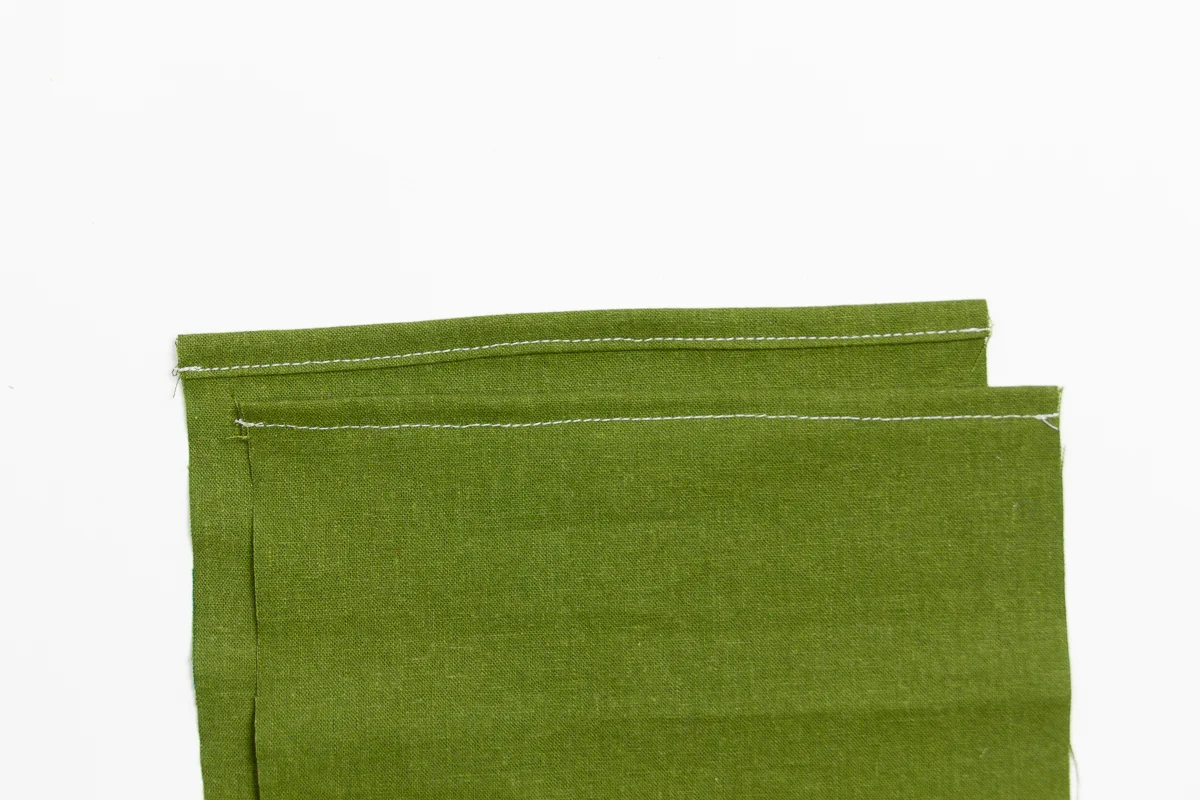
2) Hem the top and bottom with a double rolled hem 1/4” (or more) wide.

How to make an easy pouch for travel and organizing  - Tutorial by Sarah Kirsten
How to make an easy pouch for travel and organizing  - Tutorial with lots of photos by Sarah Kirsten

3) Fold the bottom up so it covers the entire length of the object for which the pouch pack is being made. Fold with wrong sides together.

How to make an easy pouch for travel and organizing  - Tutorial with lots of photos by Sarah Kirsten

4) Fold the top flap down over top.

How to make an easy pouch for travel and organizing  - Tutorial with lots of photos by Sarah Kirsten

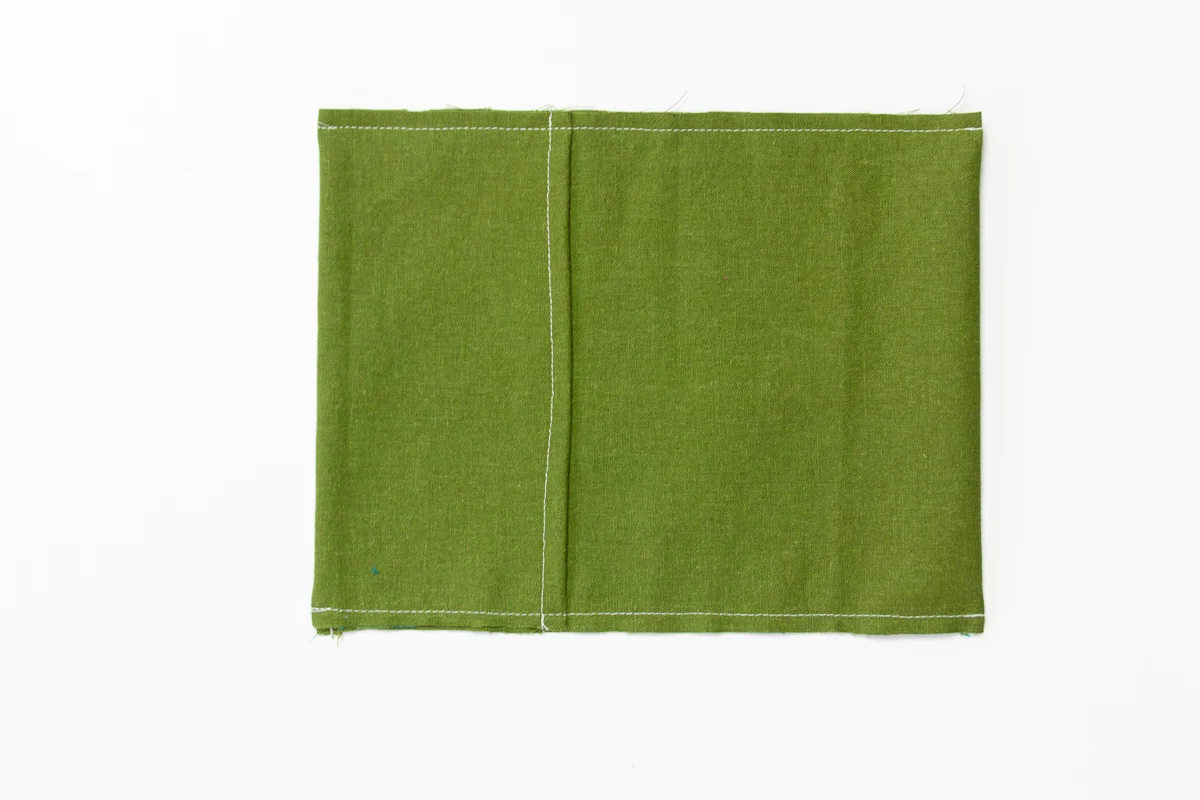
5) Sew up both sides with a 3/8” seam allowance.

_MG_1651.jpgHow to make an easy pouch for travel and organizing  - Tutorial with lots of photos by Sarah Kirsten

6) Fold the pouch pack inside out.

How to make an easy pouch for travel and organizing  - Tutorial with lots of photos by Sarah Kirsten

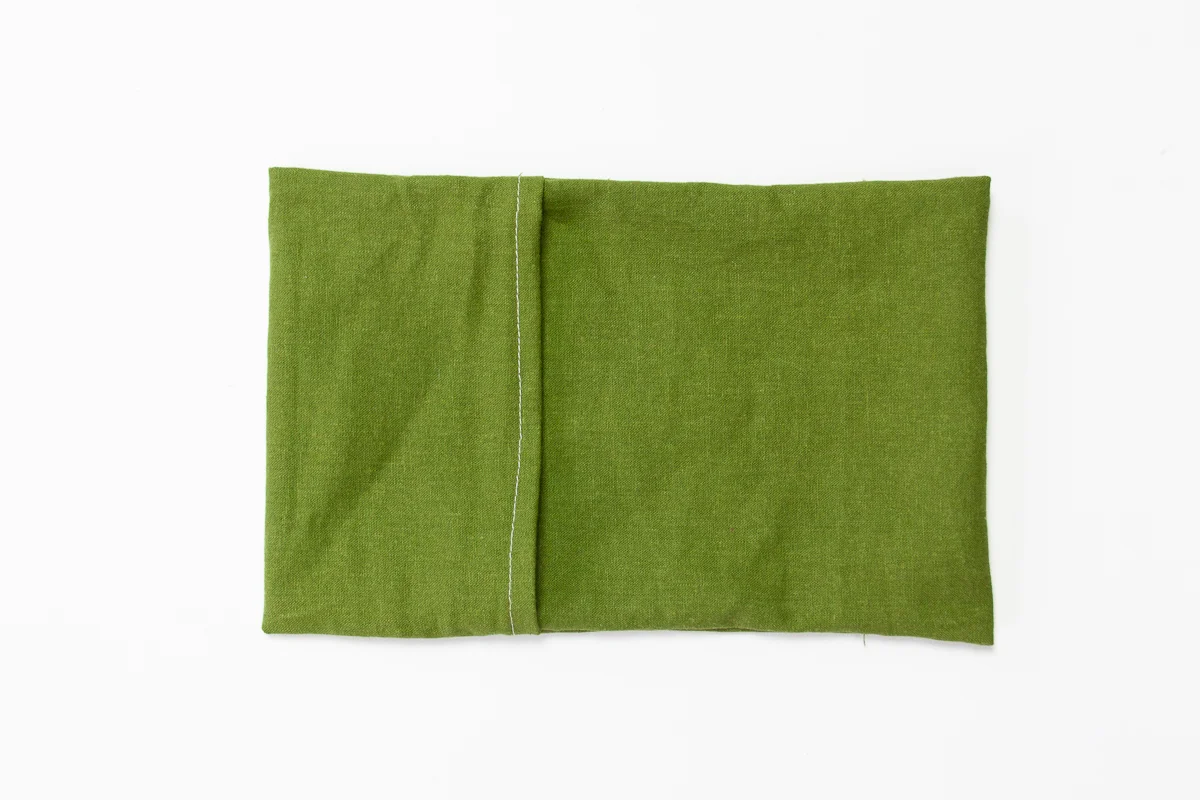
7) With the pouch pack inside out and right sides together, sew up the same sides again with a 1/2” seam allowance, being sure to totally encase the raw edges within the new seam.

You can use different seam allowances than what I used in step 5 & 7. Just be sure the allowance you use in the initial seam is smaller than allowance you use in the second seam. That way the raw edges are sure to be encased.

How to make an easy pouch for travel and organizing  - Tutorial with lots of photos by Sarah Kirsten
How to make easy travel pouch packs - Tutorial with lots of photos by Sarah Kirsten

8) Turn the pouch pack right side out and it’s done!

How to make an easy pouch for travel and organizing  - Tutorial with lots of photos by Sarah Kirsten
How to make easy travel pouch packs - Tutorial with lots of photos by Sarah Kirsten

How to Measure the Fabric

These pouch packs can be made in any size! To fit the pouches to a specific object, here’s how to do it.

1) Measure the length and width of the object (note these pouches do work best with relatively flat things like folded clothes, etc.). The width of the fabric should be the width of the object, plus some wiggle room, plus the seam allowance for French seams. I recommend 1 3/4” so you can use 3/8” seam allowance on the first seam and 1/2” allowance on the second seam.

2) Measure the length of the object. Multiply the length by 2, plus 1/3 the length of the object for the top flap to overlap, plus the hem allowance. In this illustration I made the double rolled hem allowance 1/4”, but obviously you could make it larger than that if you wish.

Here’s an example:

The object I want to make the pouch pack for is 5” wide and 10” tall.

The width of the fabric should be 5” + 2” (for wiggle room) + 1 3/4” = 8 3/4”

The length of the fabric should be (10)2 + 10/3 + 1” = 24.33 => 24 3/8”

How to make easy travel pouch packs - Tutorial with lots of photos by Sarah Kirsten

The Easiest Way to Sew Zipper Ends

Whether you are using a cut-to-length zipper (my personal favorite) or a regular zipper, the need sometimes arises to sew a nice fabric patch on the end of the zipper. Of all the ways to do this (most are terribly frustrating), this is the best method I’ve used. It’s reliable - works every time. It’s quick - only takes about a minute total. It looks neat - no raw edges which makes it good for a variety of applications. And best of all, it’s the least fussy - it’s easy to get the fabric lined up and sewn straightly.

Here’s how to do it.

1) Cut a rectangle of fabric about 4” (10 cm) long and 1/2” (1.3 cm) wider than the width of the zipper.

The easiest way to sew zipper ends - Tutorial by Sarah Kirsten

2) Fold the rectangle in half with right sides together. Sew both sides with a 1/4” (0.64 cm) seam allowance.

The easiest way to sew zipper ends - Tutorial by Sarah Kirsten

3) Turn the fabric right side out.

_MG_0765.jpg

4) Fold the top inside the little pouch so that the top of the fabric reaches all the way to the bottom.

The easiest way to sew zipper ends - Tutorial by Sarah Kirsten

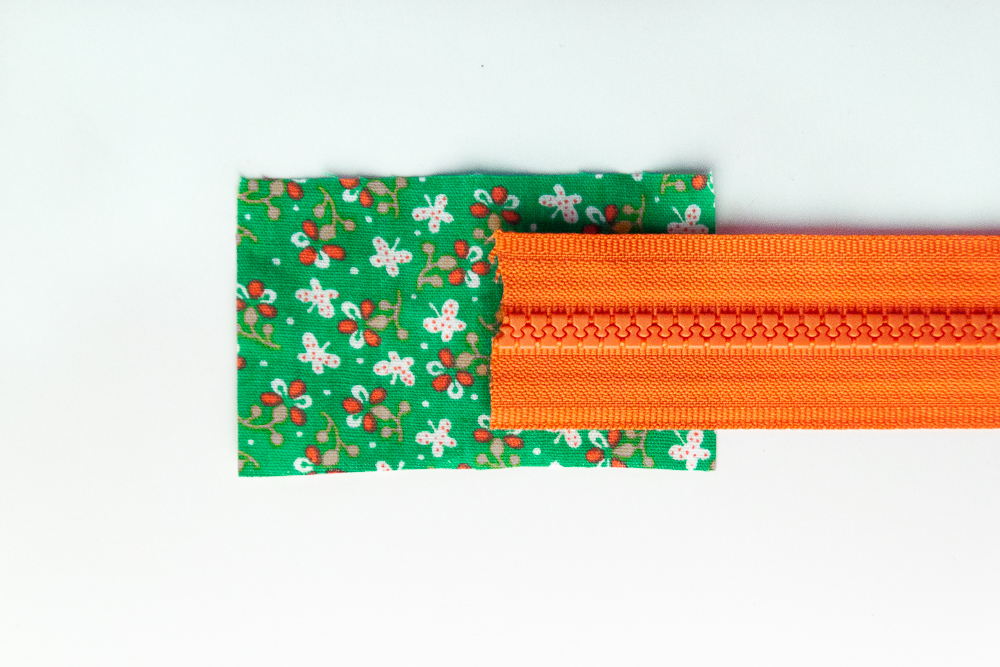
5) Make sure the folded edge of the pouch is even all the way around. Insert the zipper inside. (Note: Depending on the application you’re using it for and the type of zipper, you may want to remove some zipper teeth so you don’t sew over them.)

The easiest way to sew zipper ends - Tutorial by Sarah Kirsten

6) Stitch near the top of the pouch through all layers.

The easiest way to sew zipper ends - Tutorial by Sarah Kirsten

That’s it! You’re done.

In my free Pear Pouch Pattern I use a different method, but this would be an excellent alternative. In fact, this is, simply put, a better method. More reliable and less fussy all around.

How to Repair Work Gloves with Holes in the Fingers

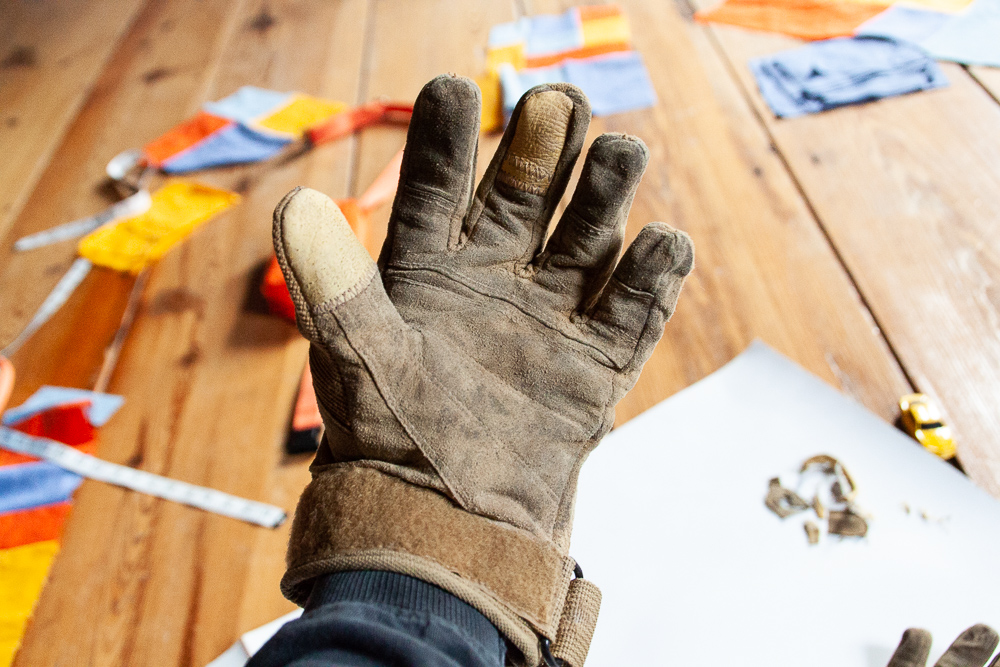
How to repair work gloves with holes in the fingers. Tutorial with lots of photos - Sarah Kirsten

Three winters ago my mom bought me a new pair of leather gloves for the daily farm chores. They have been my best pair yet, but unfortunately they are already full of holes in almost all the finger tips. I think mine are a little beyond the repair stage (practically speaking). It’s an on-going problem — farm gloves that wear out too quickly.

Our neighbor said he has the same problem with his farm gloves and sent me this video of how to repair them. The video made it look so simple that I wanted to try it out. I asked if I could repair his gloves. It turns out it IS really simple and surprisingly easy. Here’s how to do it.

How to repair work gloves with holes in the fingers. Tutorial with lots of photos - Sarah Kirsten

Step 1: Turn the gloves inside out and seam rip around the panel containing the hole.

How to repair work gloves with holes in the fingers. Tutorial with lots of photos - Sarah Kirsten

Step 2: Cut out the piece with the hole.

How to repair work gloves with holes in the fingers. Tutorial with lots of photos - Sarah Kirsten

Step 3: Using the piece with a hole as a pattern, cut out a new piece of leather (or fabric). Make the new piece 1/4” - 3/8” | 0.64 - 1 cm longer than the piece you cut out from the glove.

How to repair work gloves with holes in the fingers. Tutorial with lots of photos - Sarah Kirsten

Step 4: Overlap the new piece with the existing finger panel and zigzag stitch them together along both edges (the edge of the new piece and the edge of the existing piece).

How to repair work gloves with holes in the fingers. Tutorial with lots of photos - Sarah Kirsten

Step 5: Starting from the top of the finger, sew down each side. Stitch over the whole thing 2 - 3 times to reinforce the stitching.

How to repair work gloves with holes in the fingers. Tutorial with lots of photos - Sarah Kirsten

Step 7: Turn the glove right side out and admire the new finger!

How to repair work gloves with holes in the fingers. Tutorial with lots of photos - Sarah Kirsten

- Alternative Method -

On the thumb I tried a different method, and I ended up liking it more. Instead of cutting out the old piece just add a new piece on the outside and sew it back up!

Step 1: Seam rip around the panel containing the hole (or in this case, the soon-to-be-hole) and cut a matching piece of leather that extends past the holey area.

How to repair work gloves with holes in the fingers. Tutorial with lots of photos - Sarah Kirsten

Step 2: Zigzag stitch the bottom of the new piece to the outside of the existing piece.

How to repair work gloves with holes in the fingers. Tutorial with lots of photos - Sarah Kirsten

Step 3: Starting from the top of the finger, sew down each side. Stitch over the whole thing 2 - 3 times to reinforce the stitching.

How to repair work gloves with holes in the fingers. Tutorial with lots of photos - Sarah Kirsten

Step 4: Turn the glove right side out and you’re done!

How to repair work gloves with holes in the fingers. Tutorial with lots of photos - Sarah Kirsten

Ready for another cold winter on the farm :)

How to repair work gloves with holes in the fingers. Tutorial with lots of photos - Sarah Kirsten

How to Install Side Release Buckles and Slide Adjusters

Tutorial How to Install Side Release Buckles and Slide Adjusters - Sarah Kirsten

This post is to complement pattern instructions for the Fennel Fanny Pack. The techniques apply to all Slide Adjusters and Side Release Buckles however.

Step 1: Install the Slide Adjuster on the long end of the webbing.

Tutorial How to Install Side Release Buckles and Slide Adjusters - Sarah Kirsten

Step 2: Install the male end of the Side Release Buckle by feeding the webbing up and around the center bar of the buckle.

Tutorial How to Install Side Release Buckles and Slide Adjusters - Sarah Kirsten

Step 3: Feed the webbing back through the Slide Adjuster, the same direction as the first time, underneath the existing webbing.

_MG_0594.jpg
Tutorial How to Install Side Release Buckles and Slide Adjusters - Sarah Kirsten

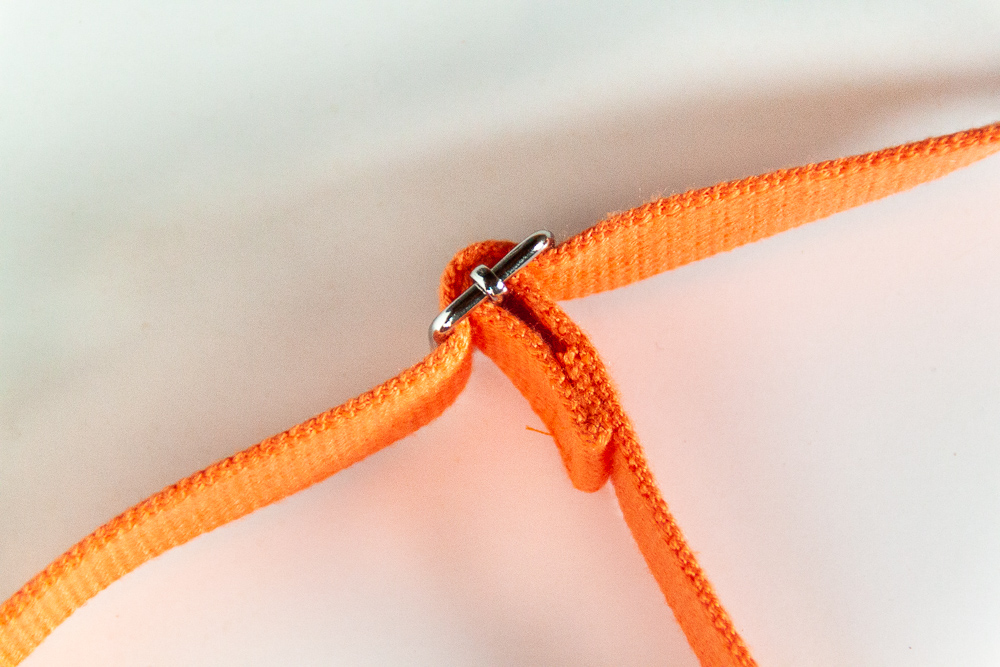
Step 4: Loop the webbing around the center bar of the Slide Adjuster. Fold the end in 1/2 in | 1.3 cm and sew the webbing to itself with two rows of stitching.

Tutorial How to Install Side Release Buckles and Slide Adjusters (with lots of photos!) - Sarah Kirsten
Tutorial (with lots of photos) - How to Install Side Release Buckles and Slide Adjusters - Sarah Kirsten

It should look something like this:

Tutorial How to Install Side Release Buckles and Slide Adjusters - Sarah Kirsten

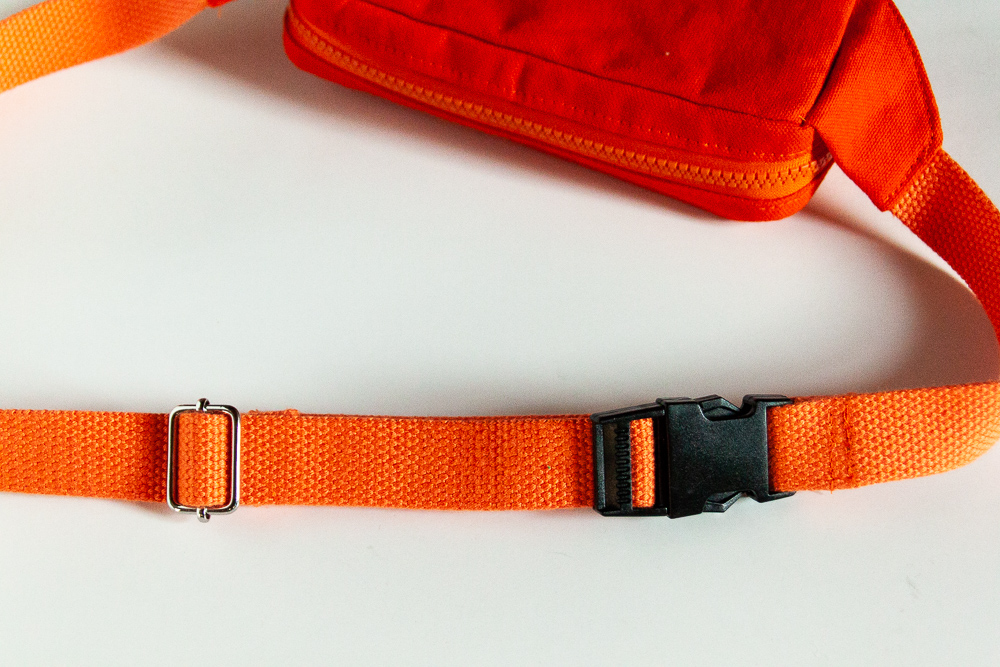
Step 5: Insert the short side of the webbing into the female end of the Side Release Buckle. Fold the end of the webbing in 1/2 in | 1.3 cm and sew with two lines of stitching.

Tutorial How to Install Side Release Buckles and Slide Adjusters - Sarah Kirsten

How to Sew a Lined Vest - Two Easy Methods

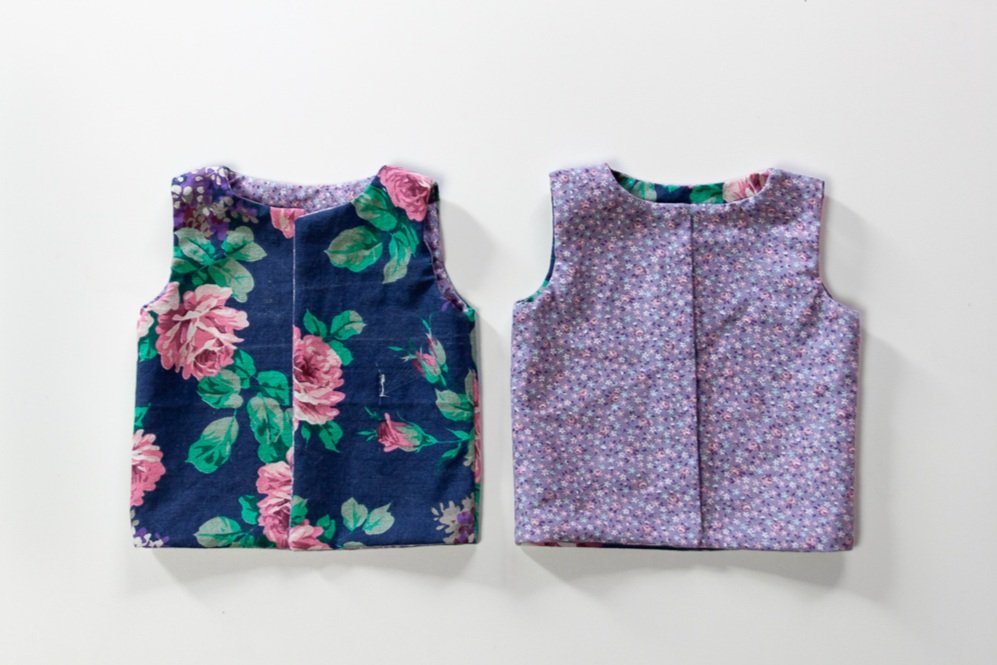
Have you ever wondered how to sew a lined vest without any raw edges showing? Wonder no more! Here are two ways to do it. The first method has open shoulders and the second has the shoulders sewn shut.

The pattern used in this tutorial is a self drafted miniature vest.

I purposely choose fabric for this tutorial that you can easily see the right and wrong sides and differentiate the lining from the outer layer.

Method One: Open Shoulders

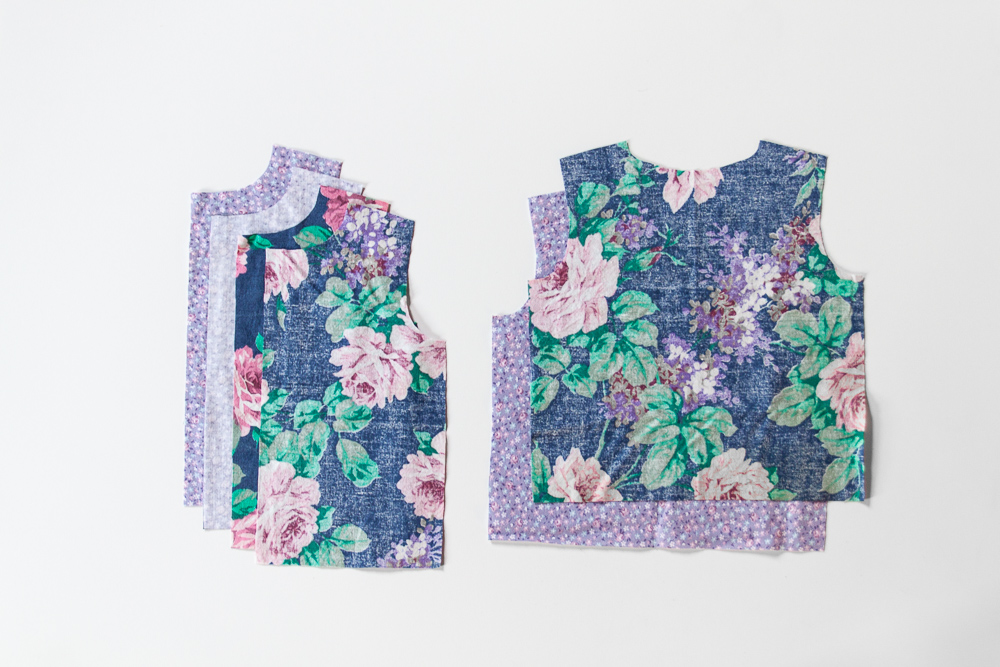
Step 1: Cut all the pieces - lining and outer layer.

How to sew a lined vest - Sewing tutorial with tons of photos

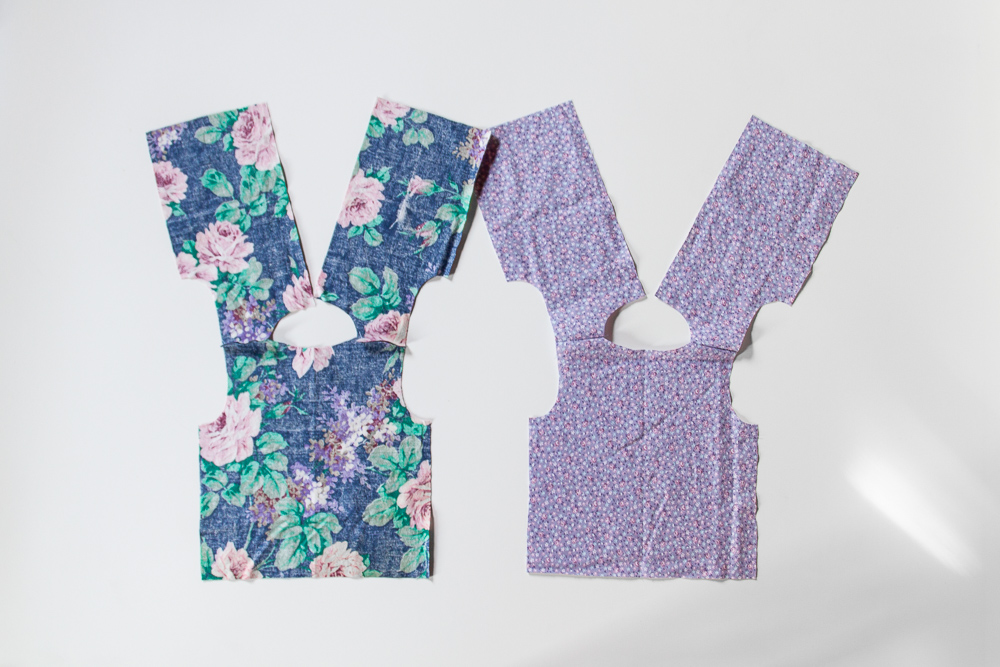
Step 2: Sew the shoulders of the outer layers together and the shoulders of the lining layers together with right sides together.

How to sew a lined vest - Sewing tutorial with photos

Step 3: Lay the two layers with right sides together. Press seams open and stitch from the bottom of the front center up around the neck and back down the front center of the other side. (If you look closely in the photo you can see white thread where I’ve stitched!)

How to sew a lined vest - Sewing tutorial with photos
How to sew a lined vest - two methods for sewing a lined vest

Step 4: Stitch around the arm holes on each side. Don’t sew down the sides, just the arm holes.

How to sew a lined vest - Sewing tutorial with photos

Step 5: Clip curves and trim corners.

How to sew a lined vest - easy to understand sewing tutorial

Step 6: Turn the vest right side out through the shoulders.

How to sew a lined vest - easy to understand sewing tutorial

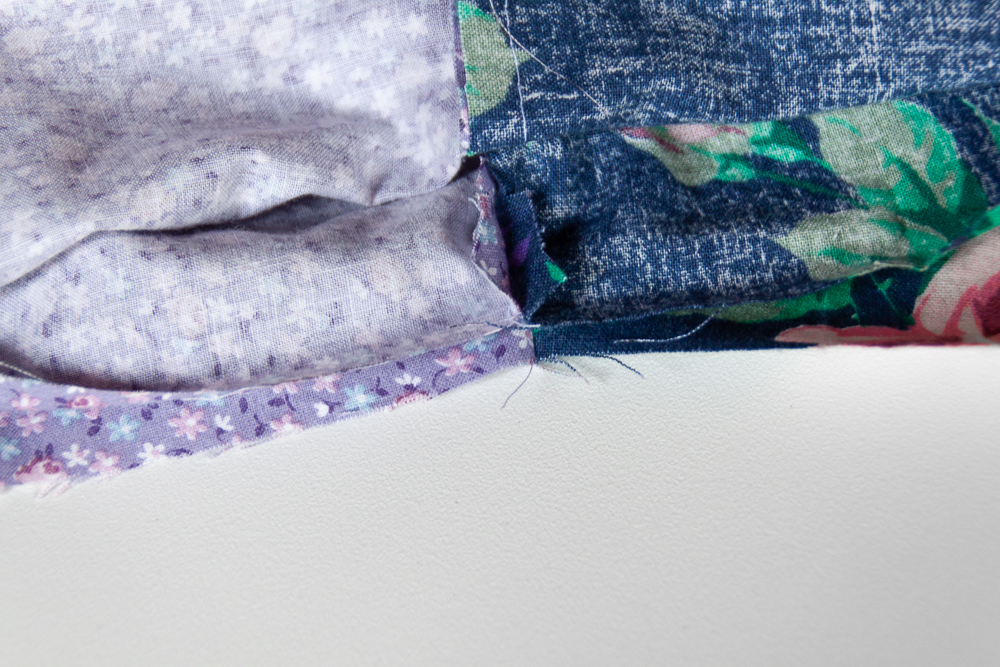
Step 7: Press the seams open and sew up the sides with right sides together. (This part is tricky to explain and photograph clearly, but it makes sence once you get it! Just play around with it a little bit.)

How to sew a lined vest - easy to understand sewing tutorial

Be sure to match up the seams. (This is the side seam right by the arm opening.)

How to sew a lined vest - easy to understand sewing tutorial

Here’s what it looks like with the sides sewn together.

How to sew a lined vest - easy to understand sewing tutorial

Step 8: Now that the side seams are sewn, admire how good your vest is looking so far.

How to sew a lined vest - easy to understand sewing tutorial

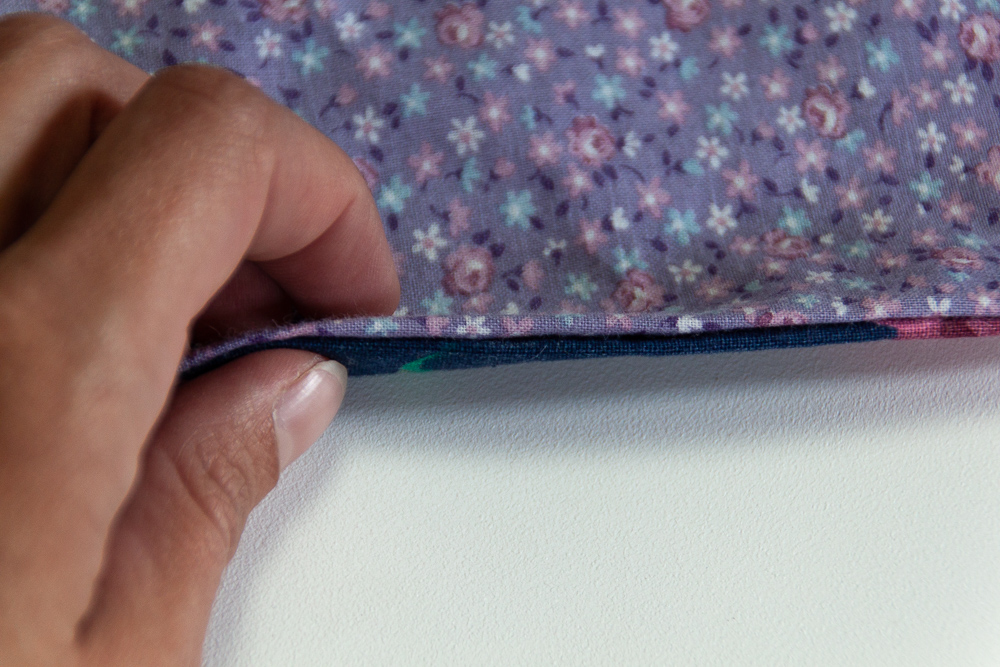
Step 9: Turn the vest inside out. Press the seams open and sew the bottom of the vest leaving a few inches open in the back. The thicker the fabric the wider you want to leave the hole for turning the vest right side out.

How to sew a lined vest - easy to understand sewing tutorial

Since turning the vest can put a lot of stress on the stitching, it works well to sew down to the bottom edge of the fabric to add extra stability. It makes for much less stressful turning!

How to sew a lined vest - easy to understand sewing tutorial

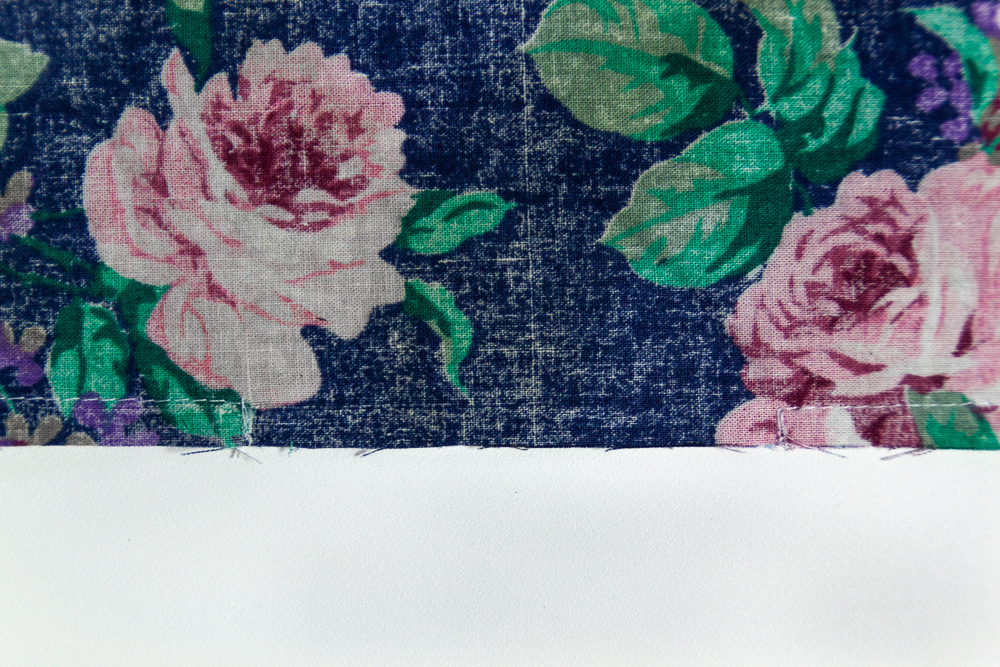
Step 10 & 11: Clip the corners. Turn the vest inside out through the opening in the back and hand or machine stitch the opening closed.

How to sew a lined vest - easy to understand sewing tutorial

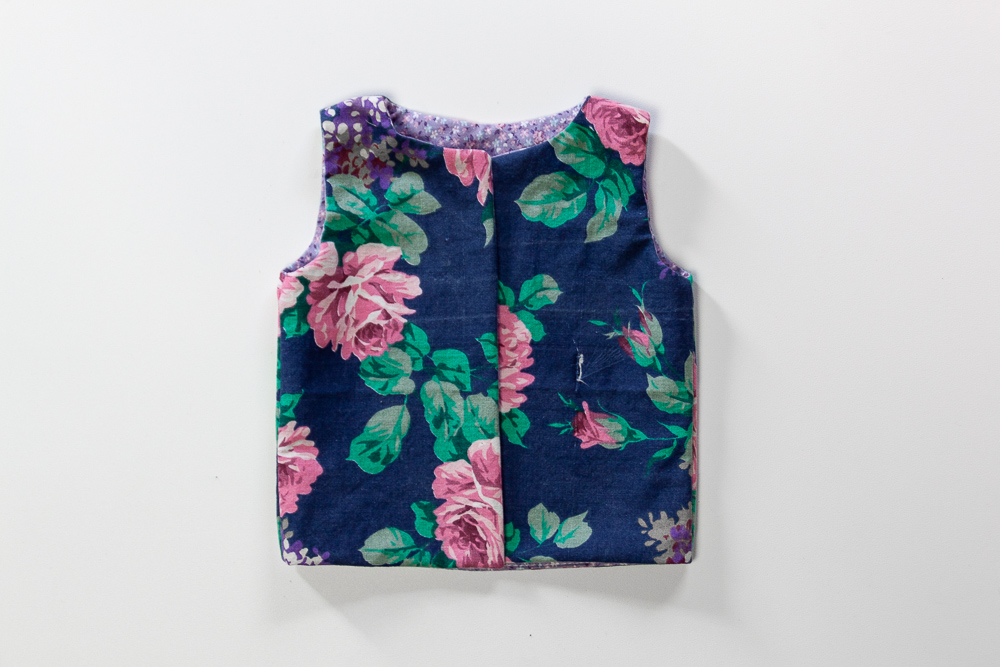
Give the vest a good press and it’s ready to wear!

Sewing Tutorial - Two methods for sewing a lined vest with tons of photos

Method Two: Closed Shoulders

Step 1: Cut out all the pieces - the lining and the outer layer.

How to sew a lined vest - Sewing tutorial with photos

Step 2: Lay the lining and the outer layers right sides together. Sew around the neck and arm openings on the back pieces. Sew around the arms, neck, and front center of the front pieces.

How to sew a lined vest - Sewing tutorial with photos

Step 3: Clip the curves, trim the corners, and trim the seam allowance at the top of the arm openings and neck by the shoulders.

How to sew a lined vest - Sewing tutorial with photos

Step 4: Turn the front vest pieces right side out.

How to sew a lined vest - Sewing tutorial with photos

Step 5: Put the front vest pieces in between the lining and outer layer of the back piece.

How to sew a lined vest - Sewing tutorial with photos

Step 6: Sew the shoulders closed.

How to sew a lined vest - Sewing tutorial with photos

Step 7: Press seams open and sew the sides of the vest with right sides together.

How to sew a lined vest - Sewing tutorial with photos

Be sure to match up the side seams.

How to sew a lined vest - Sewing tutorial with photos

Here’s what it looks like when the sides are sewn together.

How to sew a lined vest - Sewing tutorial with photos

Step 8: Turn the vest right side out and admire how it’s looking so far.

How to sew a lined vest - Sewing tutorial with photos

Step 9: Turn the vest inside out (one last time), press the seams open and sew the bottom shut leaving a few inches open in the back.

How to sew a lined vest - Sewing tutorial with photos
How to sew a lined vest - sewing tutorial with tons of photos by Sarah Kirsten

Step 10: Trim the corners.

How to sew a lined vest - Sewing tutorial with photos

Step 11: Turn the vest right side out (for the last time) through the opening in the back. Hand or machine stitch the opening shut.

How to sew a lined vest - Sarah Kirsten sewing tutorial with tons of photos

Give the vest a good press and try it on to see how it looks.

How to sew a lined vest - Sewing tutorial with tons of photos by Sarah Kirsten

Discussion notes:

In both of these examples I left the opening to turn the vest right side out on the bottom seam. It’s also a good option to leave the opening in the side seam of the lining instead of in the bottom.

The pattern used in this tutorial was a mini self drafted vest for easy sewing and photographing, but I used the pattern to make this little quilted vest with snaps. I used the open shoulder method for this vest so I could put the batting through the shoulders. I’m quite in love with how it turned out.

How to sew a lined vest - sewing tutorial with tons of photos by Sarah Kirsten

Then I made this full sized quilted vest for myself. For the batting I used wool from my parents’ sheep farm and a really lightweight ripstop nylon for the outer shell. I again used the open shoulder method to get batting up through the shoulders.

How to sew a lined vest - sewing tutorial with tons of photos by Sarah Kirsten