Tutorials

Rosemary Wrap Sew Along

Oh the elegance of wrapping yourself up in fabric. The Rosemary Wrap pattern is meant to be among the simplest forms of clothing, the form of wrapping yourself up in fabric, but in a way that hugs your beautiful curves.

Let’s dive in.

Sew the waist ties with right sides together and sew along the short end. 3/8” (1 cm) seam allowance. Press the seam open, then set aside the waist tie for now.

Sarah Kirsten Rosemary Wrap Sew Along

Sew all four darts. Press the outside darts out and the inside darts in.

Sarah Kirsten Rosemary Wrap Sew Along

Serge or zigzag stitch all the way around the sides and bottom of the skirt. Fold it toward the right side 1/4” (6 mm) and press. The curved hem version of this skit has the hem visible on the outside as a design detail. If you are using fabric that you would rather not show the wrong side, you can press the hem toward the wrong side.

Sarah Kirsten Rosemary Wrap Sew Along

Fold the hem again 1/4” (6 mm) toward the right side and press. Edge stitch along the entire length of the hem.

Sarah Kirsten Rosemary Wrap Sew Along

For the square hem version, fold up the bottom edge 1/2” (1.3 cm) toward the wrong side and press. Fold up again 1/2” (1.3 cm) and press again.

Sarah Kirsten Rosemary Wrap Sew Along

Edge stitch along the folded edge. Repeat steps to hem both sides of the skirt.

Sarah Kirsten Rosemary Wrap Sew Along

Place the center of the waist tie in the center of the skit with right sides together. Sew along the entire length of the top of the skirt. 3/8” (1 cm) seam allowance.

Sarah Kirsten Rosemary Wrap Sew Along

Fold the tails of the waist ties with right sides together so the edges meet. Sew the entire length of the tails with 3/8 (1 cm) seam allowance. Leave the ends of the tails open.

Sarah Kirsten Rosemary Wrap Sew Along

Turn the tails right side out using a bodkin or safety pin. It will be easier to turn if you grade the seam allowance before turning. Press the tails.

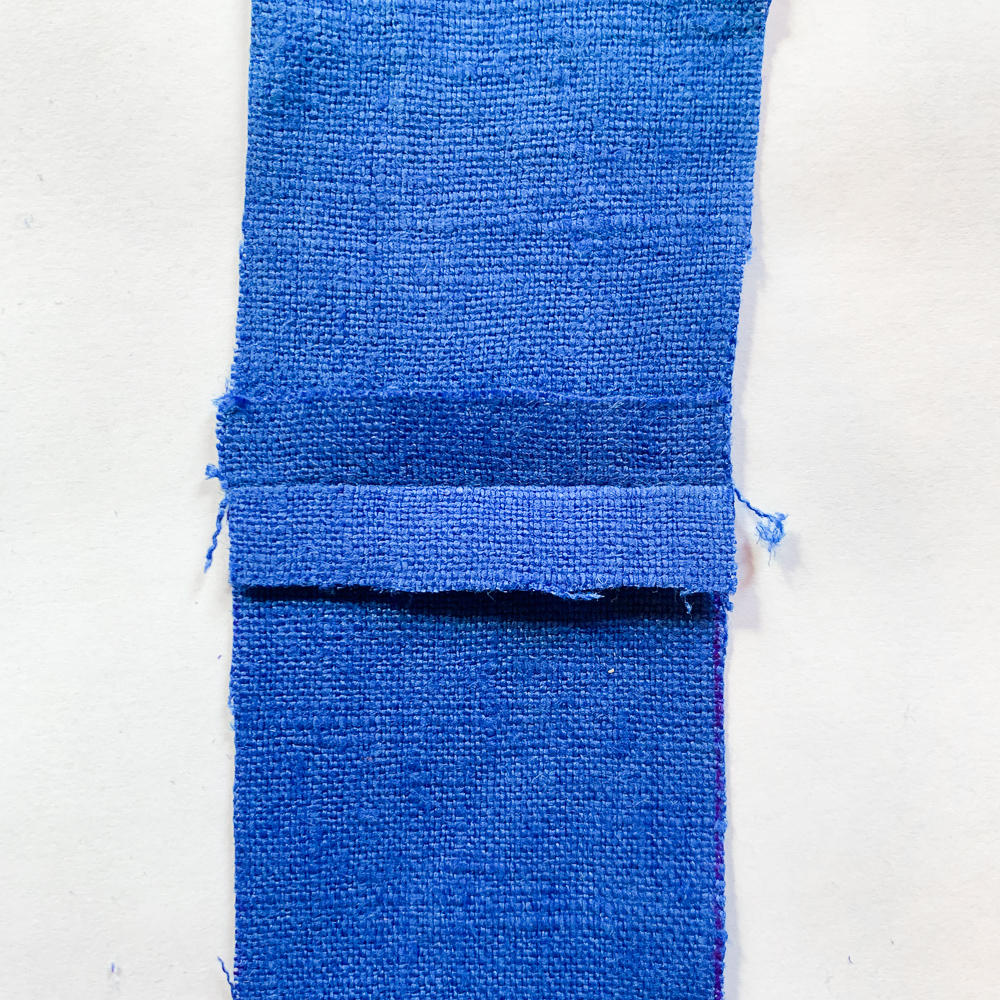
Once the tails are right side out, press the waist tie up, and the seam allowance up toward the waist tie.

Sarah Kirsten Rosemary Wrap Sew Along
IMG_9120.jpg

Fold the top edge of the waist tie down so it meets the seam allowance. Then fold it over again so the bottom folded edge just covers the seam.

Sarah Kirsten Rosemary Wrap Sew Along

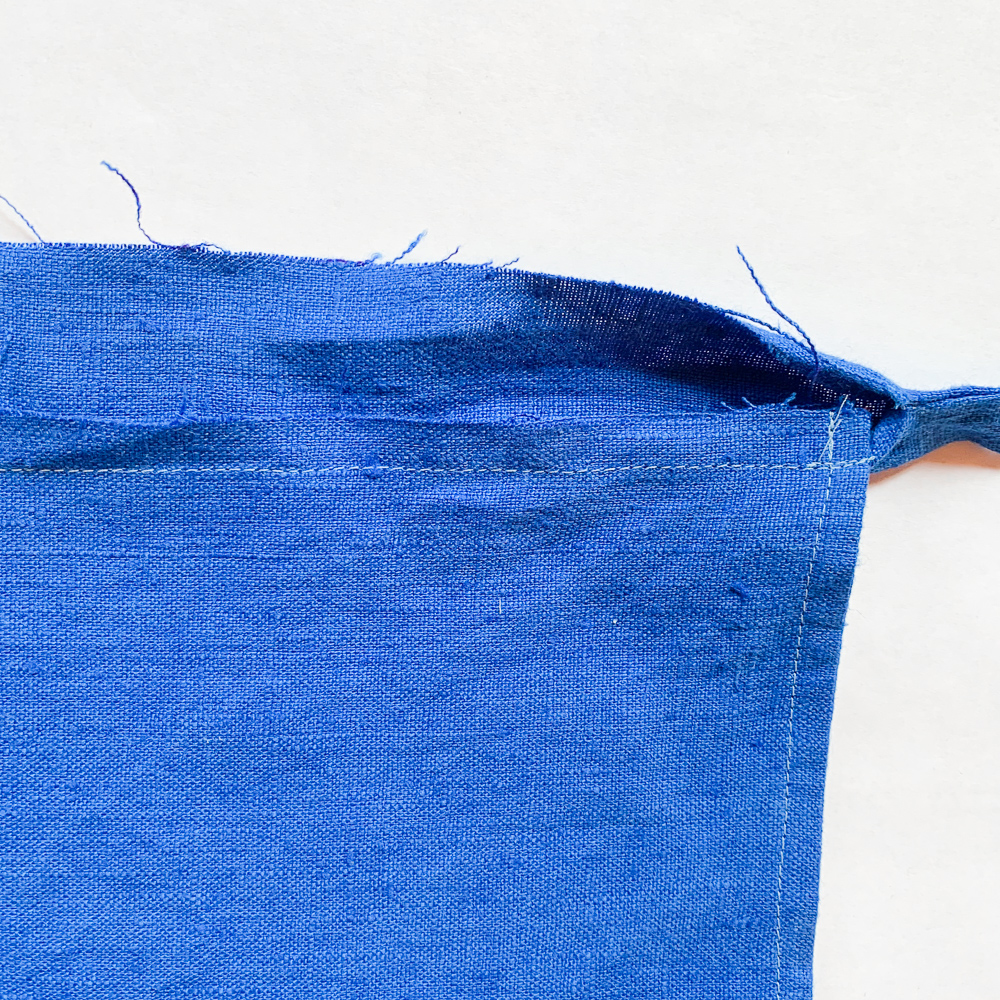
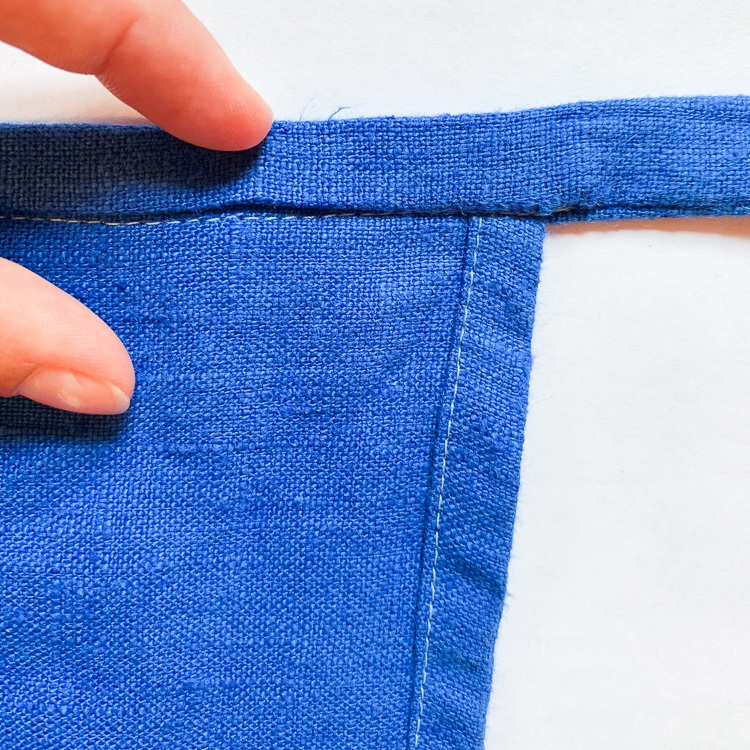
From the front of the skirt, stitch right along the seam (stitch in the ditch) and make sure it’s just catching the folded edge of the waist tie on the back side.

Sarah+Kirsten+Rosemary+Wrap+Sew+Along
Sarah Kirsten Rosemary Wrap Sew Along

Fold in the ends of the waist tie tails and sew shut.

Sarah Kirsten Rosemary Wrap Sew Along

The last step is, of course, to wrap yourself up in handmade love and tie a bow in the back. To be worn proudly and confidently in all your feminine glory.

If you don’t have the Rosemary Wrap pattern yet, you can get it here!

The Ultimate Way to Sew Beautiful Button Fly Topstitching

How to sew beautiful top stitching on the button fly - Sarah Kirsten

The dreaded topstitching of the button fly…. It’s scary because it’s one of the most visible parts of the pants. The good news is there is an easy method to get the stitching looking good every time.

Topstitching the fly was the main thing that held be back from making jeans. I was fearful the fly stitching wouldn’t look good. Had I known how easy this was, I think I would have started my journey of making pants-with-button-flies earlier than I did.

So let me spare you some heartache. Here’s how to nail the topstitching. In this tutorial I’m sewing the lovely Megan Nielsen Dawn Jeans.

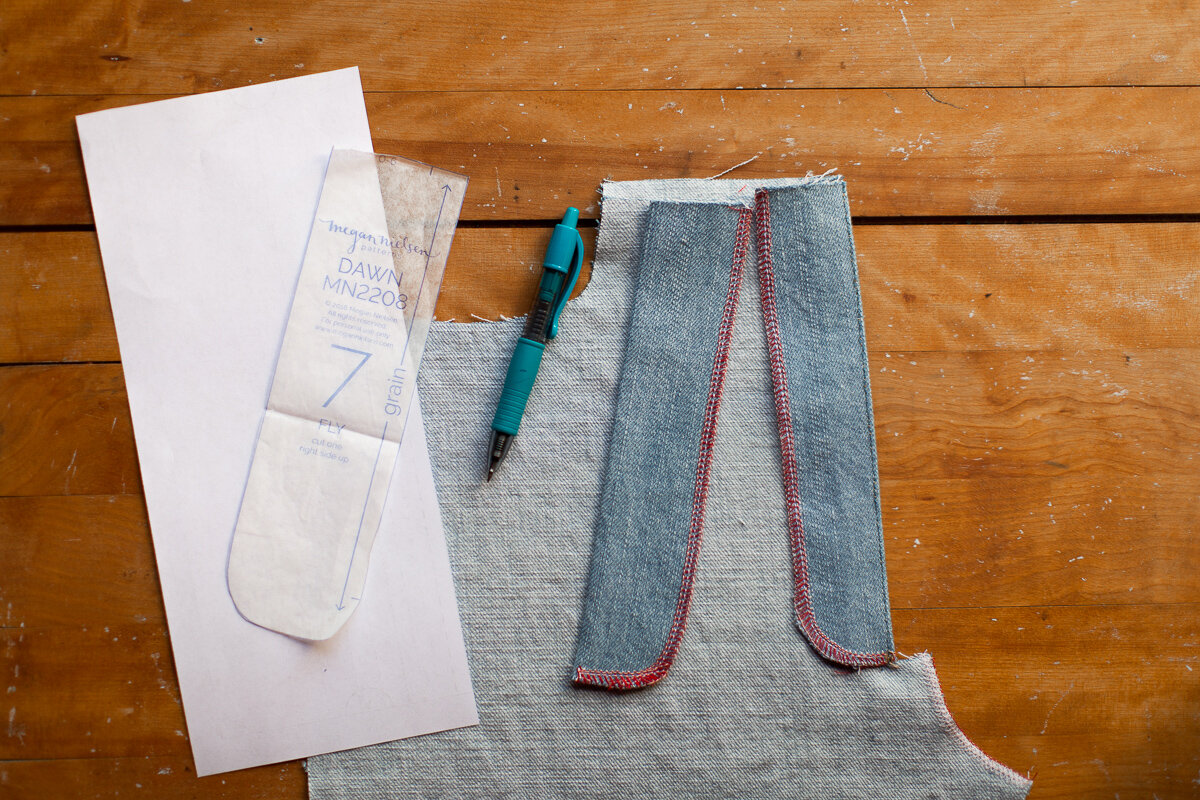
Step 1: Copy the fly pattern out of a piece of scrap paper.

How to sew beautiful top stitching on the button fly - Sarah Kirsten

Step 2: Line up the curved edge of the pattern piece right where you want your topstitching to land on the button fly — I want mine to land right along the inside of the serger thread.

(I have an abundance of scrap paper from paper patterns, so I’m using some for this tutorial.)

How to sew beautiful top stitching on the button fly - Sarah Kirsten

Step 3: Keeping the paper aligned, flip the paper and button fly over. Using a pen, mark the paper along the top and edge of the button fly.

How to sew beautiful top stitching on the button fly - Sarah Kirsten

Step 4: Cut out the stitch guide along the line you just drew. Clip the paper piece in position on top of the pants, with the button fly in position underneath.

How to sew beautiful top stitching on the button fly - Sarah Kirsten

Step 5: With everything lined up perfectly, stitch right along the edge of the stitching guide.

How to sew beautiful top stitching on the button fly - Sarah Kirsten

Step 6: Unclip, pull off the paper, admire your work.

How to sew beautiful top stitching on the button fly - Sarah Kirsten

Step 7: Once you have one line of stitching, you can easily use that line as a guide for sewing another line.

How to sew beautiful top stitching on the button fly - Sarah Kirsten

It’s a real joy to sew your own jeans. Thanks for producing this pattern, Megan. Here’s the link again to these Dawn Jeans.

If you enjoyed this post, you may also enjoy…

Step by step illustrated tutorial.

Step by step photo tutorial.

How to Sew a Fully Lined and Reversible Tank Top - Chamomile Crop Double Layer Sew Along

Here’s how to sew a fully lined, reversible tank top.

The fabrics used for this tutorial are two floral print quilting cottons. Quilting cottons are fun to use for tutorials to easily determine right and wrong sides of fabric and to help keep the two layers easily differentiable.

The pattern used for this tutorial is my Chamomile Crop and Dress pattern. Some steps (like specific seam allowances and seam trimming) may differ slightly for other patterns.

Let’s make something!

1) Cut out all the pieces. I’m using one front and back in pink floral and one front and back in blue floral. You could have both layers the same fabric if you’d like.

How to sew a fully lined tank top - tutorial with tons of photos

The right side on both of these fabrics is a bit darker and more vibrant, the wrong side is more muted and slightly whiter.

How to sew a fully lined tank top - tutorial with tons of photos

2) Using a fabric pen or chalk, mark a line 2 1/2” (6.4 cm) from the bottom edge on the wrong side of the fabric on all four pieces. This will be used as a guide for sewing the hem later. It’s easiest to mark it now when the pieces can still be laid flat before any sewing.

Camomile Crop Sewing Pattern Sew Along -  Tutorial with lots of photos by Sarah Kirsten

3) Sew all four darts (two on each front piece) and press darts toward the bottom of the crop top.

Camomile Crop Sewing Pattern Sew Along -  Tutorial with lots of photos by Sarah Kirsten

4) Sew the front and back pieces of each layer together at the shoulders with a 3/4” (2 cm) seam allowance and right sides together.

Trim seams to 3/8” (1 cm). Explanation: This pattern was drafted for French seams, which requires a large seam allowance, so the extra seam allowance has to be trimmed off for this double layer construction.

Press seams open.

How to sew a fully lined tank top - tutorial with tons of photos

5) Lay the two layers right sides together. Line up and pin or clip the arm openings together.

How to sew a fully lined tank top - tutorial with tons of photos

6) Sew the whole length of the arm openings with 3/8” (1 cm) seam allowance.

How to sew a fully lined tank top - tutorial with tons of photos

7) Clip the seam allowance along the arm opening curves. Clip farther up the length of the arm opening than you might think you need to. (I’ve made the mistake multiple times of not clipping far enough up!)

Camomile Crop Sewing Pattern Sew Along -  Tutorial with lots of photos by Sarah Kirsten

8) Turn the crop top right side out through the neck opening.

How to sew a fully lined tank top - tutorial with tons of photos

9) Flip the outer layer together and the inner layer together with right sides together.

If this part is tricky to understand, keep playing with it — you’ll get it! See how the two pink floral pieces are together on the right and the two blue floral pieces are together on the left? That’s what you want.

How to sew a fully lined tank top - tutorial with tons of photos

10) Line up the side seams and pin or clip in place. Either fold the seam allowance of the arm opening of the top and bottom layer in opposite directions, or press them both open to reduce bulk around the seam.

How to sew a fully lined tank top - tutorial with tons of photos

I chose to press my seam allowances in opposite directions.

Camomile Crop Sewing Pattern Sew Along -  Tutorial with lots of photos by Sarah Kirsten

11) Sew the side seams with a 3/4” (2 cm) seam allowance. Backstitch across the darts and the ends of the arm opening seams.

Trim seam allowance to 3/8” (1 cm). Again, because this was drafted for French seams.

Press side seams open with a steamy iron.

How to sew a fully lined tank top - tutorial with tons of photos

12) Now we’re going to sew the neck in two sections. If you look at the necklines, you’ll see there are four layers.

Grab the outermost layers (one is the blue floral fabric, the other is the pink floral fabric) and push the middle layers down away from the edge. These two outermost layers should be already be right sides together.

How to sew a fully lined tank top - tutorial with tons of photos

13) Pin or clip the outermost layers together all the way up to the shoulder seams.

It requires some arranging and finagling to pin all the way up to the shoulder seams, but you’ll want to do that to make sure the two layers are lined up and centered with each other properly.

How to sew a fully lined tank top - tutorial with tons of photos

At this point, the other half of the shoulders are tucked inside the part of the shoulders and neckline you are about to sew.

Camomile Crop Sewing Pattern Sew Along -  Tutorial with lots of photos by Sarah Kirsten

14) Sew the first half of the neckline from shoulder seam to shoulder seam with a 3/8” (1 cm) seam allowance. Make sure the two layers in between don’t get caught in the stitching.

How to sew a fully lined tank top - tutorial with tons of photos

15) Clip the seam allowance of the curve of the neckline.

One is the blue floral fabric, and the other is the pink floral fabric.

16) Flip the tank top over and pull the shoulders/neckline through the opening in the other side of the neckline.

How to sew a fully lined tank top - tutorial with tons of photos
Camomile Crop Sewing Pattern Sew Along -  Tutorial with lots of photos by Sarah Kirsten

17) Do the same thing to this side. Pin or clip the two outermost layers together up to the shoulder seams. Again, the outermost layers should already be right sides together.

How to sew a fully lined tank top - tutorial with tons of photos

18) Sew with a 3/8” (1 cm) seam allowance and be sure to not catch the in between layers in the stitching.

How to sew a fully lined tank top - tutorial with tons of photos

19) Clip curve of neckline.

Camomile Crop Sewing Pattern Sew Along -  Tutorial with lots of photos by Sarah Kirsten

Whew! Just take a breather here. You’re done with one of the tricky parts. The neckline is finished!

Okay now on to the final steps…

20) The last thing to sew is the hem. Starting at a side seam, fold the bottom of both layers up so the right sides are facing each other.

How to sew a fully lined tank top - tutorial with tons of photos
Camomile Crop Sewing Pattern Sew Along -  Tutorial with lots of photos by Sarah Kirsten

21) Line up the bottom raw edges and side seams, and sew the two layers together along the line (2 1/2” (6.4 cm) from the bottom) you marked in the first step.

Start sewing at the side seam and leave a 5” (12.7 cm) gap when you come back around so you can turn the tank top right side out.

The hem will be going in between the blue floral layer and the pink floral layer at this point. You won’t be able to lay the whole thing flat, so get a few inches flat to sew at a time.

If this step feels like a huge confusing mess, hooray! You’re probably doing it right! It always looks like a total mess — one you would never think would actually work out right.

If you’d like to test that you are doing correctly before you start sewing, you can pin along stitching line and then turn the tank top right side out through the hem to see how it works.

Camomile Crop Sewing Pattern Sew Along -  Tutorial with lots of photos by Sarah Kirsten
How to sew a fully lined tank top - tutorial with tons of photos

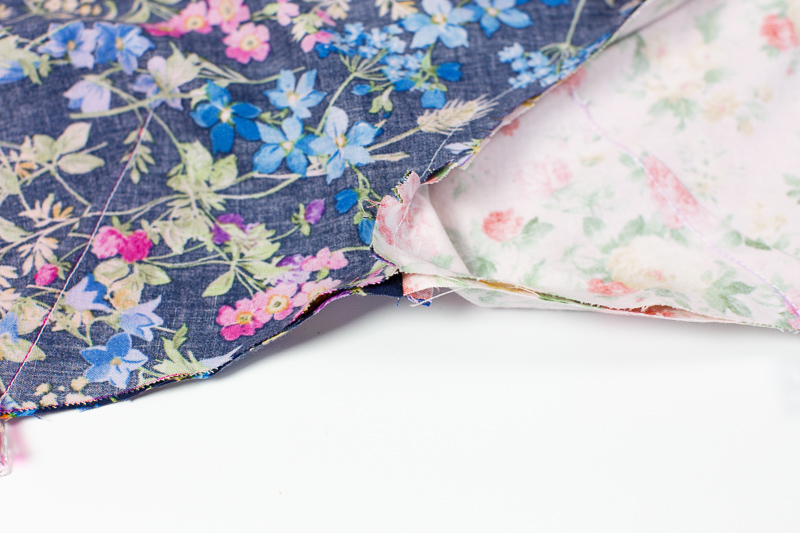
It should look something like this at this point. The hem should literally be going in between the blue floral layer and the pink floral layer.

Camomile Crop Sewing Pattern Sew Along -  Tutorial with lots of photos by Sarah Kirsten
Repeat the same procedure to sew the second half of the neckline.

22) Turn the tank top right side out through the 5” (12.7 cm) opening in the hem.

23) Give the bottom seam, neckline, and arm openings a good press.

24) Make sure the wide hem allowance is laying flat between the blue floral and the pink floral layers.

Top stitch 2” (5 cm) from the bottom edge. The hem allowance is 2 1/2” (6.4 cm) wide, so the 2” (5 cm) stitching from the bottom should be about 1/2” from the top edge of the hem allowance.

_U5A1005.jpgCamomile Crop Sewing Pattern Sew Along -  Tutorial with lots of photos by Sarah Kirsten

25) Hand sew the opening in the bottom of the hem shut using a blind stitch. Or leave it unsewed, if you want a secret little compartment in your hem :)

How to sew a fully lined tank top - tutorial with tons of photos

26) Have a cup of chamomile tea. You just made a really cool, double layer, reversible, Chamomile Crop!

Camomile Crop Sewing Pattern Sew Along -  Tutorial with lots of photos by Sarah Kirsten

If you enjoyed this tutorial, you may also enjoy…

Step by step illustrated tutorial to add pockets to all your summer dresses.

Step by step photo tutorial to sew the Rosemary Wrap Sewing Pattern.

Step by step photo tutorial.

How to Make a Sewing Pattern from Your Favorite RTW Swimsuit

Last year I finally found a one piece swimming suit that I felt good in. I was walking through Walmart (probably in there buying thread or looking at their fantastic clearance fabric) and saw it on sale for $9. I’ve wanted a swimsuit like this, so I snapped it up without trying it on. It happened to fit my body well, and I felt great in it (which, as far as swimsuits go, is kind of rare).

It became my go-to swimsuit. I wore it so much that the fabric is already worn out. Quite sad. You can see how stretched out it is in the photo.

So I decided to see if I could cut it up and make myself a new swimsuit with the same great fit.

Here’s how to do it!

Recreating my favorite swimsuit - Tutorial by Sarah Kirsten with lots of photos

Step 1: Look at how the swimsuit is constructed. Remember how it’s sewn together so you can use the same sewing techniques (or different ones if you have better ideas) when you sew the new one together.

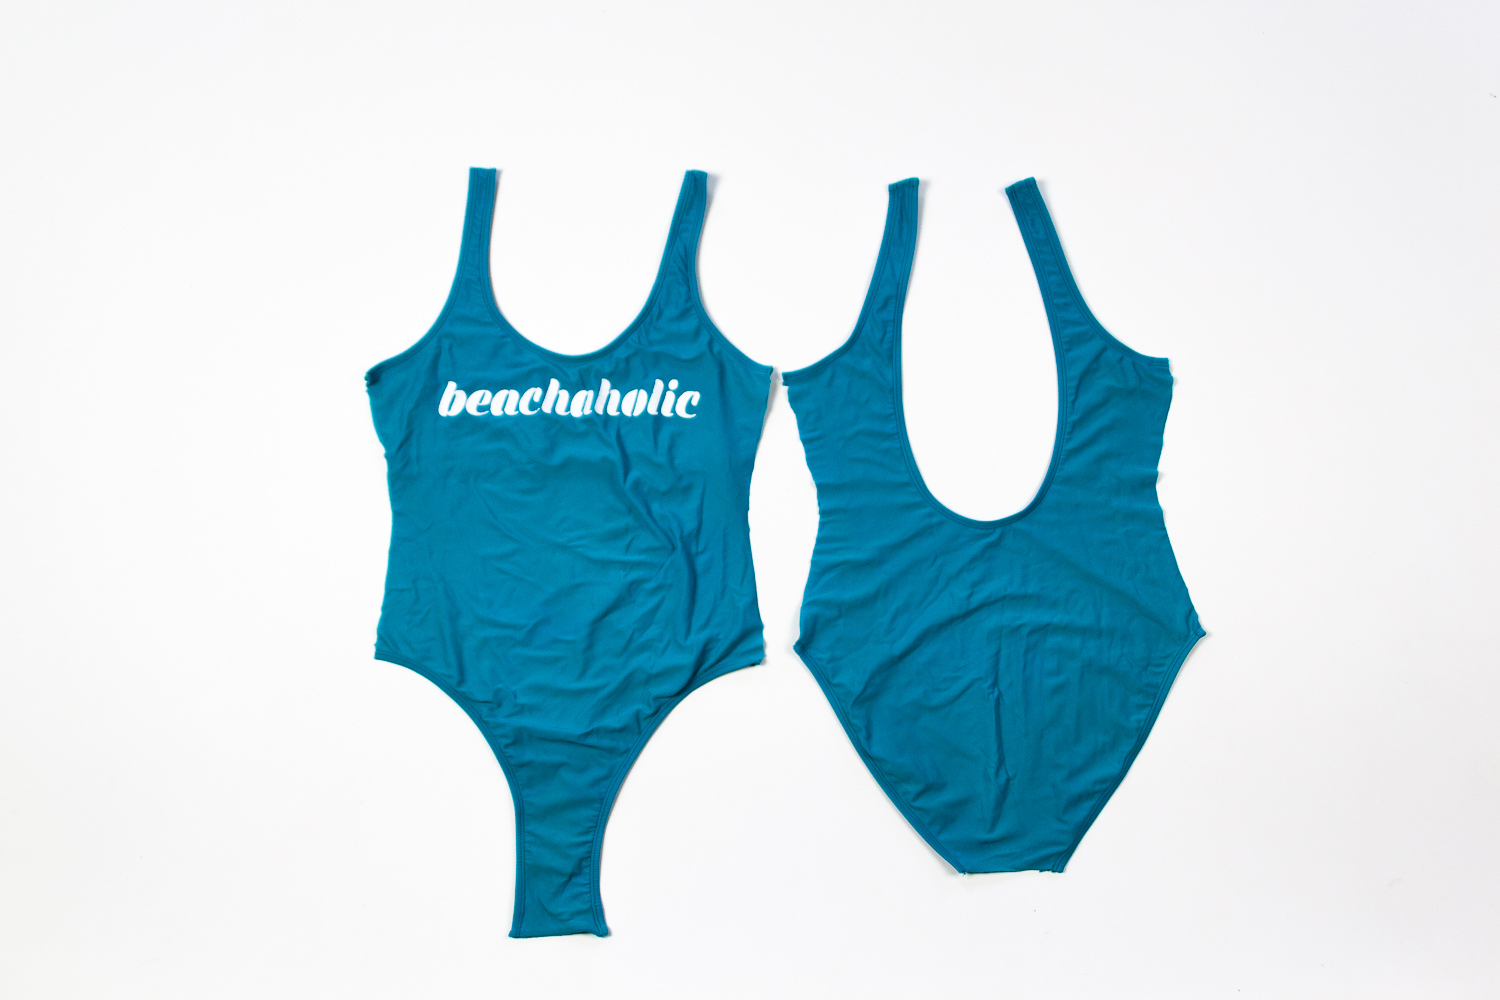
Step 2: Cut the swimsuit along all the seams. This was easy in this case because it’s only two pieces! I debated whether to also take out the elastic along the arms, legs, and neck, but it was really difficult to get the stitching out, so I left it.

Recreating my favorite swimsuit - Tutorial by Sarah Kirsten with lots of photos

Step 3: Fold the pieces in half and trace around them. Since I didn’t take out the elastic, I added about 1/4” - 1/2” length to the places that had elastic later.

Recreating my favorite swimsuit - Tutorial by Sarah Kirsten with lots of photos

Step 4: Draw the folded edge using a ruler to make sure it is straight.

Recreating my favorite swimsuit - Tutorial by Sarah Kirsten with lots of photos

Step 5: Add seam allowances. I decided to use a 1/2” seam allowance all around. (Here’s where I also added some extra length to places where there was elastic — the crotch and the shoulders.)

Recreating my favorite swimsuit - Tutorial by Sarah Kirsten with lots of photos

Step 6: Cut out the new pattern pieces.

Recreating my favorite swimsuit - Tutorial by Sarah Kirsten with lots of photos

I bought this beautiful blue swimsuit fabric from my friend’s previous fabric store, Cloth Story. It’s smooth like silk yet thick and firm. It’s delicious! For some reason the idea of another blue swimsuit that matches the color of my eyes was appealing. Isn’t it nice to wear clothes that bring out your eye color? Plus, Maycie (the owner) had such cool branding. I love her fabric tags!

Recreating my favorite swimsuit - Tutorial by Sarah Kirsten with lots of photos

Step 7: Cut out your swimsuit fabric. I decided to do a double layer, so I cut two of each pattern piece.

Recreating my favorite swimsuit - Tutorial by Sarah Kirsten with lots of photos

Step 8: SEW!

I sewed the crotch and the shoulders together in such a way that the seam allowance would be hidden within the double layer.

Then I measured the openings of the arms and legs and cut elastic that length minus 2” (depending on the stretchiness of your elastic you may want to cut more or less than that). I did the same thing for the neck opening, except I reduced the length of the elastic by 7” instead of 2” because of the greater length. I used 3/8” wide elastic.

I overlapped the ends of each elastic strip together and sewed them shut. Then I made sure the elastic was evenly distributed by clipping it in place along each opening (this is really important!) and serged it to the wrong side of the fabric.

Then I folded the elastic and the edge of the fabric it’s serged to over once and zigzag stitched along the folded edge with matching thread.

DONE!

Recreating my favorite swimsuit - Tutorial by Sarah Kirsten with lots of photos

Sewing swimwear is quick to sew, I’ve discovered. The fabric is forgiving and fun to sew. It’s a bit slippery and hard to work with, ha, but fun. I didn’t have blue serger thread, so I just used white. But I think blue would look nice. Next time maybe I’ll buy matching thread so the insides will match.

Now that I have the pattern, I can make another one for myself next spring! And the next spring.

Check out this post that shows the finished swimsuit at the pond.

What do you think? Does this make you want to whip out your scissors and elastic right now? I hope so. It’s really a satisfying project.

Raspberry Rucksack Sew Along Number Three - Popup Pocket

The Popup Pocket on the Raspberry Rucksack is fully lined and may be the most challenging part of the pattern to sew. So rest assured, if you can sew this, you can sew the rest! I’ve taken lots of photos and broken down each step to aid you in smoothly completing each phase of the Popup Pocket construction.

This tutorial is made specifically to accompany the Raspberry Rucksack, but the techniques are applicable for any bag you wish to add a lined popup pocket!

First, make sure you have all the pieces.

  • Top Pocket outer layer

  • Top Pocket lining

  • Bottom Pocket outer layer

  • Bottom Pocket lining

  • Zipper Ends

  • Single Pull Zip - 7” (17.8 cm) for the Little Raspberry or 9” (22.9 cm) for the Big Raspberry

Raspberry Rucksack Sew Along - Sarah Kirsten

Fold the Zipper Ends in half and press (you can either press with an iron or just firmly with your fingernail). Then fold both ends in toward the center.

Raspberry Rucksack Sew Along - Sarah Kirsten

Trim off the tails off your single pull pocket zipper (I’m using a cut-to-length zipper so mine doesn’t have tails). At this point, it’s very important to check if the length of your zipper is actually 7” (17.8 cm) for the Little or 9” (22.9 cm) for the Big with the tails cut off. Some zippers are slightly longer than that and will need to be trimmed. Be sure to use one of your not-so-nice scissors to trim the zipper, especially if using a metal zipper

Place the Zipper End directly against the beginning of the teeth and sew them in place. Be careful navigating your needle through the zipper teeth.

Once the Zipper Ends are sewn on, check again to make sure the length of the zipper is still the same.

Raspberry Rucksack Sew Along - Sarah Kirsten
Raspberry Rucksack Sew Along - Sewing a lined popup pocket - Sarah Kirsten

Top of the Pocket

Place the zipper face down on the right side of the Top Pocket outer layer. Make sure the zipper is centered and has about 1/2” (1.3 cm) clearance on each side. Place the Top Pocket Lining right side down on top.

So just to be clear here, the outer layer and lining are right sides together, and the zipper is sandwiched in between facing the outer layer.

Sew the length of the seam through all layers with a 3/8” (1 cm) seam allowance.

Raspberry Rucksack Sew Along - Sewing a lined popup pocket - Sarah Kirsten

Fold the lining back. Press the seam allowance toward the lining and edge stitch through all layers.

Raspberry Rucksack Sew Along - Sewing a lined popup pocket - Sarah Kirsten

Fold each of the four corners right sides together and mark with a fabric pen where the width across is 1 1/2” (3.8 cm). Sew along the line you marked on all four corners.

It should look something like this with all the corners sewn.

Raspberry Rucksack Sew Along - Sewing a lined popup pocket - Sarah Kirsten

Fold both the outer layer corners toward the center of the long side. Edge stitch both of the outer layer corners along the seam.

Trim all four corner’s seam allowances to 1/4” (6 mm).

Raspberry Rucksack Sew Along - Sewing a lined popup pocket - Sarah Kirsten

Fold the whole piece in half with right sides together so that the corners you just sewed are aligned. Here are some photos of what it looks like from different angles.

Raspberry Rucksack Sew Along - Sewing a lined popup pocket - Sarah Kirsten

With the corners aligned, flatten out the folded bottom edge (this is the zipper flap that will cover the zipper when turned right side out) with your fingers. Sew up the sides leaving a 3” (7.6 cm) gap in the middle. Use a 3/8” (1 cm) seam allowance.

Raspberry Rucksack Sew Along - Sewing a lined popup pocket - Sarah Kirsten

It should look something like this.

Tip: When leaving openings where something will be turned right side out, turn a corner and sew the the edge of the seam allowance. This makes for easier turning with less stress on the fabric.

Raspberry Rucksack Sew Along - Sewing a lined popup pocket - Sarah Kirsten

Turn the piece inside out through the opening. Shape it to look like this with the zipper flap cover the zipper. Give it a good press with an iron. Neatly press in the seam allowances of the opening. Those will be sewn shut when the Popup Pocket is attached to the front of the rucksack.

Raspberry Rucksack Sew Along - Sewing a lined popup pocket - Sarah Kirsten

After shaping it and giving it a good press, stitch along the top of the zipper from outer layer side of the piece.

To do this, I move my needle to the far left side of the foot (not all machines have this option - a zipper foot would work well if your machine isn’t able to change the position of the needle). I place the left edge of the foot right along side the zipper (you can just make out the bump under the fabric in the photos) and stitch along the whole length of the piece going slow and steady.

Raspberry Rucksack Sew Along - Sewing a lined popup pocket - Sarah Kirsten

Here’s a view of the outside and inside of the stitching. You can see from the inside that it just barely catches the edge of the lining. Thankfully no one sees this so it doesn’t have to line up perfectly in the inside. For this stitch it matters more what the outside looks like.

The top of the Popup Pocket is done!
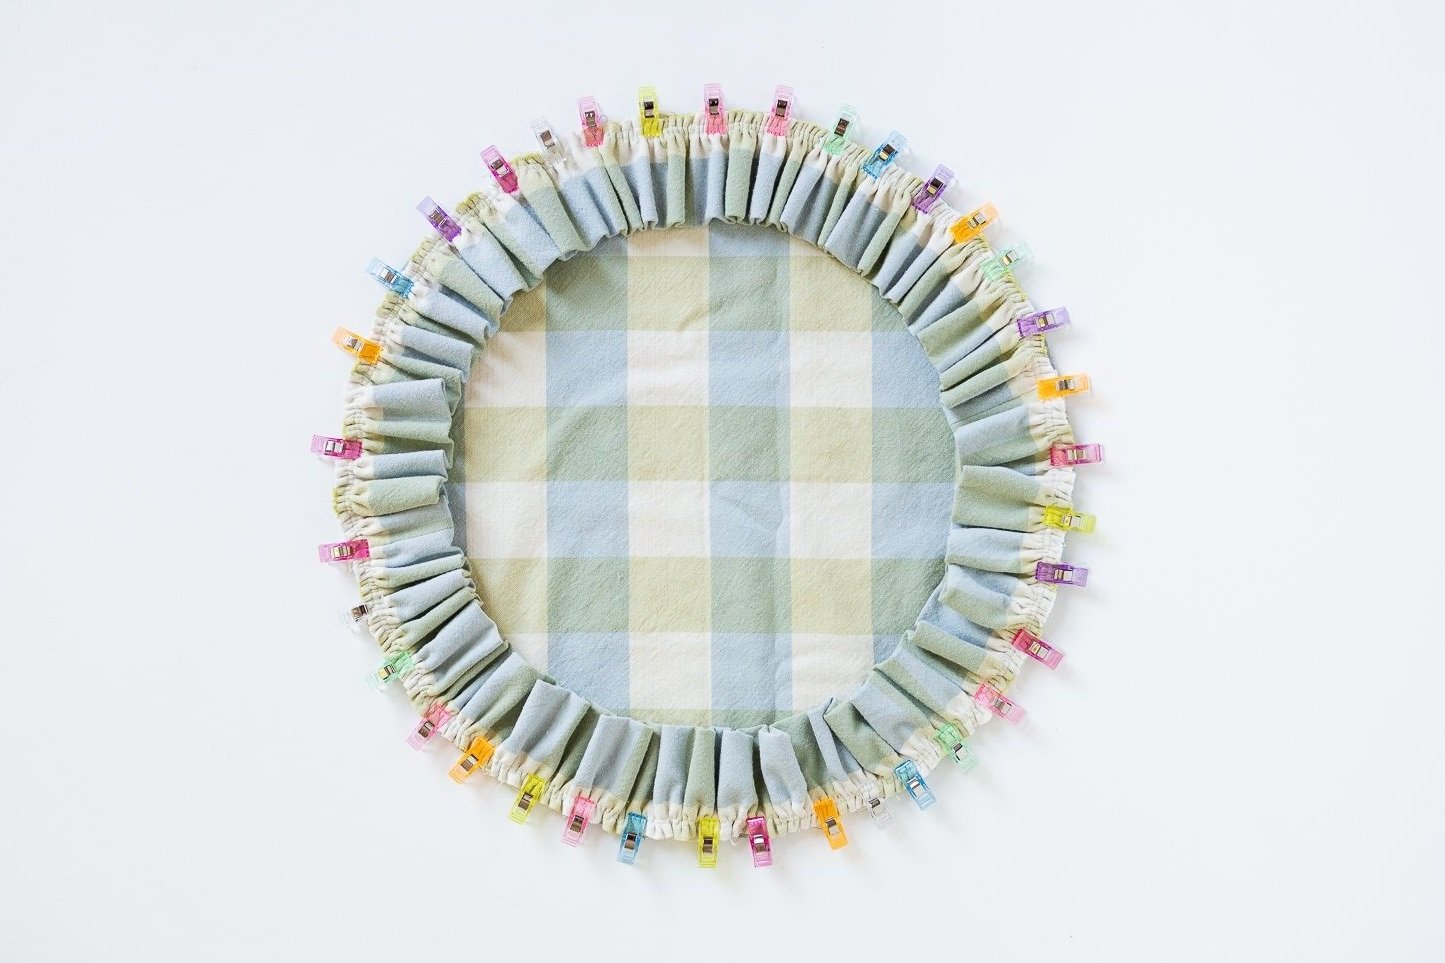
Raspberry Rucksack Sew Along - Sewing a lined popup pocket - Sarah Kirsten

Bottom of the Pocket

Fold the zipper flap up (by the way, the ends of those Zipper Ends can be trimmed off at any point).

Raspberry Rucksack Sew Along - Sewing a lined popup pocket - Sarah Kirsten

Place the whole top pocket piece you just sewed face down on the right side of the Bottom Pocket outer layer. Make sure that zipper flap is folded back so you don’t stitch through it.

Place the Bottom Pocket lining right side down on top.

So to clarify, the lining and the outer layer are right sides together, and the zipper of the top pocket piece is sandwiched in between the two facing the outer layer.

Sew the whole length of the seam through all layers with a 3'/8” (1 cm) seam allowance.

Raspberry Rucksack Sew Along - Sewing a lined popup pocket - Sarah Kirsten

Just like the top pocket pieces, fold all four corners with right sides together. Mark where they are 1 1/2” (3.8 cm) wide and stitch along the line.

It should look something like this.

Raspberry Rucksack Sew Along - Sewing a lined popup pocket - Sarah Kirsten

Again, fold both outer layer corners toward the center of the long side and edge stitch along the seam.

Then trim all four corner seam allowances to 1/4” (6 mm).

Raspberry Rucksack Sew Along - Sewing a lined popup pocket - Sarah Kirsten

Fold the whole piece in half so that the corners of the lining and outer layer you just sewed are aligned.

With the corners aligned, sew up the sides with a 3/8” (1 cm) seam allowance and leave a 3” (7.6 cm) opening in the top for turning the piece right side out.

Raspberry Rucksack Sew Along - Sewing a lined popup pocket - Sarah Kirsten

Trim both bottom corners like so and turn the piece right side out.

Raspberry Rucksack Sew Along - Sewing a lined popup pocket - Sarah Kirsten

Shape it with your hands so it takes the shape of a box and give all the edges a good press with an iron.

Raspberry Rucksack Sew Along - Sewing a lined popup pocket - Sarah Kirsten

Fold the zipper flap back and edge stitch along the seam.

Raspberry Rucksack Sew Along - Sewing a lined popup pocket - Sarah Kirsten

Popup Pocket is DONE!
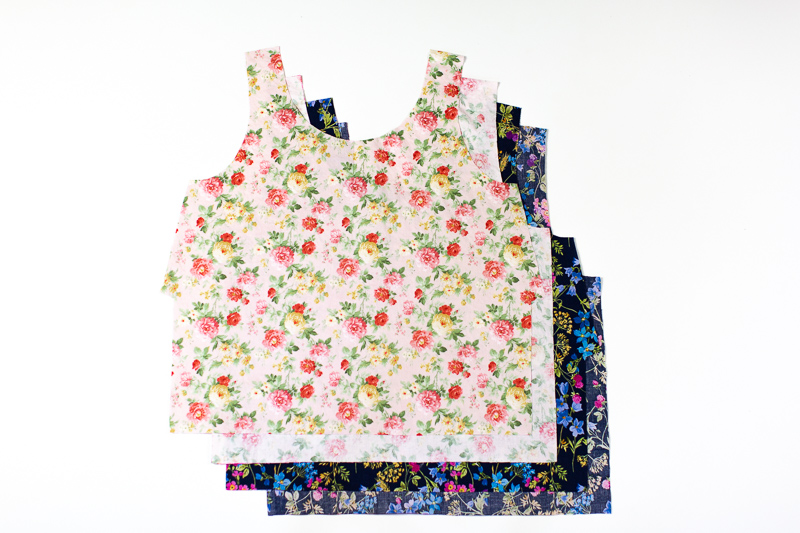
Raspberry Rucksack Sew Along - Sewing a lined popup pocket - Sarah Kirsten