7 Great Woven Tank Top Sewing Patterns

Can you have too many woven tank tops? If you’re like me, they are basically the foundation of your wardrobe that you build outfits around. They go with so many things, they keep you cool, they don’t get in the way of your work, they are beautiful and fun to sew, and they just… be with you. They don’t require flashy attention, they just add to who you are and how you adorn yourself.

Here are 7 woven tank top sewing patterns to make and love. All the titles and photographs are linked to the designer’s site where you can purchase or download the pattern.

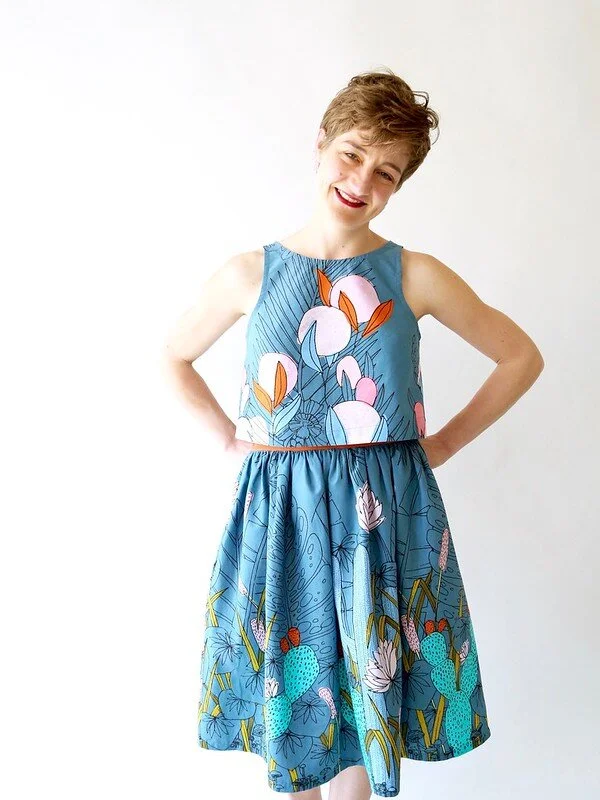
Chamomile Crop by Sarah Kirsten (Sorry, not sorry…)

The Chamomile comes with a wide shoulder version and a narrow shoulder version, and a cropped fit for perfect pairing with high waisted pants, shorts, and skirts. 

Ashton Top by Helen’s Closet

The Ashton Top sewing pattern comes with a super cute cropped and long version, wide hem, and also the option for bias tape or a sharp looking all-in-one facing to finish the seams.

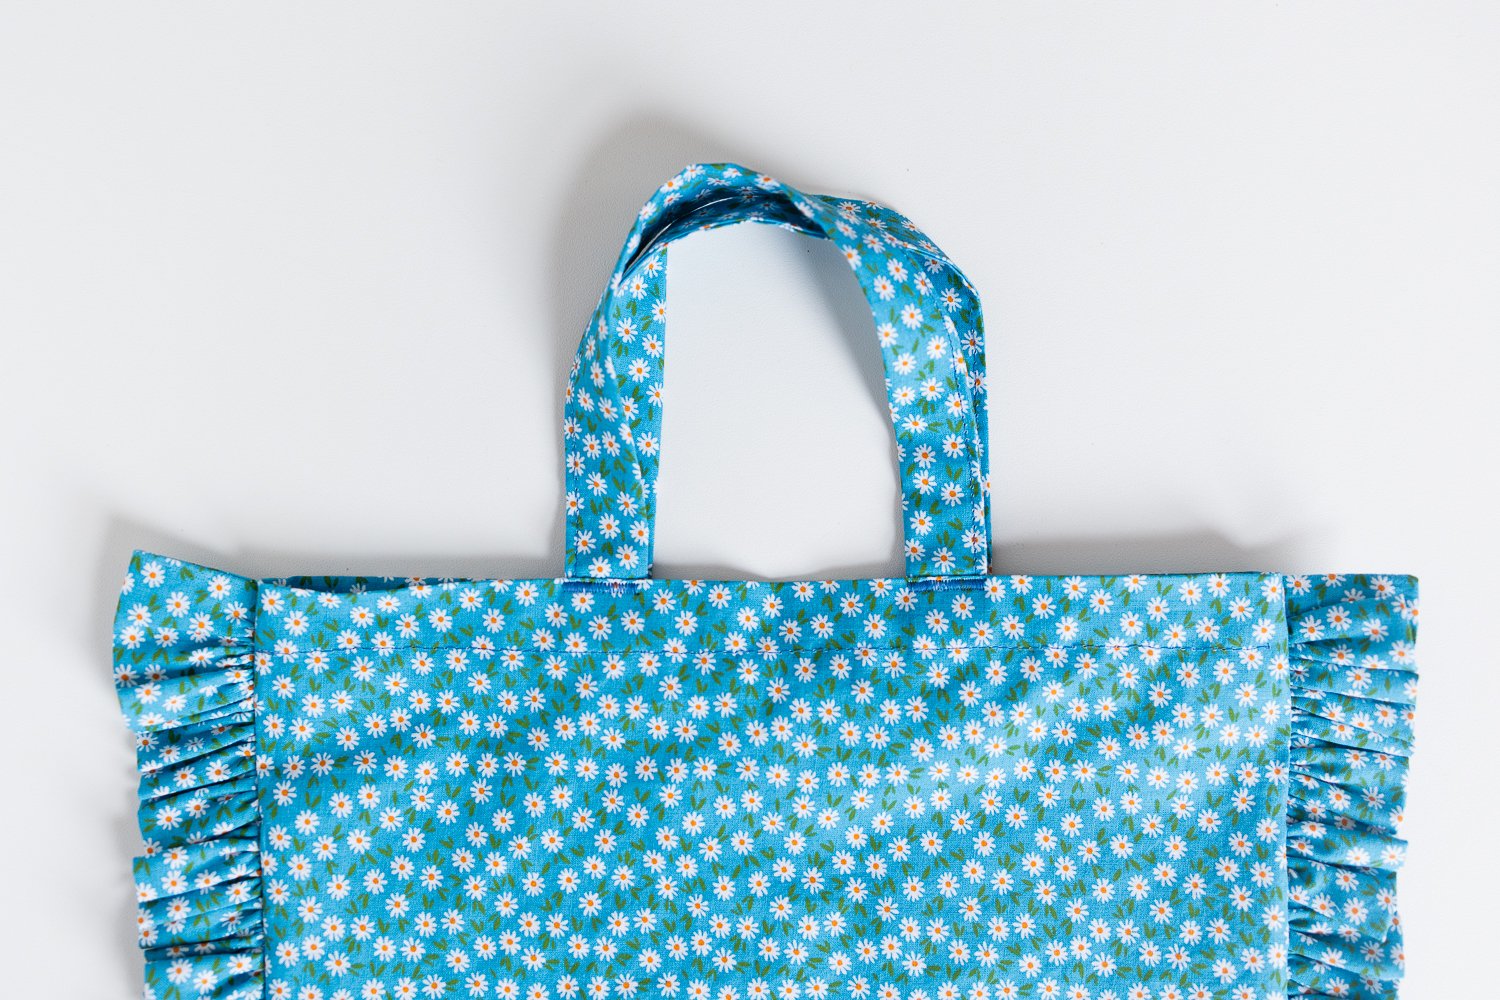
Peplum Top by In The Folds & Peppermint Mag (FREE PATTERN!)

The Peplum features a ruffle bottom and a v-neck back. It’s designed by my friend Emily from In The Folds who produces amazing patterns every year. 

Demeter Dress & Top by Anna Allen 

The Demeter sewing pattern is another wonderful example of how wonderful everything is that Anna designs. So dreamy. This pattern comes in four versions - a sleeveless and sleeved dress, and a sleeveless and sleeved shirt. All versions are stunning. 


Willow Tank & Dress by Grainline Studio

The Willow has a tank top and a dress version with a lovely wide hem, straight hem.


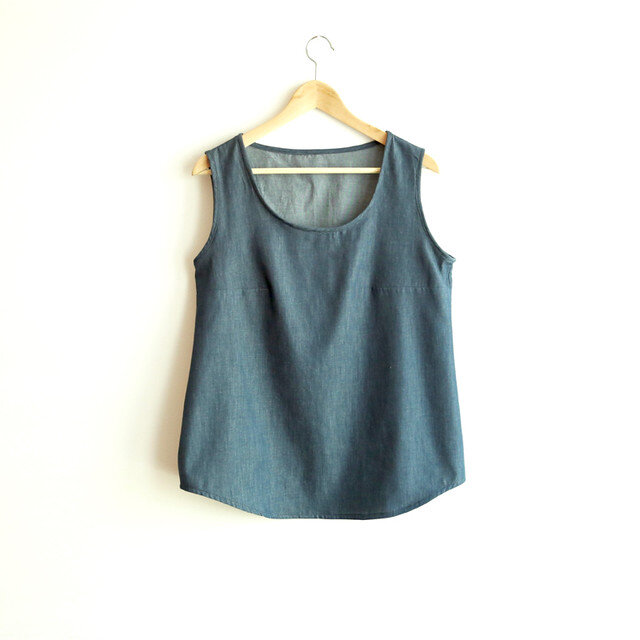
Wiksten Tank Top and Dress by Wiksten

The Wiksten Tank is a beautiful dartless tank with a lovely curved hem.

Gemma Tank by Made by Rae

The Gemma is simple and elegant with a lovely neckline and curved hem. She also has lots of tutorials about sewing the bias binding and how to make a cropped version.

How to Sew a Fully Lined and Reversible Tank Top - Chamomile Crop Double Layer Sew Along

Here’s how to sew a fully lined, reversible tank top.

The fabrics used for this tutorial are two floral print quilting cottons. Quilting cottons are fun to use for tutorials to easily determine right and wrong sides of fabric and to help keep the two layers easily differentiable.

The pattern used for this tutorial is my Chamomile Crop and Dress pattern. Some steps (like specific seam allowances and seam trimming) may differ slightly for other patterns.

Let’s make something!

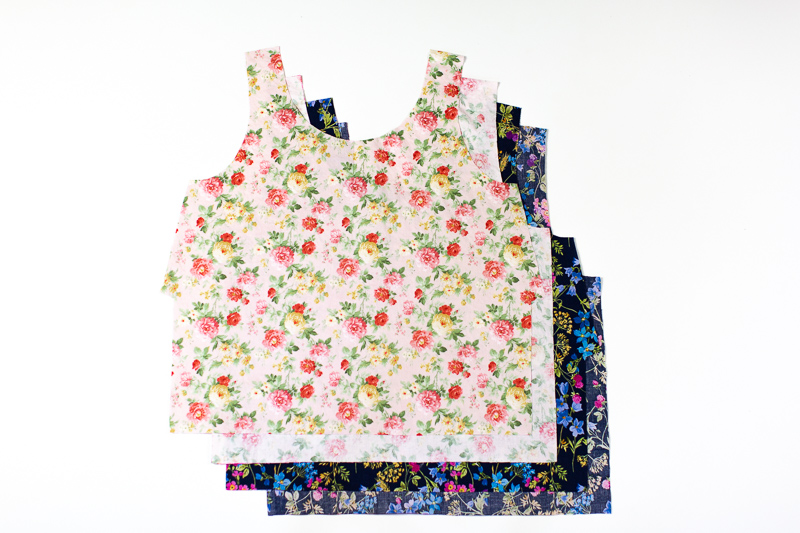
1) Cut out all the pieces. I’m using one front and back in pink floral and one front and back in blue floral. You could have both layers the same fabric if you’d like.

How to sew a fully lined tank top - tutorial with tons of photos

The right side on both of these fabrics is a bit darker and more vibrant, the wrong side is more muted and slightly whiter.

How to sew a fully lined tank top - tutorial with tons of photos

2) Using a fabric pen or chalk, mark a line 2 1/2” (6.4 cm) from the bottom edge on the wrong side of the fabric on all four pieces. This will be used as a guide for sewing the hem later. It’s easiest to mark it now when the pieces can still be laid flat before any sewing.

Camomile Crop Sewing Pattern Sew Along -  Tutorial with lots of photos by Sarah Kirsten

3) Sew all four darts (two on each front piece) and press darts toward the bottom of the crop top.

Camomile Crop Sewing Pattern Sew Along -  Tutorial with lots of photos by Sarah Kirsten

4) Sew the front and back pieces of each layer together at the shoulders with a 3/4” (2 cm) seam allowance and right sides together.

Trim seams to 3/8” (1 cm). Explanation: This pattern was drafted for French seams, which requires a large seam allowance, so the extra seam allowance has to be trimmed off for this double layer construction.

Press seams open.

How to sew a fully lined tank top - tutorial with tons of photos

5) Lay the two layers right sides together. Line up and pin or clip the arm openings together.

How to sew a fully lined tank top - tutorial with tons of photos

6) Sew the whole length of the arm openings with 3/8” (1 cm) seam allowance.

How to sew a fully lined tank top - tutorial with tons of photos

7) Clip the seam allowance along the arm opening curves. Clip farther up the length of the arm opening than you might think you need to. (I’ve made the mistake multiple times of not clipping far enough up!)

Camomile Crop Sewing Pattern Sew Along -  Tutorial with lots of photos by Sarah Kirsten

8) Turn the crop top right side out through the neck opening.

How to sew a fully lined tank top - tutorial with tons of photos

9) Flip the outer layer together and the inner layer together with right sides together.

If this part is tricky to understand, keep playing with it — you’ll get it! See how the two pink floral pieces are together on the right and the two blue floral pieces are together on the left? That’s what you want.

How to sew a fully lined tank top - tutorial with tons of photos

10) Line up the side seams and pin or clip in place. Either fold the seam allowance of the arm opening of the top and bottom layer in opposite directions, or press them both open to reduce bulk around the seam.

How to sew a fully lined tank top - tutorial with tons of photos

I chose to press my seam allowances in opposite directions.

Camomile Crop Sewing Pattern Sew Along -  Tutorial with lots of photos by Sarah Kirsten

11) Sew the side seams with a 3/4” (2 cm) seam allowance. Backstitch across the darts and the ends of the arm opening seams.

Trim seam allowance to 3/8” (1 cm). Again, because this was drafted for French seams.

Press side seams open with a steamy iron.

How to sew a fully lined tank top - tutorial with tons of photos

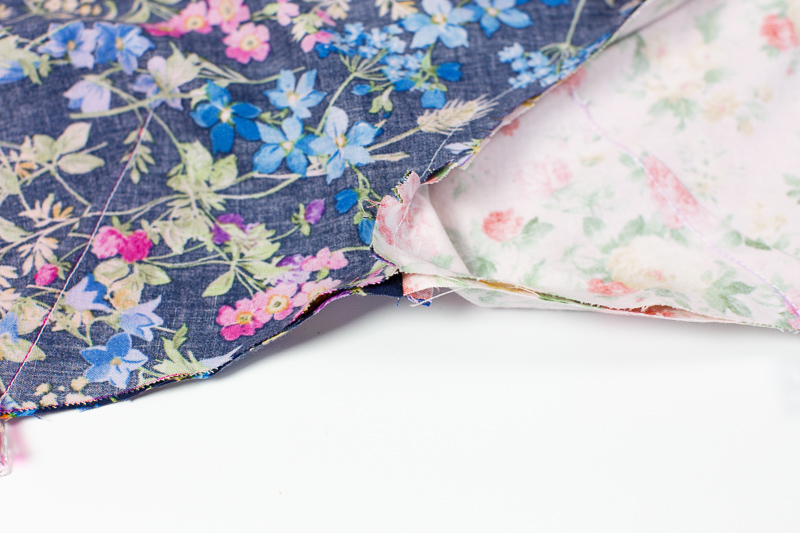
12) Now we’re going to sew the neck in two sections. If you look at the necklines, you’ll see there are four layers.

Grab the outermost layers (one is the blue floral fabric, the other is the pink floral fabric) and push the middle layers down away from the edge. These two outermost layers should be already be right sides together.

How to sew a fully lined tank top - tutorial with tons of photos

13) Pin or clip the outermost layers together all the way up to the shoulder seams.

It requires some arranging and finagling to pin all the way up to the shoulder seams, but you’ll want to do that to make sure the two layers are lined up and centered with each other properly.

How to sew a fully lined tank top - tutorial with tons of photos

At this point, the other half of the shoulders are tucked inside the part of the shoulders and neckline you are about to sew.

Camomile Crop Sewing Pattern Sew Along -  Tutorial with lots of photos by Sarah Kirsten

14) Sew the first half of the neckline from shoulder seam to shoulder seam with a 3/8” (1 cm) seam allowance. Make sure the two layers in between don’t get caught in the stitching.

How to sew a fully lined tank top - tutorial with tons of photos

15) Clip the seam allowance of the curve of the neckline.

One is the blue floral fabric, and the other is the pink floral fabric.

16) Flip the tank top over and pull the shoulders/neckline through the opening in the other side of the neckline.

How to sew a fully lined tank top - tutorial with tons of photos
Camomile Crop Sewing Pattern Sew Along -  Tutorial with lots of photos by Sarah Kirsten

17) Do the same thing to this side. Pin or clip the two outermost layers together up to the shoulder seams. Again, the outermost layers should already be right sides together.

How to sew a fully lined tank top - tutorial with tons of photos

18) Sew with a 3/8” (1 cm) seam allowance and be sure to not catch the in between layers in the stitching.

How to sew a fully lined tank top - tutorial with tons of photos

19) Clip curve of neckline.

Camomile Crop Sewing Pattern Sew Along -  Tutorial with lots of photos by Sarah Kirsten

Whew! Just take a breather here. You’re done with one of the tricky parts. The neckline is finished!

Okay now on to the final steps…

20) The last thing to sew is the hem. Starting at a side seam, fold the bottom of both layers up so the right sides are facing each other.

How to sew a fully lined tank top - tutorial with tons of photos
Camomile Crop Sewing Pattern Sew Along -  Tutorial with lots of photos by Sarah Kirsten

21) Line up the bottom raw edges and side seams, and sew the two layers together along the line (2 1/2” (6.4 cm) from the bottom) you marked in the first step.

Start sewing at the side seam and leave a 5” (12.7 cm) gap when you come back around so you can turn the tank top right side out.

The hem will be going in between the blue floral layer and the pink floral layer at this point. You won’t be able to lay the whole thing flat, so get a few inches flat to sew at a time.

If this step feels like a huge confusing mess, hooray! You’re probably doing it right! It always looks like a total mess — one you would never think would actually work out right.

If you’d like to test that you are doing correctly before you start sewing, you can pin along stitching line and then turn the tank top right side out through the hem to see how it works.

Camomile Crop Sewing Pattern Sew Along -  Tutorial with lots of photos by Sarah Kirsten
How to sew a fully lined tank top - tutorial with tons of photos

It should look something like this at this point. The hem should literally be going in between the blue floral layer and the pink floral layer.

Camomile Crop Sewing Pattern Sew Along -  Tutorial with lots of photos by Sarah Kirsten
Repeat the same procedure to sew the second half of the neckline.

22) Turn the tank top right side out through the 5” (12.7 cm) opening in the hem.

23) Give the bottom seam, neckline, and arm openings a good press.

24) Make sure the wide hem allowance is laying flat between the blue floral and the pink floral layers.

Top stitch 2” (5 cm) from the bottom edge. The hem allowance is 2 1/2” (6.4 cm) wide, so the 2” (5 cm) stitching from the bottom should be about 1/2” from the top edge of the hem allowance.

_U5A1005.jpgCamomile Crop Sewing Pattern Sew Along -  Tutorial with lots of photos by Sarah Kirsten

25) Hand sew the opening in the bottom of the hem shut using a blind stitch. Or leave it unsewed, if you want a secret little compartment in your hem :)

How to sew a fully lined tank top - tutorial with tons of photos

26) Have a cup of chamomile tea. You just made a really cool, double layer, reversible, Chamomile Crop!

Camomile Crop Sewing Pattern Sew Along -  Tutorial with lots of photos by Sarah Kirsten

If you enjoyed this tutorial, you may also enjoy…

Step by step illustrated tutorial to add pockets to all your summer dresses.

Step by step photo tutorial to sew the Rosemary Wrap Sewing Pattern.

Step by step photo tutorial.

Handmade Wooden Spool Stands

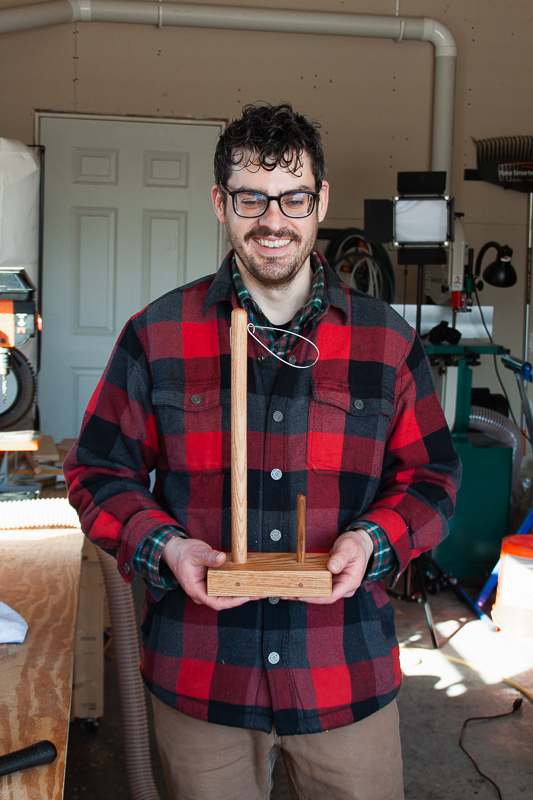
I’m excited to announce another limited edition release of a really cool sewing tool! This time… it’s a Spool Stand created in collaboration with my friend, Nate.

Nate is a structural engineer with a natural knack for being good at designing things. He is also sewist, cyclist (he designed and sewed his own set of cycle touring bags), photographer, pickleball player, and a woodworker. He has an adorable shock of salt and pepper curly hair toppled on his head most days. My siblings and I met him through a mutual friend about 10 years ago. Now we go on lots of bike rides, eat lots of ice cream cones, and occasionally attempt triathlons together.

Handmade wooden spool stands - Sarah Kirsten

Nate says, “The idea for this spool stand developed while working on a project that required upholstery thread. Instead of going through many 150-yard spools I decided to make the jump to 1500-yard spools, which are only a few dollars more than the smaller spools. I didn’t have a spool stand, and after looking around I realized I could make my own out of scraps in my garage. I was able to combine two of my hobbies, woodworking and sewing.”

When I saw the spool stand he made for himself, I was so impressed and asked if we could do a collaboration to produce a limited edition run. We batted around a few design tweaks, and what he developed for the final product is so beautiful.

My favorite part of the Spool Stand is it’s designed to hold together without glue or nails! It just uses wooden pieces fitted together like tightly secured puzzle pieces. And it’s really strong! There’s no way to take it apart once it’s fitted — it’s all stuck together really solidly. We’ll explain how in the photos below.

Nate invited me to his woodwork shop to see the process of making the Spool Stands. I took my camera with, and Nate explained every step in the process as I snapped photos.

Handmade wooden spool stands - Sarah Kirsten

“To make them I start by cutting up oak boards into 7-inch lengths for a base. Then I cut up oak dowels into lengths for the thread guide, smaller oak dowels into short lengths for the spool holder, and even smaller oak dowels into 2.5-inch lengths for dowel pins. Oak hardwood looks really nice, has good durability, and is also easily sourced at my local lumber store, so it was a good choice for this project.”

Handmade wooden spool stands - Sarah Kirsten

“Next, I round one end of the dowels by using a roundover bit in my router table and drill two holes where the thread guide wire is going to go (inserted in one of the last steps). Then I lightly sand down the dowels to make sure they are smooth after drilling and rounding.”

Handmade wooden spool stands - Sarah Kirsten

“Next, I mark the center locations on the base where all the dowels are going to go. Using a slightly undersized bit for hole for the larger dowel and a right-size drill bit for the smaller dowel that acts as the spool holder, I use my drill press to neatly drill all the holes.”

Handmade wooden spool stands - Sarah Kirsten

“Using a rubber mallet to not dent or damage the dowels, I pound the dowels into their place on the base.”

Handmade wooden spool stands - Sarah Kirsten

“Then [this is the cool part] I drill holes into the side of the base through the two dowels and pound the smallest dowel pins into these holes. Now all the dowels are prevented from rotating or being pulled out of the base. This allows for a design that doesn’t need any glue, screws, or nails.”

Pretty cool, right?!

Handmade wooden spool stands - Sarah Kirsten

“After sanding and cleaning off the dust, I wipe the Spool Stand down with a Danish oil using a clean rag (I use a scrap of a t-shirt I have from making a t-shirt quilt). The Danish oil is a wood stain and sealer in one. It’s easy to apply, provides protection to the wood, and enhances the look. It’s fun to use a natural finish that slightly darkens the wood and brings out the personality of the woodgrain — this is where the unique characteristics of each Spool Stand really stands out.”

Handmade wooden spool stands - Sarah Kirsten

“Finally, I cut and bend some stainless-steel wire and install it through the holes I drilled previously in the larger dowel. The two 90-degree bends at the back of the dowel prevent the wire from rotating in the dowel. This wire material and size is perfect for this Spool Stand because of its ability to be shaped without kinking, its strength and durability, and its adjustability.”

Handmade wooden spool stands - Sarah Kirsten

And just like that, you have a beautiful spool stand that enables you to seamlessly (no pun intended haha) use larger spools of thread on your regular sewing machine!

I’m really excited to be releasing a very limited amount of these special handmade Spool Stands along with the Chamomile Crop on September 7th! They are sitting in my sewing room right now, waiting to be shipped out to their new homes. These are such beautiful pieces of workmanship and design. It’s a good piece of equipment to have in your sewing arsenal. I feel honored to have one sitting on my sewing table and to be able to provide a limited number to my customers!

Interview with Abby Glassenberg on the Popular While She Naps Podcast

This week I have the honor of appearing on the delightful While She Naps Podcast by Abby Glassenberg!

If you haven’t listened to Abby’s podcast before, you should give it a listen just so you can hear her lovely voice and thoughtful questioning style. Not only is her voice soothing and powerfully gentle, she has a way of putting people at ease and letting them really explain their thoughts while guiding them with insightful, perfectly timed questions. The way she draws out stories is like an artist at work. Asking questions well is a social art, and she does it masterfully. It was a joy to be on the receiving end of her questions for this interview.

We talk about some of my marketing strategies and how my business has taken off, how I left the world of academia and agriculture to pursue sewing and starting my own business, some pivotal moments in my career so far (some might surprise you!), and how things have grown and changed in the short time since starting.

I’d love for you to have a listen (and then get sucked in and listen to all her other episodes!).

While She Naps Episode #148: SARAH KIRSTEN