Two-Toned Bleached Denim Dawn Jeans

Two Toned Bleached Denim Dawn Jeans - Sarah Kirsten

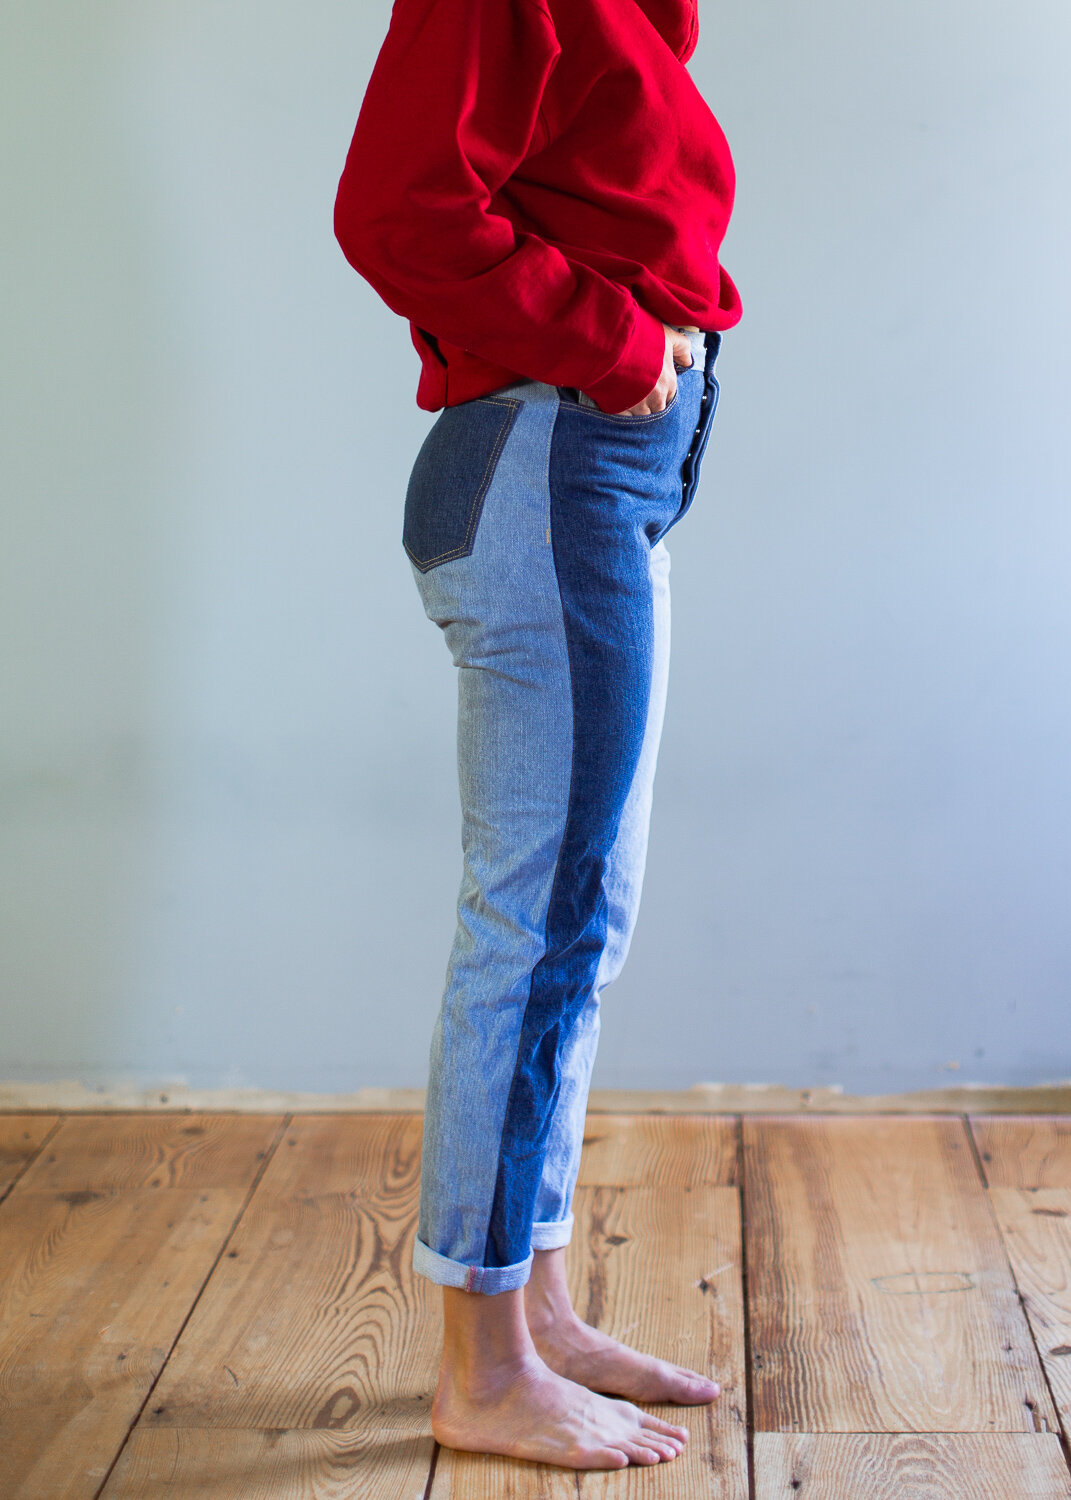
I finally sewed my first pair real jeans - the Dawn Jeans by Megan Nielsen. Non stretch, high waist, classic tapered fit. Needless to say, they are fulfilling my handmade jean dreams.

I bought 2 yards of 12 oz., dark wash, non stretch denim. I cut it in half and soaked one half in bleach water for 3.5 hours.

Bleached Denim Dawn Jeans - Sarah Kirsten
Two Toned Bleached Denim Dawn Jeans - Sarah Kirsten

The longer you leave the denim in the bleach, obviously the lighter it gets. I checked on it every 15-30 minutes and swished it around to make sure it was bleaching evenly. When the color looked about as light as I wanted, I took it out and washed it.
Two Toned Bleached Denim Dawn Jeans - Sarah Kirsten

Once I washed and dried both the light and dark wash denim, I cut out the pieces and sewed them up.

Two Toned Bleached Denim Dawn Jeans - Sarah Kirsten

The Dawn Jeans pattern instructions are a joy to follow and sew along with. I made a size 4 and tightened up the waist a bit by taking off some extra width from the center back and the side seams — a common adjustment I have to make with pants.

To see my favorite way to sew beautiful topstitching on a button fly, check out my photo tutorial here!

Two Toned Bleached Denim Dawn Jeans - Sarah Kirsten

What a joy to have my very own jeans, handmade by me, fit perfectly to my own body. So thankful for this pattern!

The Ultimate Way to Sew Beautiful Button Fly Topstitching

How to sew beautiful top stitching on the button fly - Sarah Kirsten

The dreaded topstitching of the button fly…. It’s scary because it’s one of the most visible parts of the pants. The good news is there is an easy method to get the stitching looking good every time.

Topstitching the fly was the main thing that held be back from making jeans. I was fearful the fly stitching wouldn’t look good. Had I known how easy this was, I think I would have started my journey of making pants-with-button-flies earlier than I did.

So let me spare you some heartache. Here’s how to nail the topstitching. In this tutorial I’m sewing the lovely Megan Nielsen Dawn Jeans.

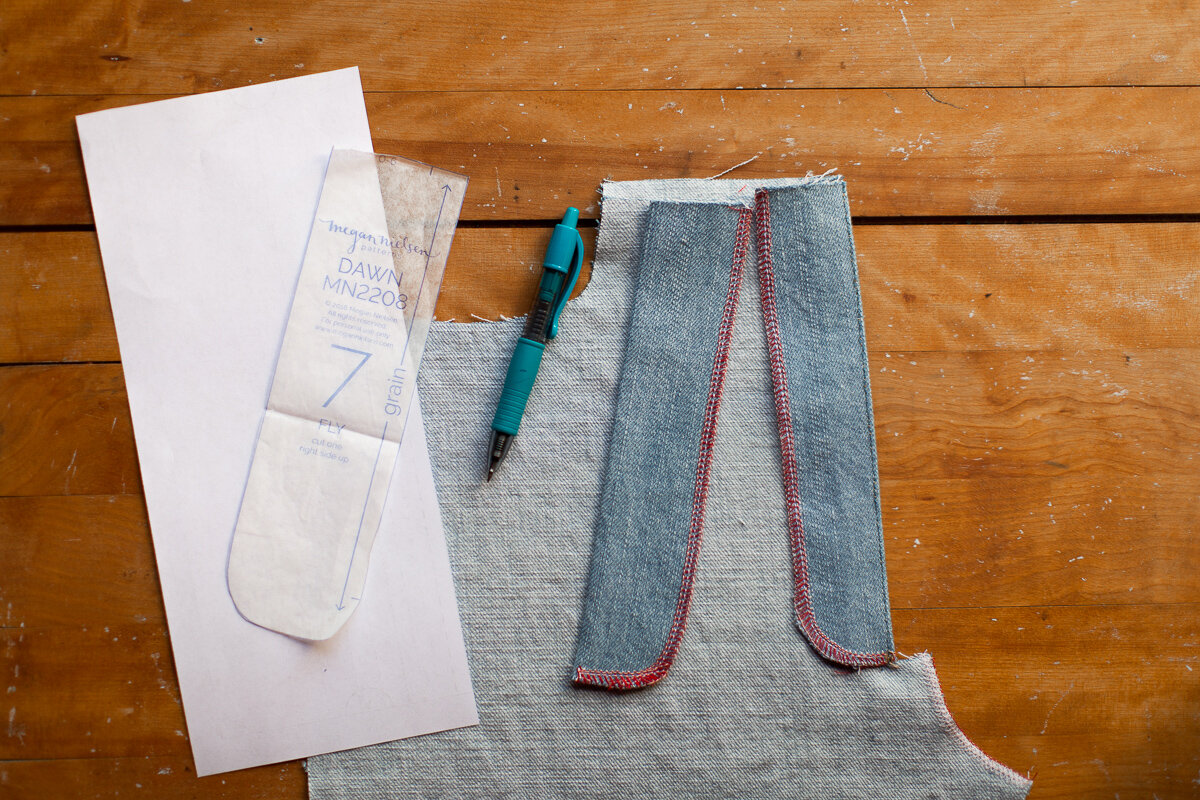
Step 1: Copy the fly pattern out of a piece of scrap paper.

How to sew beautiful top stitching on the button fly - Sarah Kirsten

Step 2: Line up the curved edge of the pattern piece right where you want your topstitching to land on the button fly — I want mine to land right along the inside of the serger thread.

(I have an abundance of scrap paper from paper patterns, so I’m using some for this tutorial.)

How to sew beautiful top stitching on the button fly - Sarah Kirsten

Step 3: Keeping the paper aligned, flip the paper and button fly over. Using a pen, mark the paper along the top and edge of the button fly.

How to sew beautiful top stitching on the button fly - Sarah Kirsten

Step 4: Cut out the stitch guide along the line you just drew. Clip the paper piece in position on top of the pants, with the button fly in position underneath.

How to sew beautiful top stitching on the button fly - Sarah Kirsten

Step 5: With everything lined up perfectly, stitch right along the edge of the stitching guide.

How to sew beautiful top stitching on the button fly - Sarah Kirsten

Step 6: Unclip, pull off the paper, admire your work.

How to sew beautiful top stitching on the button fly - Sarah Kirsten

Step 7: Once you have one line of stitching, you can easily use that line as a guide for sewing another line.

How to sew beautiful top stitching on the button fly - Sarah Kirsten

It’s a real joy to sew your own jeans. Thanks for producing this pattern, Megan. Here’s the link again to these Dawn Jeans.

If you enjoyed this post, you may also enjoy…

Step by step illustrated tutorial.

Step by step photo tutorial.

Rosemary Wrap Sewing Pattern Materials List

Ready to wrap yourself up in some handmade love? Here are the fabric requirements and fiber content recommendations you need for the Rosemary Wrap.

This pattern is meant to be light hearted and chill. Meaning, it’s easy to cut out, easy to sew, easy to wear, easy to fit (because it wraps!), and easy to adjust the length to your preference. Check the chart below to find your approximate size and the corresponding fabric yardage requirements.

Rosemary Wrap Fabric Requirements - Sarah Kirsten